Make a Shark!

Great for Shark Week or any week! We have 3 fun and creative stuffed animals you can weave and sew. These include step-by-step instructions, so anyone can make them.

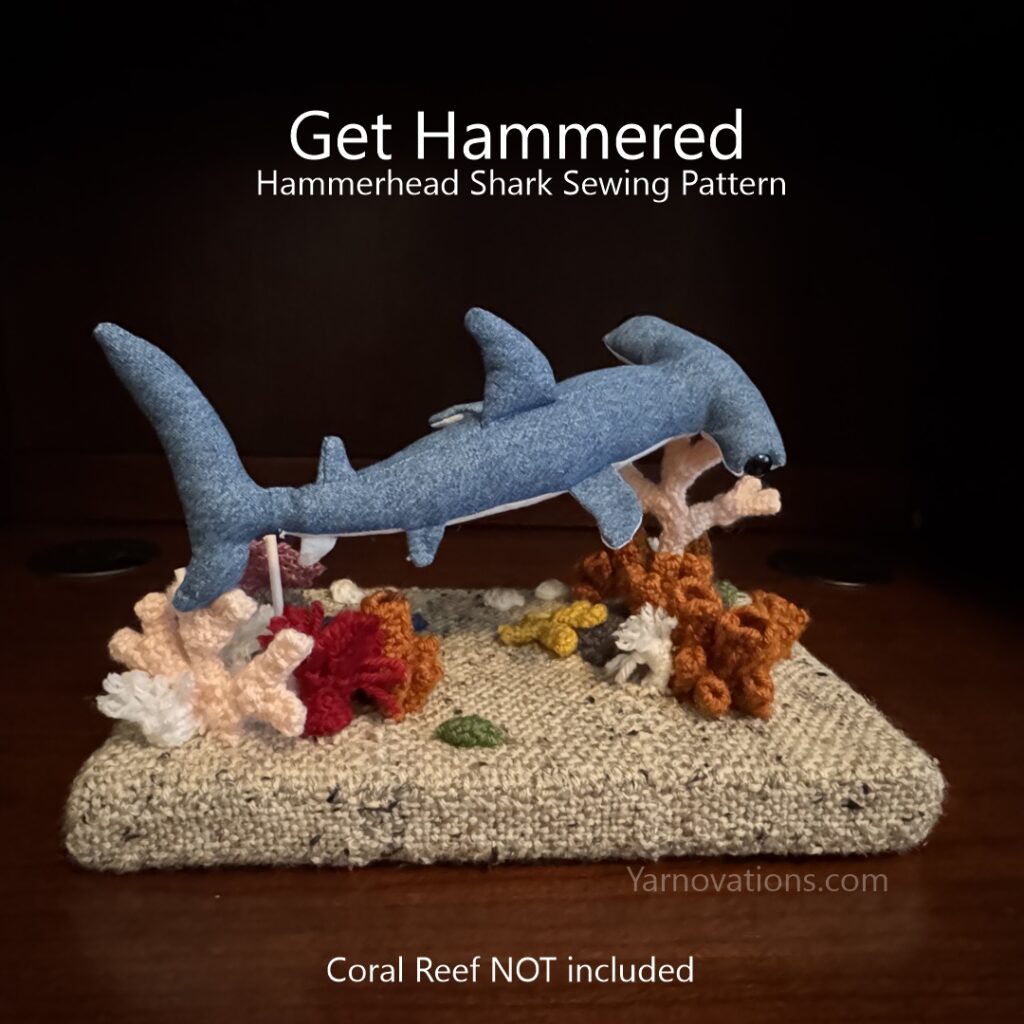
1. Get Hammered: Hammerhead Shark Sewing Pattern

Hammerhead shark sewing pattern with step by step instructions

This Hammerhead Shark sewing pattern is a great pattern for new sewists. It includes step-by-step written instructions, lots of photos and tracing templates. The coral reef pictured is not included. It was woven on pin looms.

The sewn hammerhead shark measures approximately 18″ long. If you love upcycling, this is a great project for that. What makes this hammerhead shark sewing pattern so realistic is the inclusion of all 8 fins and the notch on the caudal (tail) fin.

Hammerhead Shark sewing pattern is now available on Etsy.

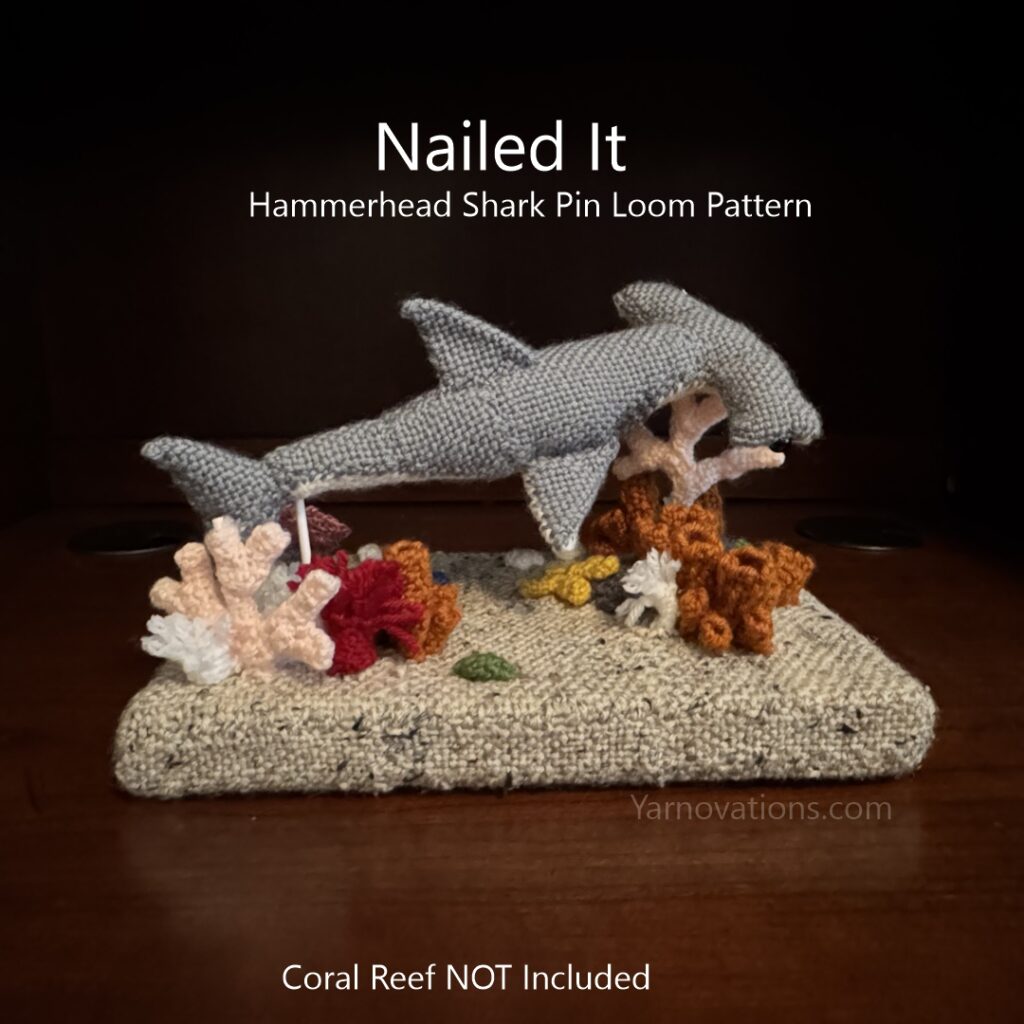
2. Nailed It: Hammerhead Shark Pin Loom Weaving Pattern

You’ll be saying, “Nailed It” after weaving your own hammerhead shark. This shark stuffed animal is created with pin loom shapes that are folded or tucked and sewn together. The hammerhead shark pin loom pattern includes step-by-step written instructions and lots of photos, so even the beginner weaver can make one.

The pin loom hammerhead shark measures approximately 10″ long. Each pin loom shape is woven in plain weave making it a very approachable project.

The Hammerhead Shark Pin Loom Pattern is now available on Etsy.

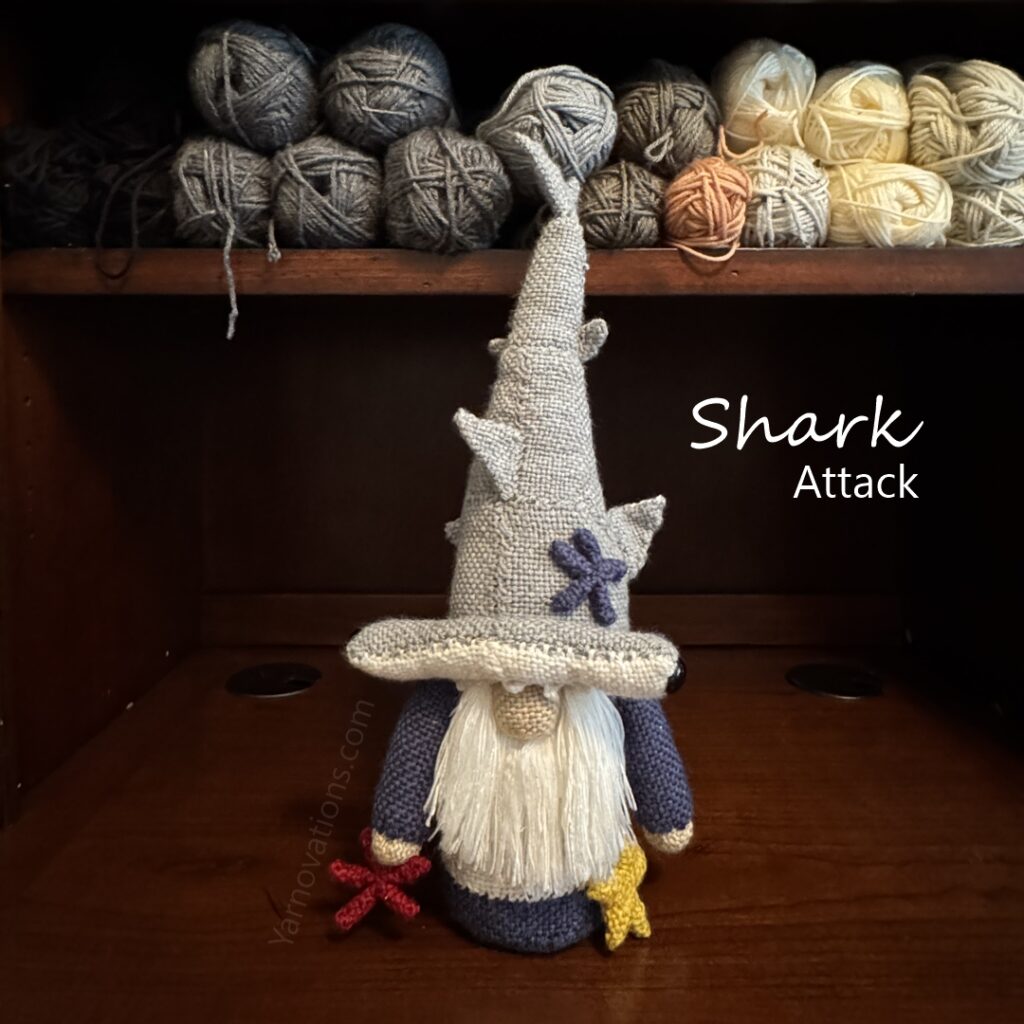
3. Shark Attack: Gnome Pin Loom Weaving Pattern

Ready for a day at the beach, this gnome’s hat looks like a Shark Attack! The gnome, shark and even the starfish are made from pin loom woven shapes. This pin loom pattern also includes step-by-step written instructions and lots of photos.

Shark Attack Gnome measures approximately 18″ tall from bottom of gnome to the end of the shark tail. The gnome, shark and starfish are all woven on pin looms in plain weave. The teeth are crocheted.

Shark Attack Pin Loom Pattern is now available on Etsy.

All three of these Hammerhead Shark patterns are a lot of fun to make and to play with.

Enjoy!

August 2025 Classes

Beat the heat this summer by taking a couple craft classes with me. It’s open to all members of Sew’n Sew’s sewing group that meets in Sun Lakes, Az. Ping me for more information.

Granny Square – Crochet Class August 25

Learn how to crochet the granny square. This is a fun class for first time crocheters and those needing a refresher on the granny square. Bring 2 to 5 skeins of medium worsted weight yarn and I/9/5.5 m crochet hook (I recommend Susan Bates).

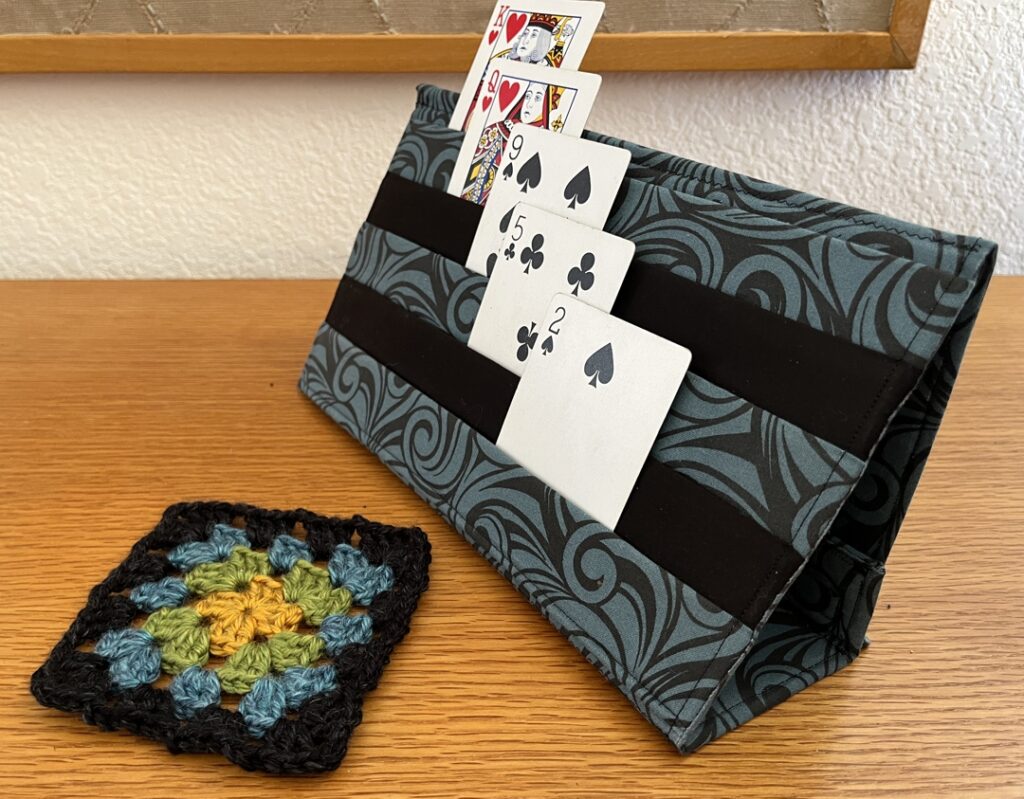
Playing Card Holder – Sewing Class August 11

If you love playing cards but want to play hands free, this is the perfect card holder for you! It has 5 rows of pockets (no center seam), it’s slanted, weighted and folds flat when not in use. You will cut fabric before class and learn how to sew it all together and go home with a completed card holder.

Can’t make the class? No worries, you can purchase the sewing pattern for the card holder in our Etsy shop: Playing Card Holder.

Looking forward to seeing you there!

Dana

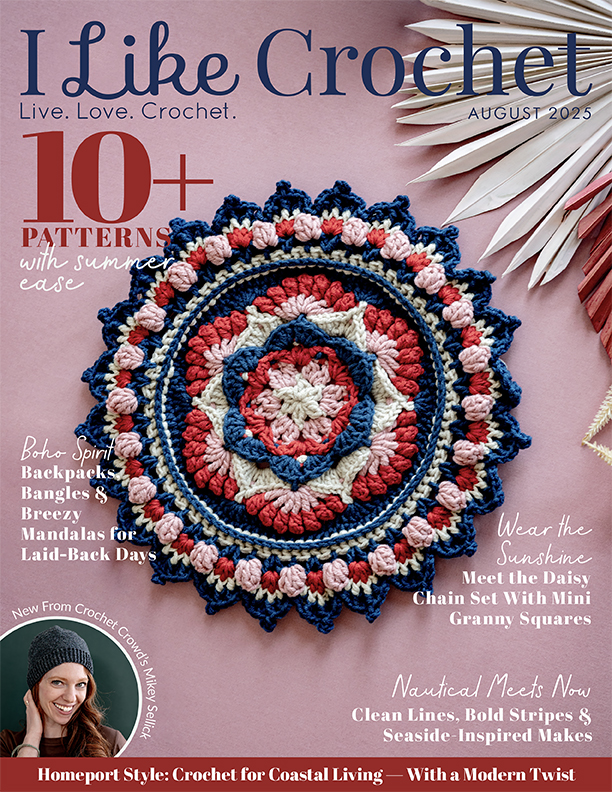
Published in I Like Crochet August 2025

We have 3 fun designs featured in I Like Crochet August 2025. This issue features 3 exciting themes including: Boho, Modern Mariner, Bold Prints for Late Summer. You’ll find items such as bags, pillows, tops and more.

1. Peach Grove Backpack

Photo courtesy of I Like Crochet magazine.

Peach Grove Backpack is a fun and stylish backpack that features a wide variety of crochet stitches and techniques. The handle and drawstring are made with a super easy faux icord. The shoulder straps are stitched in Tunisian crochet using a standard crochet hook. The main body of the bag is made with mini bobbles. It’s an exciting project to crochet and fun to assemble. I particularly love how the metal grommets and buckles create a tailored look.

Universal Yarns Clean Cotton yarn provides great stitch definition allowing each element to really pop. This line has 21 bold and beautiful colors to choose from.

There are a few more photos on our Peach Grove Backpack Instagram post.

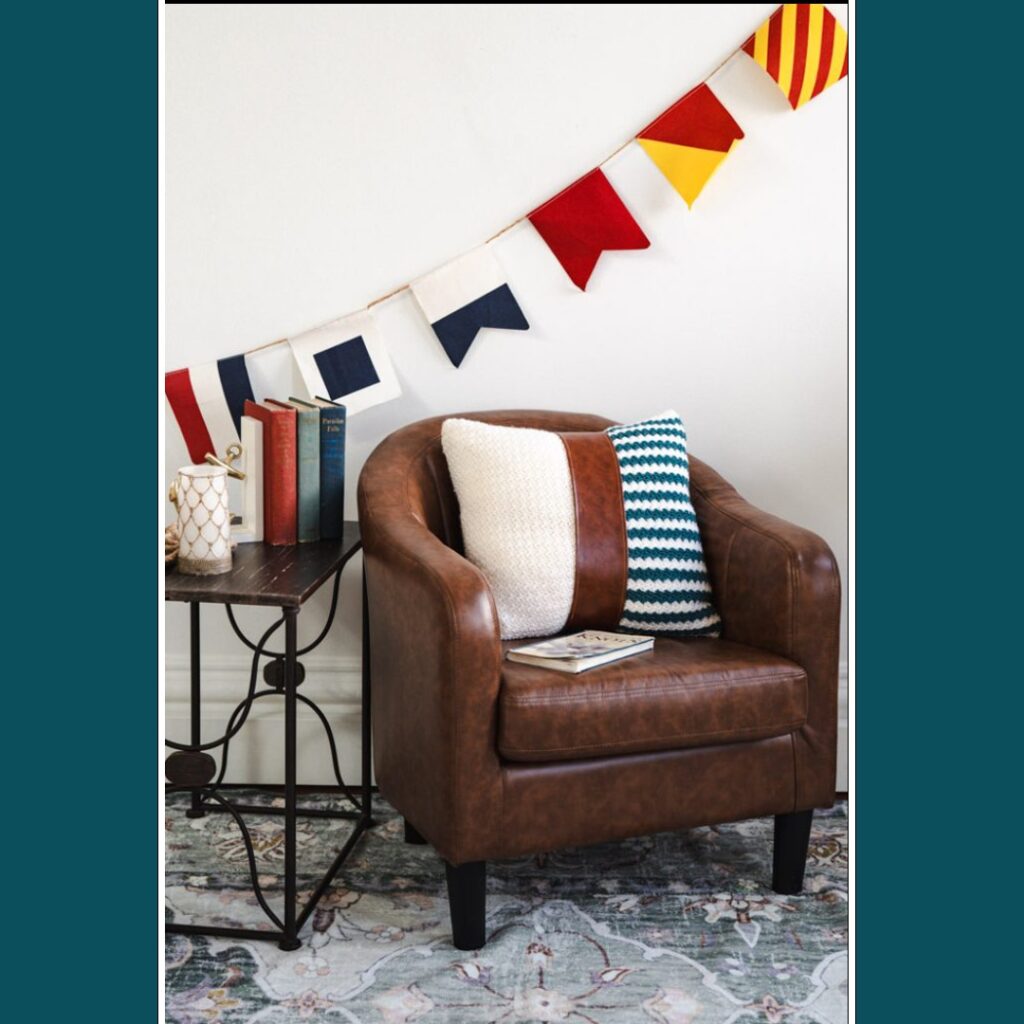
2. Leather & Stripe Pillow

Photo courtesy of I Like Crochet magazine.

This mariner style pillow is fast and easy project to crochet. The faux leather band creates a gorgeous transition between the 2 panels. It is so enjoyable to make, I’m tempted to make this in other color schemes for different rooms in my home. I’m thinking black and white stripe section…or maybe a pink and white stripe.

Pacific yarn from Cascade Yarn is really lovely to crochet with. And with 82 colors to choose from, you’re bound to find just the right combination for your crochet pillow.

There are a couple more photos on our Leather & Stripe Pillow Instagram post.

3. Rosy Knots Tote

Photo courtesy of I Like Crochet magazine.

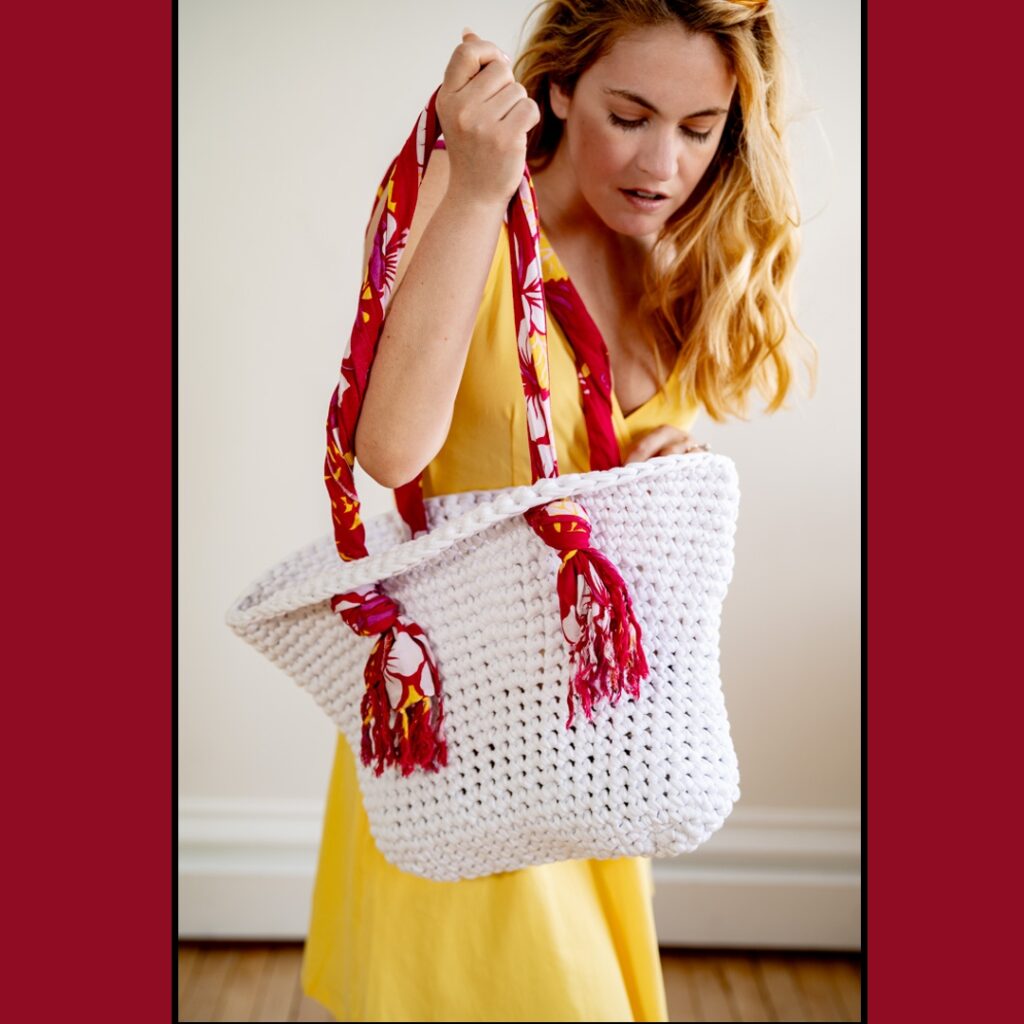
Rosy Knot Tote combines yarn and fabric, one of my new favorite things to do. In this case, I purchased a scarf from a second hand store and turned it into a shoulder strap for a bag. I love how the bright white single crochet stitches contrast with the vivid colors of the scarf. This is a great project for a brand new crocheter.

There are a few more photos on our Rosy Knots Tote Instagram post.

The yarn for this bag is made from upcycled textile waste. It’s a t-shirt yarn called Zpagetti by Hoooked. You need to check their website for colors and prints. There are so many to choose from and the inventory changes.

It’s pretty rare for us to have 3 projects in a single issue of a magazine. We are thankful for the opportunity and encourage you to check out this fantastic issue of I Like Crochet August 2025.

Serene Shores Wrap – June 2025 ILC

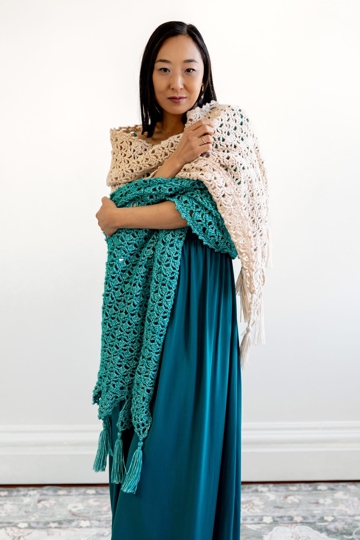
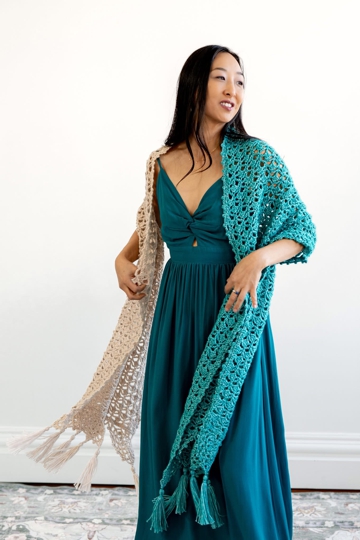
The June 2025 issue of I Like Crochet magazine features our Serene Shores Wrap. This shawl crochet pattern is a lacy, playful design with a unique edging and flirty tassels. It’s stitched in a scrumptious Cantata yarn which is medium worsted weight.

For those of us living in warmer climates, this shawl is a must have in summer months for battling fridge temperatures of indoor air conditioning. For those living in cooler climates, the Serene Shores Wrap is a must have for the cooler evening temperatures.

About the Serene Shores Wrap

  • Measurements: 96” long x 21” wide
  • Skill Level: Intermediate
  • Cascade Yarns: Cantata (6 skeins)

Serene Shores Wrap in Cascade Yarns Cantata

I highly recommend this yarn for shawls such as the Serene Shores Wrap. It feels luxurious to stitch with and has great stitch definition. Last time I looked, there were 45 colors to choose from. Wow! The Serene Shores is worked in #16 Sand, 3 hanks and #12 Green Teal, 3 hanks.

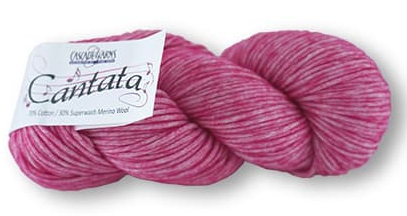
Cascade Yarns Cantata is the perfect choice for Spring and Summer stitching because it has gorgeous sun-kissed colors. The yarn is a luxurious cotton tube with soft Merino wool blown in. It has fantastic loft and beautiful drape allowing the lacework to really shine.   

  • Fiber: 70% Cotton / 30% Merino Wool
  • Approx. Yardage: 218 yds (200 m)
  • Weight: 100 g (3.5 oz)
  • (4) Medium Worsted Weight
  • Hand Wash Cold
  • Lay Flat to Dry

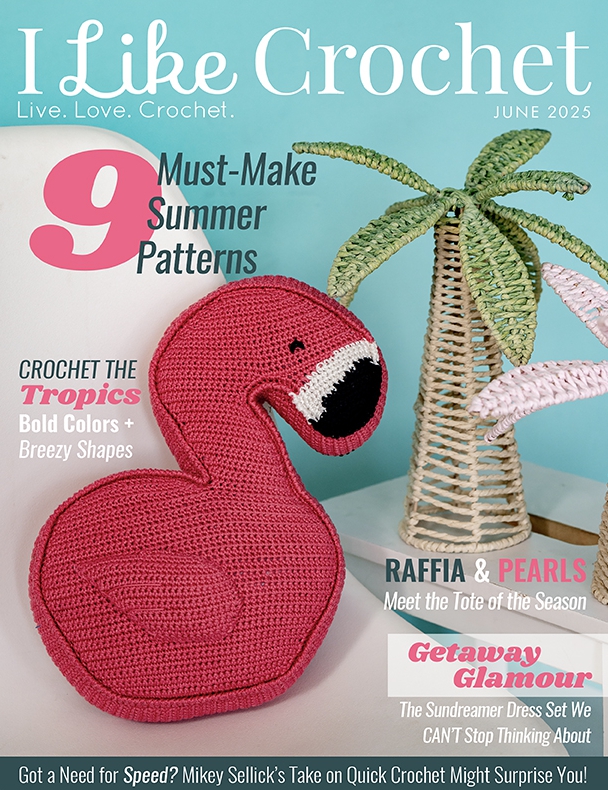
I Like Crochet – June 2025

I Like Crochet June 2025 issue has a fun beachy vibe with a “Sand + Sea” story and a “Hot Tropics” theme. You’ll find tops, wraps, and a fun flamingo pillow. And, if you like Pineapple crochet, there are 7 designs to stitch.

Photo courtesy of I Like Crochet magazine.

Rag Quilt – Creating Squares

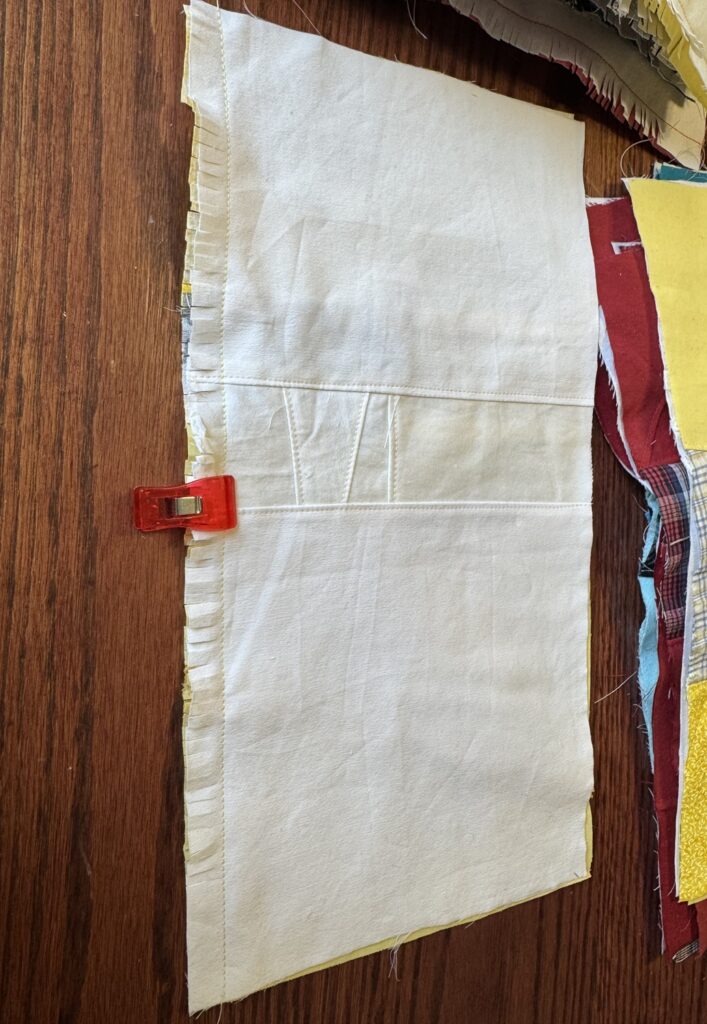
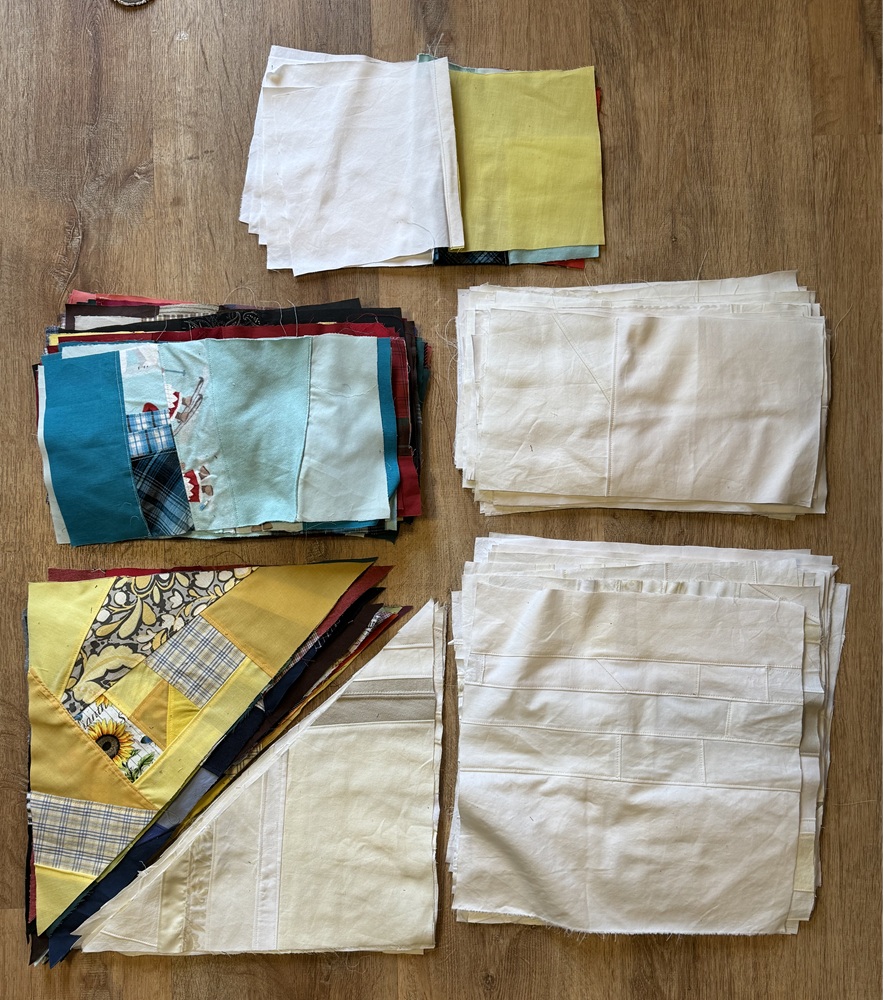
Part 2: After making a plan and creating colorful scrap triangles and rectangles, I sewed the triangles and rectangles together to make squares. The pieces were sewn together with the wrong side facing so the seam would be on the front to be ragged. I cut the seam with little slits about 1/8″ apart. I cut very close to the seam stitches. Once in awhile, I accidentally cut the stitches. I put a sewing clip on the cut section to remind myself to sew that area together as I sewed the large “X’s”.

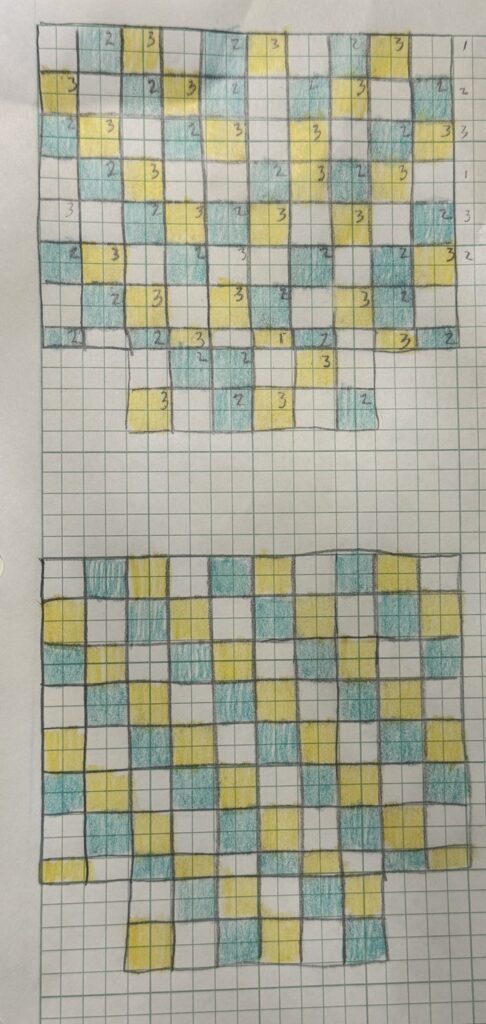
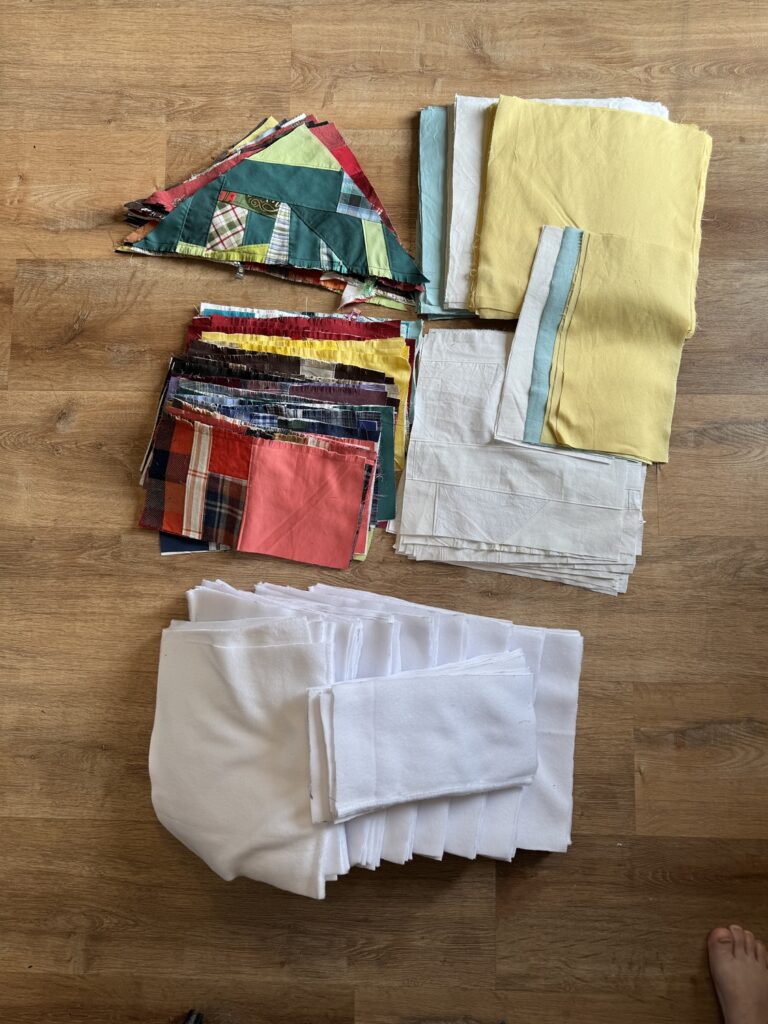
Next, I began working on the second major part of the scrap rag quilt, deciding on the bottom fabric and layout, and cutting the center layer. I chose three colors of cotton for the bottom layer, and a random pattern. I sketched it out so I could place the colors in the correct place.

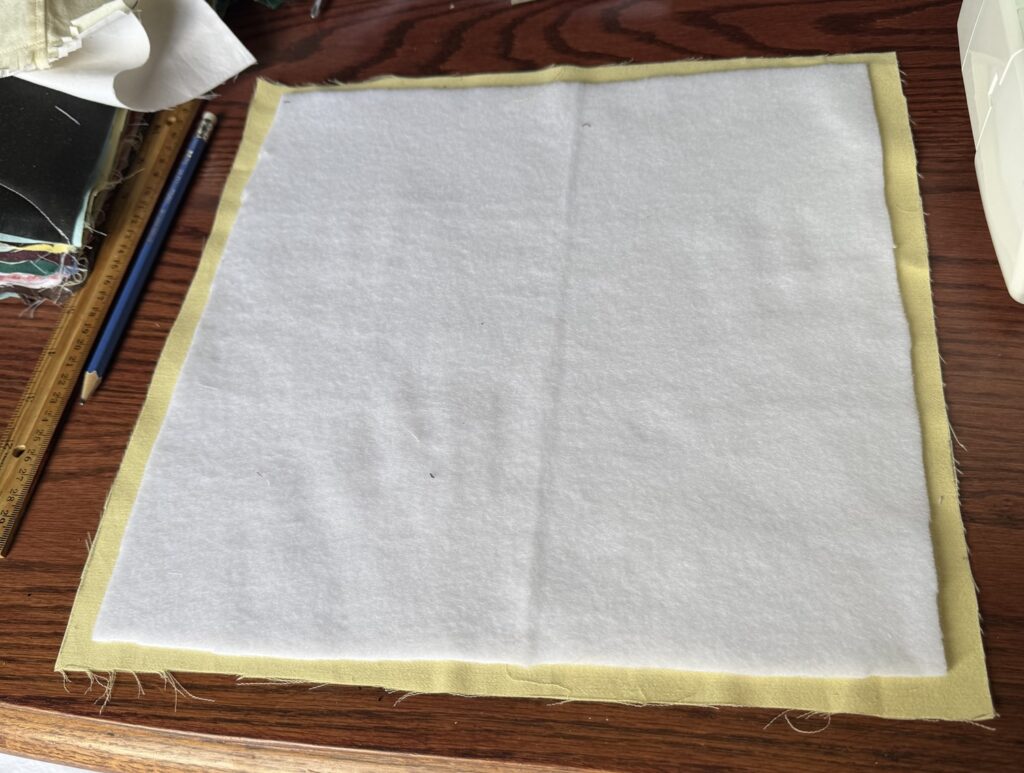
I decided on fleece for the center as an inlay. I cut the fleece squares to 12″. This meant there wouldn’t be fleece in the ragged seam.

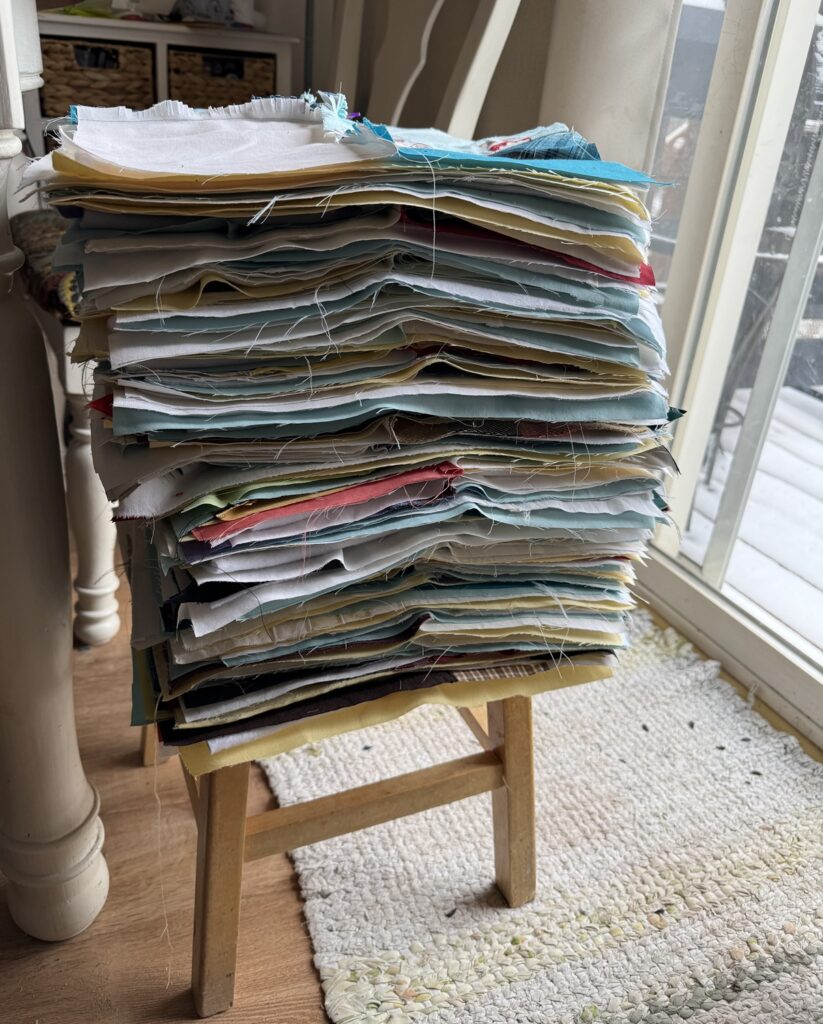
Once all the top squares, middle inlays, and bottom squares were cut, I decided to stack all the square layers together square by square. I laid the bottom layer down, centered a fleece on that, then the top piece on top.

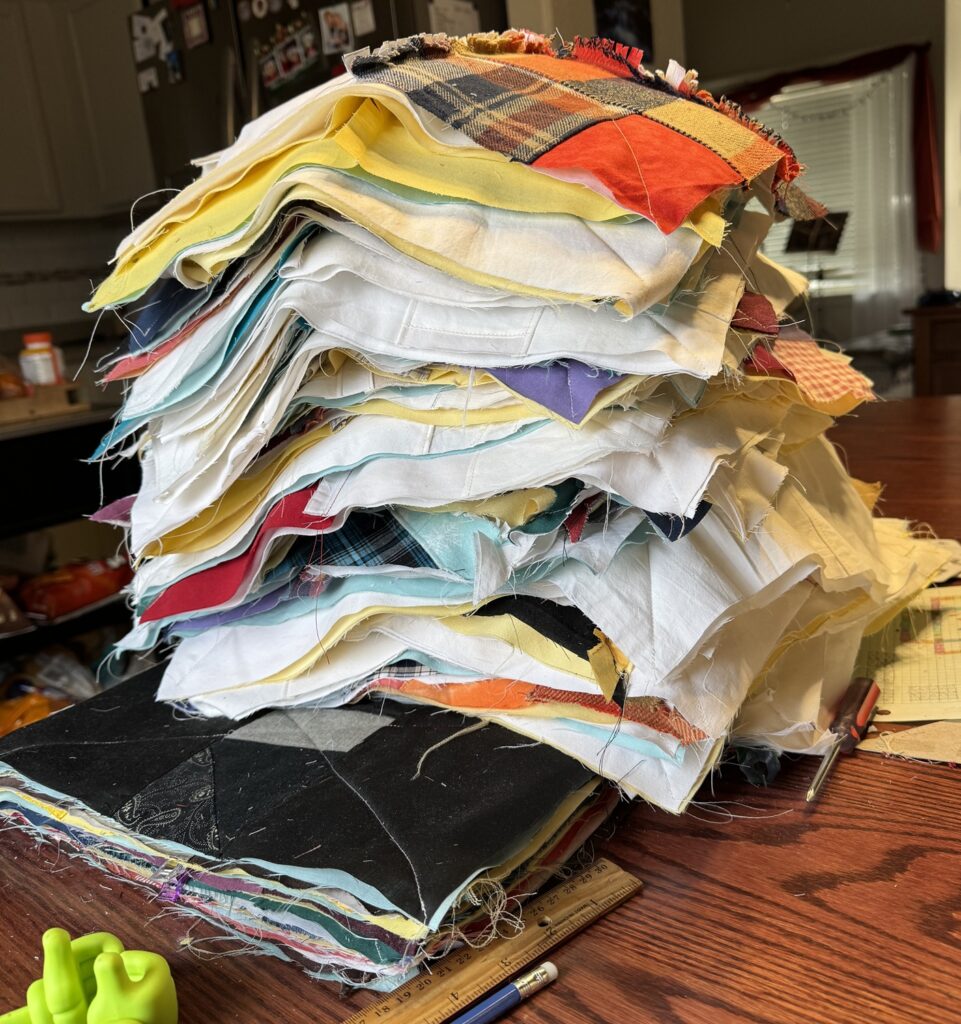
I made a nice tall pile of these layers to get them ready to sew “X’s” on them.

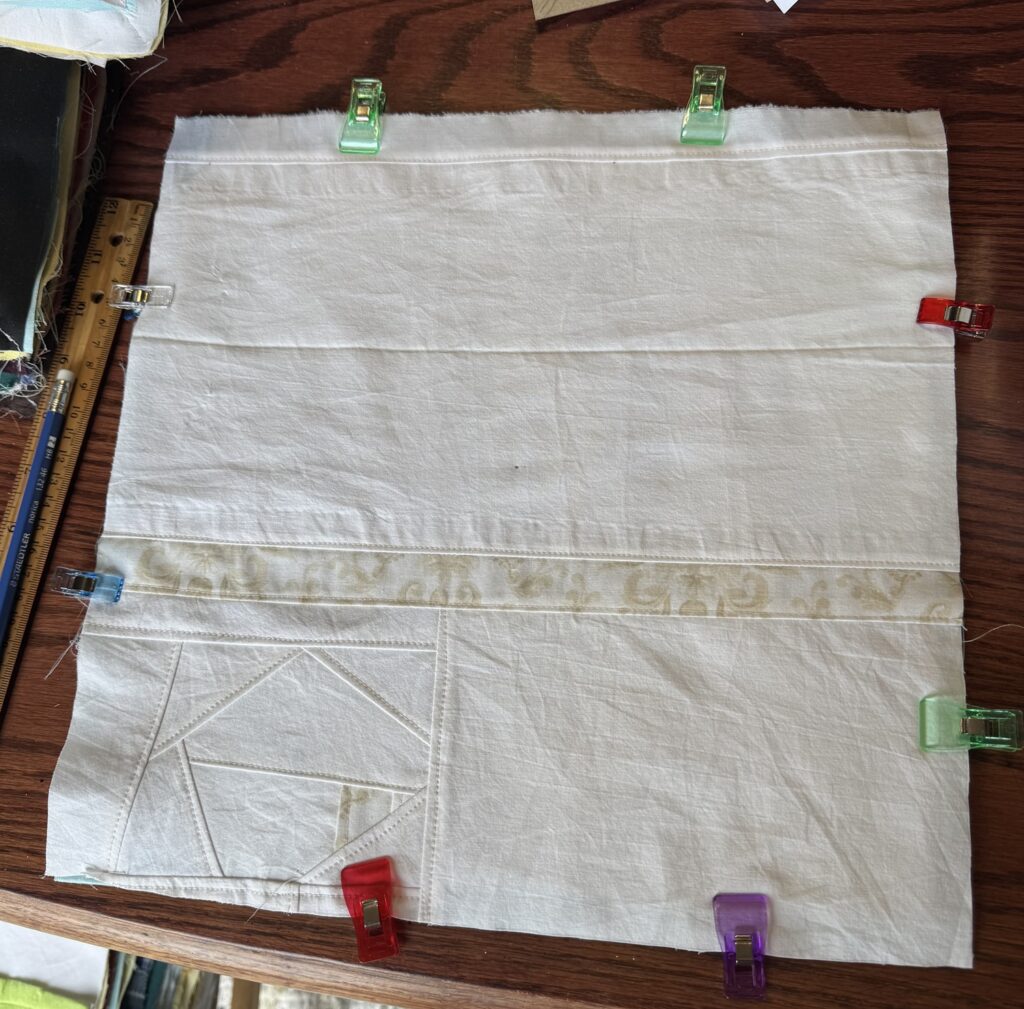
Before sewing the “X’s”, I made sure each layer was centered neatly. 2 Clips per side is a nice amount to keep the layers steady.

I kept the sewn layers in order so it would be easy to sew them into strips. Does this look like a CA king quilt?

The plan is to sew them into strips, rag them, then sew 2 strips together at a time so it isn’t hard to sew the whole blanket together. This step took about 2 weeks, bringing the total working time up to 8 weeks.

**Some people sew two straight stitches per square or strip for extra durability.

Beginning a Scrap Rag Quilt – CA King

I am embarking on a large task, sewing a California king sized rag quilt! Do I have lots of time for this? Not really. I anticipate this quilt will take several months working in 10-30 minute snippets at a time. First, I made a plan.

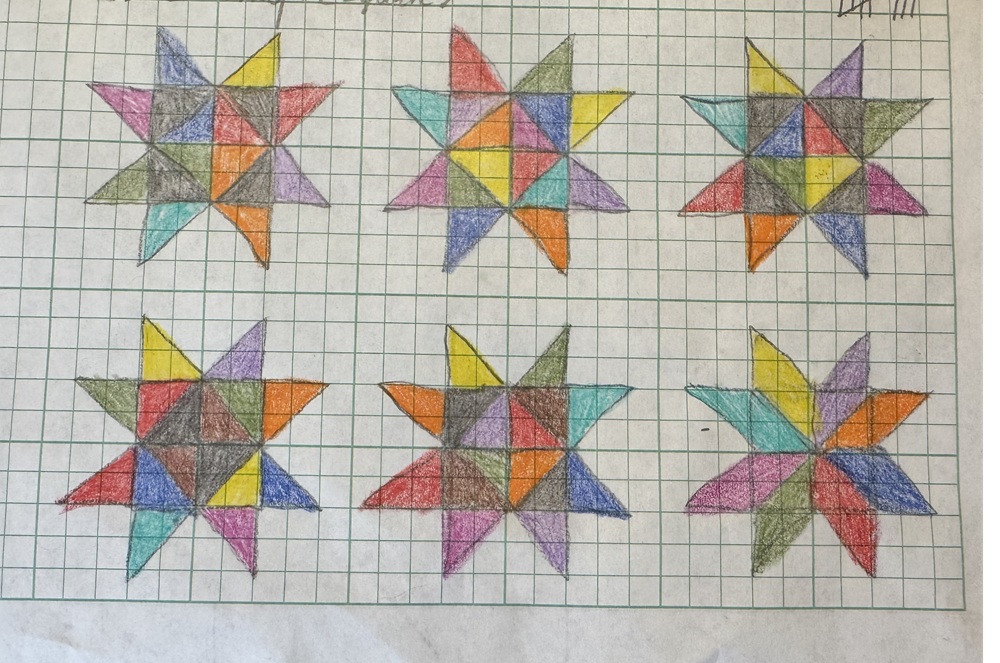
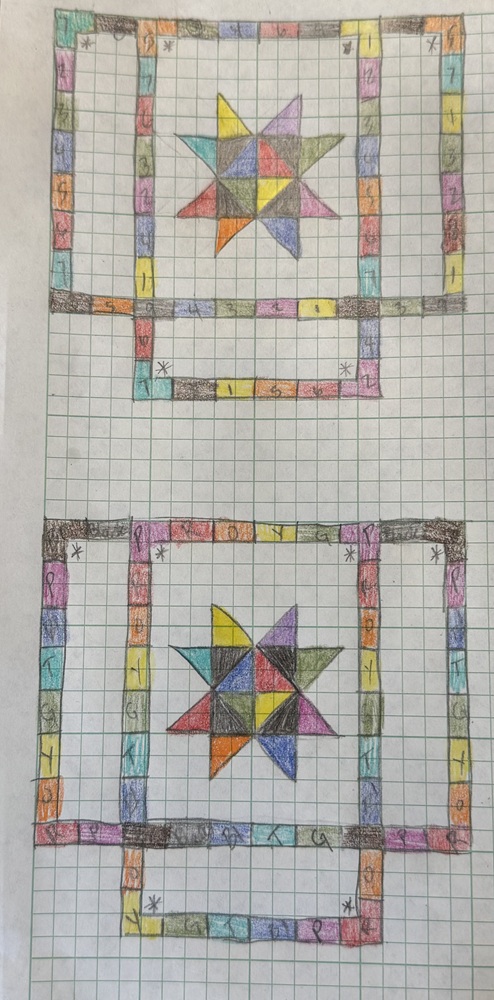
I decided on a star image with border sections. I sketched out several stars to try out different color placements. Next, I measured the bed (top and overhang desired) to determine what sized squares and triangles I would need. The top measured 72″ wide x 84″ long. The length of the sides could be 18-22″ long. I already know that I do not want the sides to touch the floor. With these dimension in mind, I decided on 12″ squares after being sewn together. I decided on 1/2″ seams on each side, so the squares need to be 13″.

Next, I sketched out a design. Many quilts used as bedspreads have a bunch of extra fabric in the corners. I don’t want all that fabric, so I decided to leave out the corner sections on the bottom of the blanket. If the quilt doesn’t close in the corners after being placed on the bed, I will come up with a creative solution for keeping the corners closed.

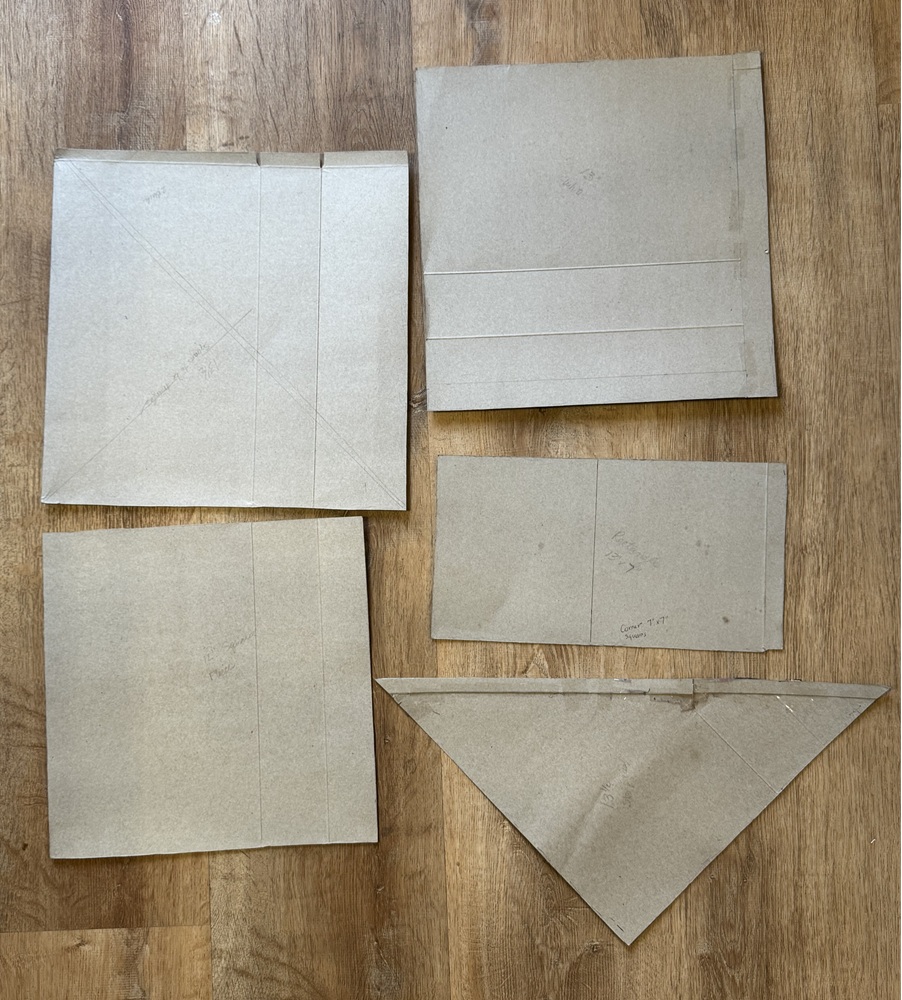
With this design in mind, I began tackling the shapes for the top. As drawn, I would need triangles, squares, and rectangles. Rag quilts often have 1/2″ (5/8″, 3/4″, or 1″) seams on the front/right side of the quilt that are clipped 1/8″ apart to create the rag look. Therefore, I cut the squares at 13″ to allow for a 1/2″ seam on each side. I cut the triangles to 13 1/2″ lengths (on the two sides that make the right angle, not the hypotenuse), but that ended up being just a tad short when I sewed the squares together. I recommend 14″ right triangles. The border is rectangles, and those were cut to 7″ x 13″ I don’t have special cutting equipment, so I decided to make cardboard templates from cereal boxes.

In addition to being a rag quilt, this is a scrap quilt. I decided to sew my remnant pieces together to create the star and border sections.

Because I couldn’t wait to see the star come together, I started my scrap quilt with the colorful triangles. I organized all my scraps by color and used the cardboard templates to make the triangles, squares, and rectangles.

Want to guess how long these steps took? Between homeschooling my two boys, driving my kids to appointments and activities, creating other sewing, weaving, and crocheted designs, the above steps took 6 1/2 weeks. Did I get frustrated? Normally I would have, but I decided that this project is allowed to take as long as it takes.

Next steps: Decide on the bottom fabric and colors, cut the bottom squares, cut middle fleece, then assemble the quilt.

Doily Mug Rug and Upcycling Doilies in We Like Sewing Magazine April 2025

Photo courtesy of We Like Sewing magazine.

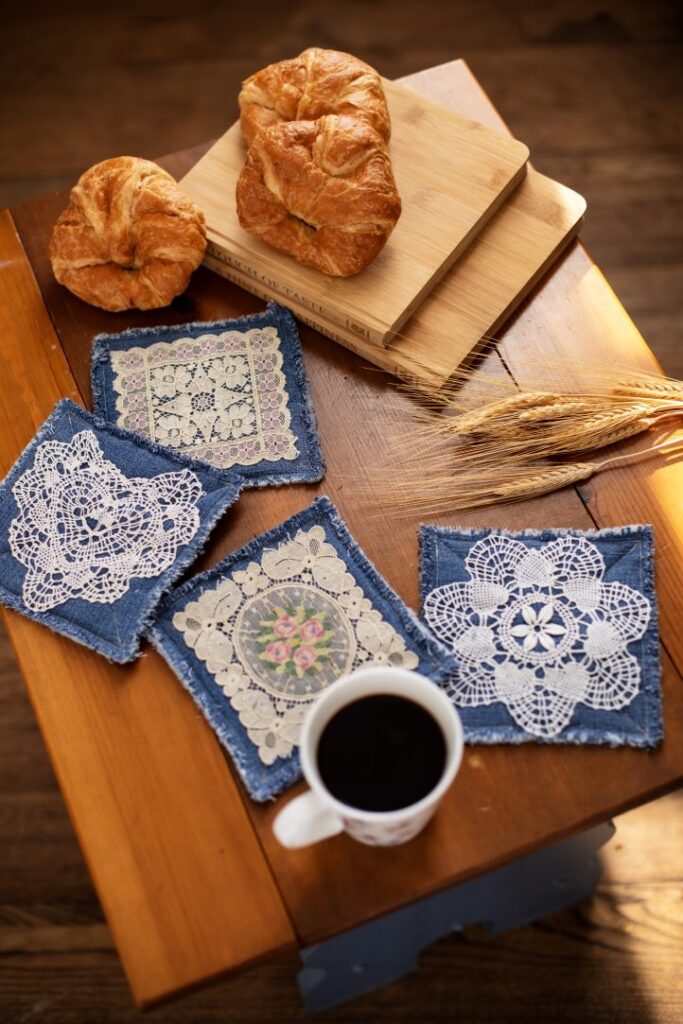
For the April 2025 issue of We Like Sewing online magazine, we wrote a sewing pattern and an article about doilies. We’ve grown to appreciate doilies more and more over the last few years. Back in the day, when our grandmother was crocheting them, we didn’t appreciate them, but now we do. There are so many new and exciting ways that people are using doilies, that it’s hard not to get excited about them.

As you can see in the photo above, we wrote a beginner friendly pattern for mug rugs. These are fun and quick upcycle projects that can be made in an hour. The denim is from upcycled denim jeans. The doilies were given to me by my aunt. Some had “Made in China” tags on them, so I felt comfortable upcycling them on the coasters.

Additionally, I, Dana, wrote an article with 11 ideas for upcycling doilies and lace in the article: Reduce, Reuse, Relace! In that I share ideas for decorating your home, updating clothing and creating useful items as well. I also share a few photos from my home where I’ve upcycled doilies and lace.

Check out our latest article and pattern on We Like Sewing April 2025 website.

The article I wrote is just a small sample of the amazing projects I saw online. I didn’t have time or space to share them all. But if you’re looking for a visual inspiration, check out the Pinterest board I created: Upcycle Doilies and Lace.

This article ramped up my appreciation of doilies so much that I sewed a doily on a playing card holder I made for my sister. This was also a denim upcycling project. Check out the doily on the Playing Card Holder Sewing Pattern.

60 Quick Granny Squares

We are thrilled to have 6 granny squares published in this new book: 60 Quick Granny Squares. In addition to the squares, we’ve written a pattern for a Dickie to wear under a shirt or jacket. 2 of our squares kind of made it on the cover…at the bottom left corner…how fun.

The 6 granny squares we’ve written include:

  • Spike Stitch Mosaic Tile – project 8
  • Sunflower – project 26
  • Daisy – project 27
  • Flower Patch – project 28
  • Butterfly – project 29
  • Swirl – project 58
  • Comfort Swirl – granny square project

Above, I’m wearing the prototype of the Comfort Swirl Dickie made from 4 Swirl granny squares.

All of the projects are crocheted using 220 Superwash Sport by Cascade Yarn. I, Dana, am a big fan of this yarn. There are tons of colors and the thinner weight is great for getting lots of detail in smaller projects.

All the granny squares in the book measure 6″ x 6″ so you can mix and match designs to make larger projects like bags, clothes, blankets and more.

The first section of the book includes helpful tips on changing color, joining, etc.

The squares were designed by a handful of crochet designers, their names are listed with their square. Each square also includes charts…for those that like to stitch with those visuals.

60 Quick Granny Squares is published by Get Creative 6, an imprint of Mixed Media Resources. You can buy your copy of 60 Quick Granny Squares in your favorite yarn store or Amazon.

Horse Drawstring Backpack

This horse drawstring backpack sewing pattern is great for beginners and fun for sewists of all abilities. The reason it’s so great is because it has step-by-step written instructions and a TON of photos. If you’re new to sewing, there are lots of fun techniques in this backpack sewing pattern.

What you’ll learn with this sewing pattern:

  • How to make a drawstring bag.
  • How to reinforce the drawstring pocket opening.
  • How to use a tracing template.
  • How to sew an applique (sew on top of the bag).
  • 2 options for securing a drawstring: grommet or sewn tab.

Horse Drawstring Backpack Sewing Pattern on Etsy

The Horse Drawstring Backpack sewing pattern is available as a PDF on Etsy.

Available now on Etsy.

Buy the pattern on etsy

Upcycle Fabric to Sew Horse Drawstring Backpack

Another awesome feature of this bronco bag is that it looks great with upcycled materials! The pink bag with tan pony was made from upcycled bed linens sourced at a second hand store. The bookbag on the right was made with old denim jeans. If you’re new to upcycling denim, let me share a secret. The inside/wrong side of jeans is a different color than the outside/right side. So, one pair of jeans gives you 2 different colors if you use the wrong side as a second color.

Materials Needed to Sew the Horse Drawstring Backpack

The materials needed to make your own horse drawstring backpack are pretty minimal. We recommend a sewing machine. We used 2 stitches for this project: straight stitch and zigzag. Other supplies include:

  • Cotton or Denim Fabric
  • Wonder-Under Interfacing (heavy-duty)
  • Drawstring: 0.375-0.5” diameter rope (polypropylene, nylon, or cotton)
  • Thread: matching or coordinating
  • Eyelets: (2) Large ¼” (optional)
  • Straight Pins or Sewing Clips
  • Felt: brown
  • Yarn: beige or mane color
  • Scissors, pinking shears (optional)
  • Pencil or Washable Marker
  • Iron
  • Glue

Securing Rope to Horse Drawstring Backpack

The sewing pattern for the Horse Drawstring Backpack has instructions for securing the drawstring 2 different ways. When you look at the picture above, you will see the drawstring secured to the bottom of the bag by either a grommet or a cloth tab.

If you love the look of a grommet or eyelet, we’ve included instructions for that option. If you don’t have and don’t want to buy grommets, the sewing pattern shows you how to make the cloth tab. Both are easy to make/install and both look great.

The Horse Backpack Sewing Pattern on Etsy

Buy your copy of the Horse Drawstring Sewing Pattern on Etsy.
Available now on Etsy.

Buy the pattern on etsy

Personalize the Horse Drawstring Backpack

What to personize this horse drawstring backpack a little bit? Here are some fun ideas:

  • Embroider the child’s name on the bag.
  • Embroider a horse’s name on the bag.
  • Sew a horn on the forehead and make a unicorn (horn pattern not included).
  • Use team colors of your favorite sports team.

Happy Sewing!

Mini Wallet in Quick to Stitch to Crochet 2025

Keep your cards and money organized with this cute little wallet. There are 2 pockets and a fold over front flap secured with a button. Add a bit of whimsy to this mini wallet by embroidering a rose in the button hole.

This mini wallet is a great project for the confident beginner because it uses basic stitches. The wallet is crocheted flat and folded to make a wallet with 2 pockets.

The yarn is Lion Brand Cotton DK which is really nice to work with. It’s also durable and washable. This wallet measures 4″ wide x 2.5″ tall making a great size for stowing in a purse or grabbing for a quick trip out.

Quick to Stitch Crochet 2025 by Crochet World

Quick to Stitch Crochet by Crochet World has 35+ designs that use a wide variety of yarn weights from sport to super bulky. It includes bags, scarves, shawls, blankets, baskets and more. This issue is available in craft stores until Jun 9, 2025. Learn more about Crochet World magazine at Crochet-World.com.