Little Looms Winter 2026

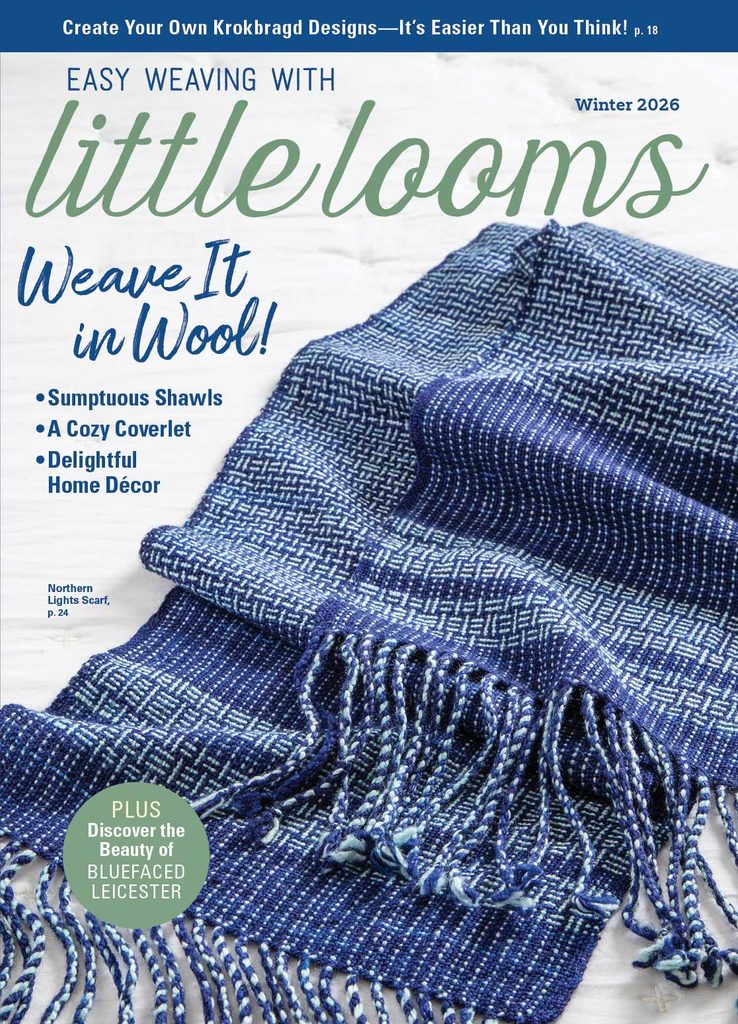
Both Deborah and I each have delightful patterns in the Little Looms Winter 2026 issue on newsstands now. This issue is devoted to the wonders of wool.

Embossed Lines Pillow
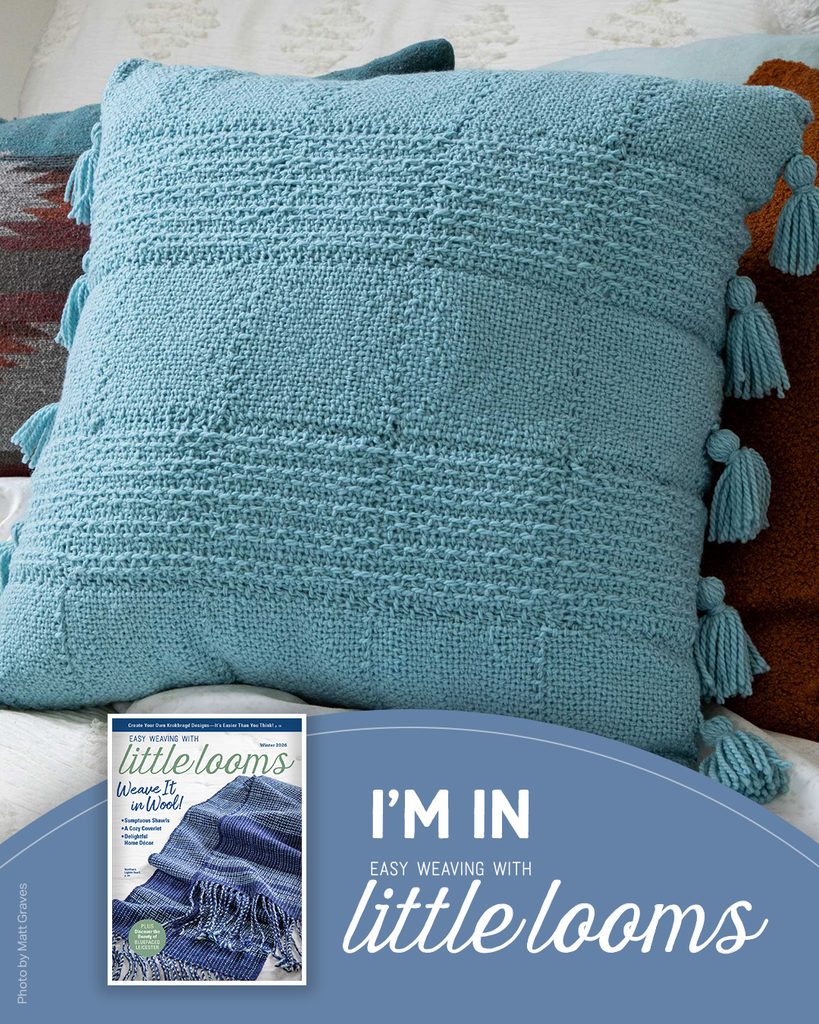
This generously sized pillow is fun to make and even more fun to use. The gorgeous sky blue color and distinctive striping make it a wonderful addition to any home decor. I have mine sitting on a really deep dining room chair though it could transition well to a couch or bed.

The pillow uses just one pin loom – the 4″ square. The pillow’s finished size is 16″x16″

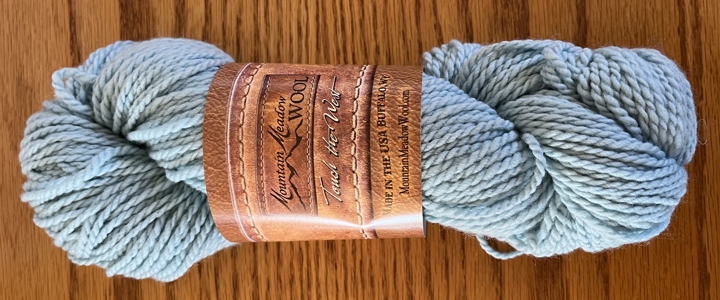
The yarn was delightful to weave with. It’s woven with Mountain Meadow Wool Laramie (100% Mountain Merino ® Wool; 200 yds/3.5 oz), #40475681 Storm.
Learn how to weave your own with the pattern in Little Looms Magazine Winter 2026 issue.

Sweet Dreams Lamb Stuffie
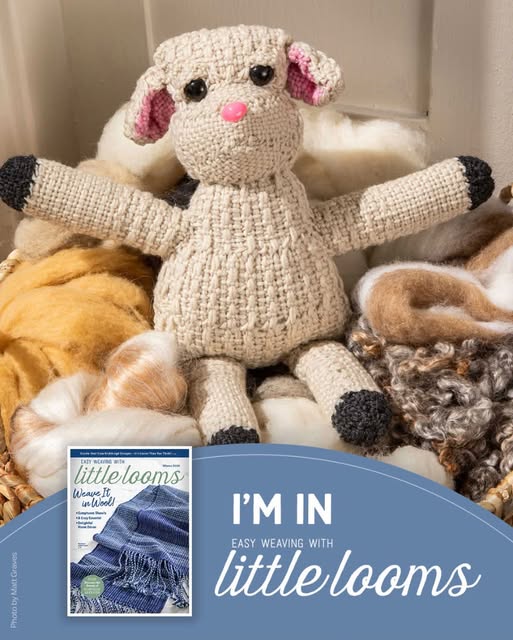
This adorable little lamb will help you sleep and keep you from counting sheep. It’s huggable and lovable at 5″ x 12″.

The lamb is made with several pin looms including:

  • Squares: 1″, 2″, and 4″
  • Rectangles: 1″ × 4″, 2″ × 4″, and 2″ × 6″
  • Triangle: 2″ right-triangle

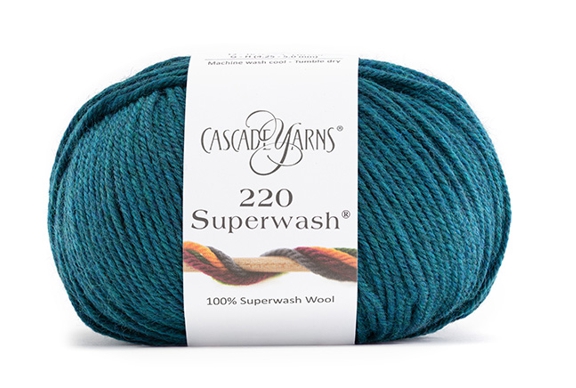
Cascade 220 Superwash Merino (100% merino wool; 220 yd/3.5 oz) is a great choice for lovies like stuffed animals because it’s machine washable. This woolie creature was woven in colors: #71 Parsnip, #82 Jet, and #24 Candy Pink.
Learn more and get the pattern in Little Looms Magazine Winter 2026.
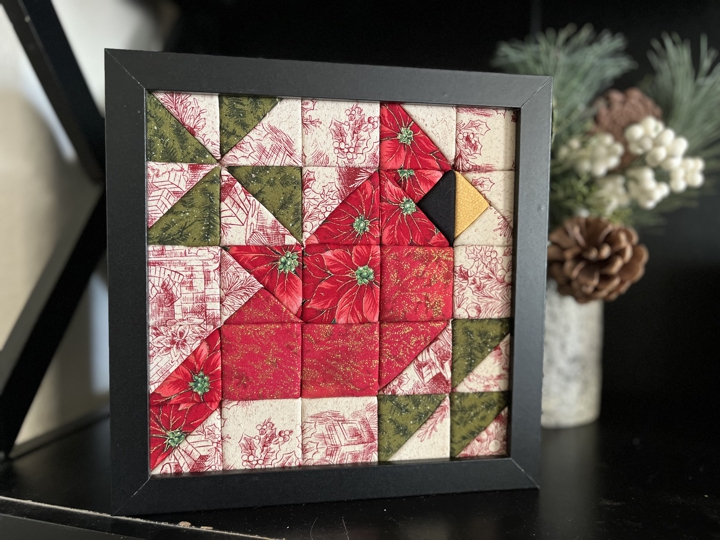
Kinusaiga 101 Class

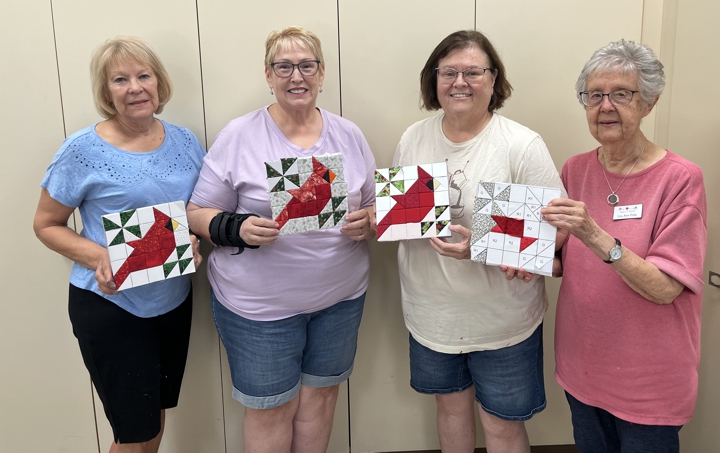
What fun it was to host my first Kinusaiga class. We made the Cardinal Quilt Block – pressing fabric into foam. The straight lines made this a great project for beginners. But I’d rate it more as a confident beginner pattern due to all the places where fabrics intersect.

Here’s a few of the comments I received about the Kinusaiga class:

  • They loved having another way to use fabric from their sewing stash.
  • They loved learning something new.
  • They signed up because I was teaching (how sweet is this comment).
  • They loved how patient I am as a teacher (again, very sweet of them to say).
  • They loved how easy it was to do once they learned how.
  • They are looking forward to making their next Kinusaiga project.

Thank you, ladies, for attending class. It was such a joy spending the afternoon with you. I’m so thankful to be part of such a fun sewing guild.

What is Kinusaiga?

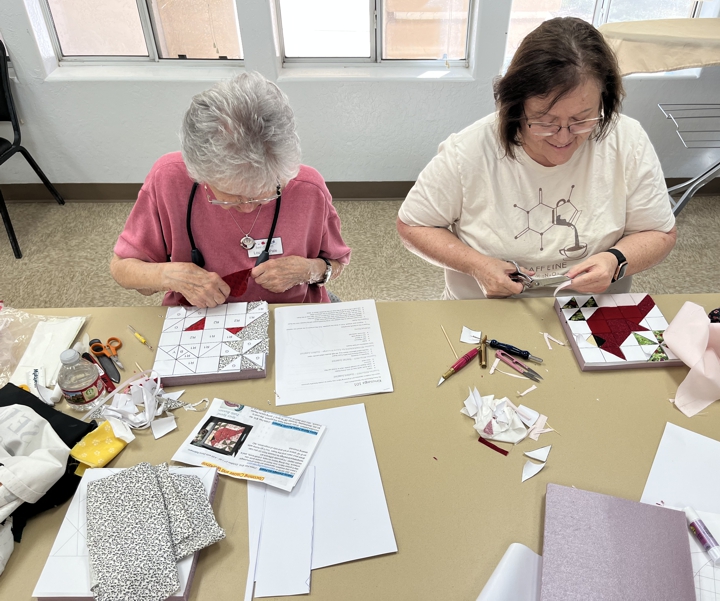
For those that are unfamiliar with Kinusaiga, this is sometimes called “silk painting”, or “painting with fabric”. I call it “fabric collage on foam”. For this class I cut XPS Polystyrene Foam Board into 8″x8″ squares for each lady. Following a template, they used craft knives to cut the quilt block design into the foam. Then they each used a seam ripper to press the fabric into the cut grooves. Once complete, these foam boards can be displayed in shadow box frames.

Because this class was offered to the ladies in my sewing guild, they each provided their own fabric. And what a treat it was to see what they selected. I encourage you zoom in on the second picture of this post to see what they selected.

Dana

I think I’ve got a couple of these ladies as hook on Kinusaiga as I am. What fun!

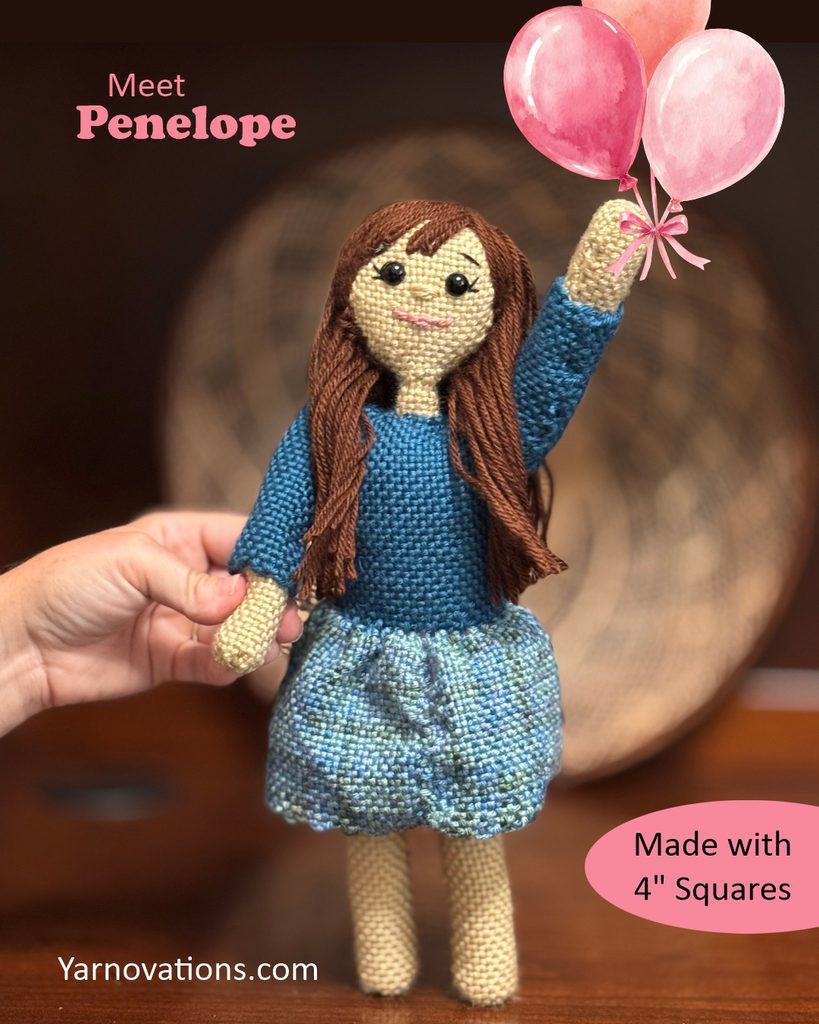
Meet Penelope, Pin Loom Woven Doll

Penelope means “weaver” in ancient Greek, which is fitting for a doll that’s pin loom woven! This adorable little girl is made completely from squares woven on 1 pin loom – a 4″ square. Not only is the doll woven on 1 loom, but the pattern for Penelope also includes a little blanket…made from 4″ woven squares.

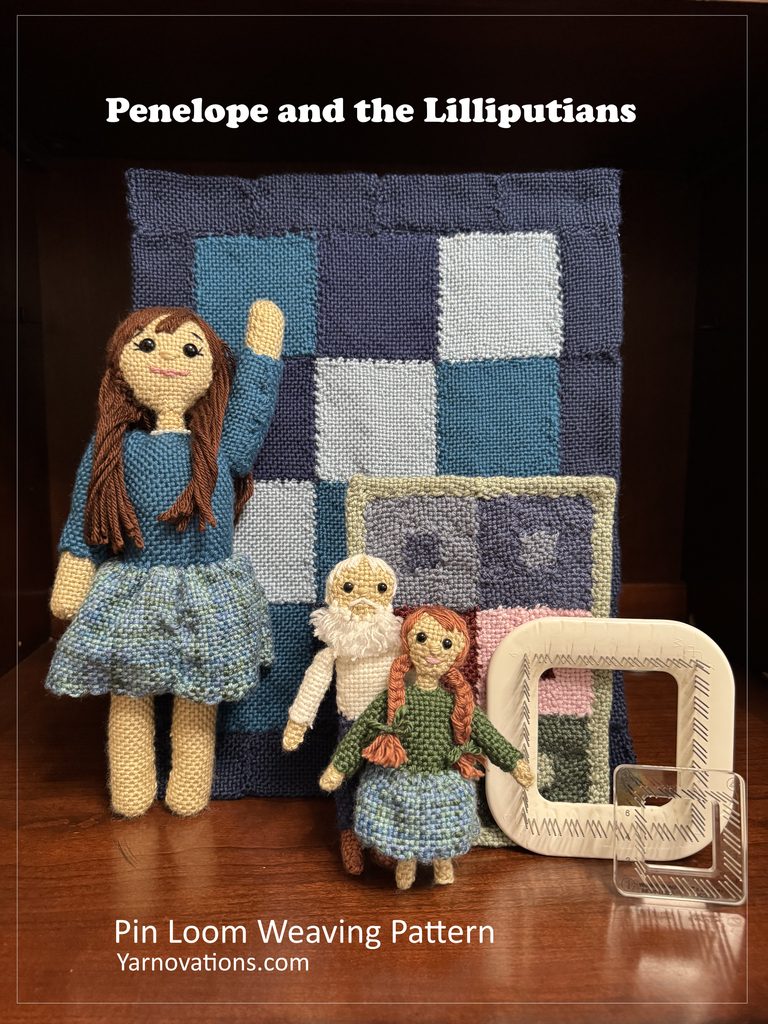
But wait, there’s more! We’ve combined the pattern for Penelope with the Lilliputian dolls. The updated and revised pattern now includes:

  • Large Girl Doll (Penelope) – 14″ tall
  • Small Girl Doll (Lilliputian) – 6 1/4″ tall
  • Small Boy Doll (Lilliputian) – 7 1/4″ tall
  • Quilt/Blanket for Large Doll – 11″ L x 14″ H
  • Quilt/Blanket for Small Doll – 6 1/2″ L x 9″ H
  • Step by Step Written Instructions
  • Lots of Photos and Charts

The Lilliputian dolls can both be made with a 2″ square pin loom (but a 2″ x 4″ rectangle would be nice for the skirt). The quilt for the small dolls can be made with a 1″ square pin loom but would be more enjoyable (have less tails for weaving in) if it was also made with a 1″ x 2″ and a 1″ x 4″ rectangle.

Get your copy of Penelope and the Lilliputian Dolls in our Etsy shop.

Boy and Girl Dolls – Pin Loom Weaving Pattern

The pattern is written for the 3 dolls you see in the above photo, a tall girl doll, a small boy doll and a small girl doll. The woven dolls are easy to customize by changing the color of the clothes, hair and skin. We say “girl” because of the skirt, but perhaps you want to weave a tartan fabric and give the boy doll a kilt. You can do that, too!

The pattern also shows the Lilliputian dolls with or without shoes. You decide about the footwear for the Lilliputians.

The dolls are made with 3 different types of shoulders attachments. Penelope has posable arms that can spin all around. This is great for having her wave or for holding hands with the kiddos. The little boy doll has arms that bend at the shoulder so they can be raised and lowered, where as the little girl doll has arms that are stationary.

We rate this pattern as easy…great for confident beginners. All the parts and pieces are woven in plain weave.

Learn more about Penelope and the Lilliputian Dolls Pin Loom Weaving Pattern in our Etsy shop.

Available now on Etsy.

PS: We would love for you to share our photos on social media. Spread the word about pin loom weaving.

Dana

Wool-E Sheep Pin Loom Pattern

Weave your own cuddly sheep with this instant download sheep pin loom pattern. It comes 2 for 1! Yep, the instructions include the little 4″ tall sheep (cute as a Christmas Ornament) or the large 12″ tall sheep (soft and squishy as a pillow). They are constructed fairly similarly but there are differences due to scale. But don’t worry, they are super fun and easy to make.

Let’s take a closer look at each sheep, the differences and materials needed.

Small Sheep

  • Regular sett pin looms. Squares in 1″ and 4″. Rectangle in 1″ x 2″.
  • Worsted weight yarn (4) (pictured in acrylic)
  • 3” length x 3” width x 4” height
  • Body woven in Smocking Stitch Weave (included in pattern)
  • Head and Legs woven in Plain Weave

Large Sheep

  • Wide sett pin loom (Kayu Board). Squares in 4″, 5 1/2″, 10″. Triangles in 4″, 7″.
  • Super Bulky Yarn (6) (pictured in Chenille)
  • 10” length x 7” width x 12” height
  • Body woven in either Bias Plain Weave or Bias Smocking Stitch Weave (included in pattern)
  • Head and Legs woven in Bias Plain Weave

The photo above shows the body of the large sheep woven in bias weave in 2 different weave patterns. Left is the gorgeous textured Smocking Stitch Weave. Right is the smooth Plain Weave. Both are adorable and both are so soft you won’t want to put them down. You’ll want to hug them for days and days. And the kids will beg you to weave them a sheep of their own.

Smocking stitch is really easy to weave. It’s the stitch that has you weave (under 3, over 1) across the row. The “under 3” leaves floats on the squares creating a beautiful wooly texture. It’s easy to do both in traditional pin loom weaving and continuous bias weaving, too.

Wool-E Sheep Pin Loom Pattern on Etsy

The sheep pin loom pattern is now available in our Etsy shop. You’ll LOVE this pattern because it includes lots of charts for how to fold and assemble each size of sheep.

Download Wool-E Sheep Pin Loom Pattern in our Etsy shop.

We couldn’t resist showing you how Penelope (the Lilliputian doll) is going to be celebrating Halloween this year. She’s going with the little sheep as Little Bo Peep! What a cute pair. They are sure to win the cutest couple contest.

Get these pin loom patterns in our Etsy shop:

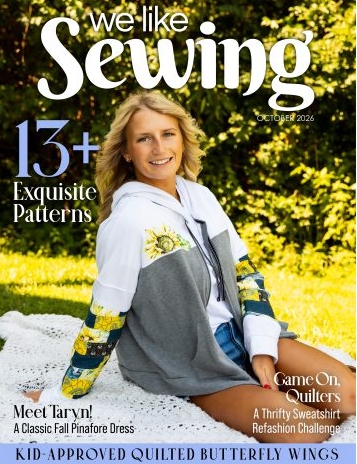
We Like Sewing 2026 October

Photo used by permission from We Like Sewing

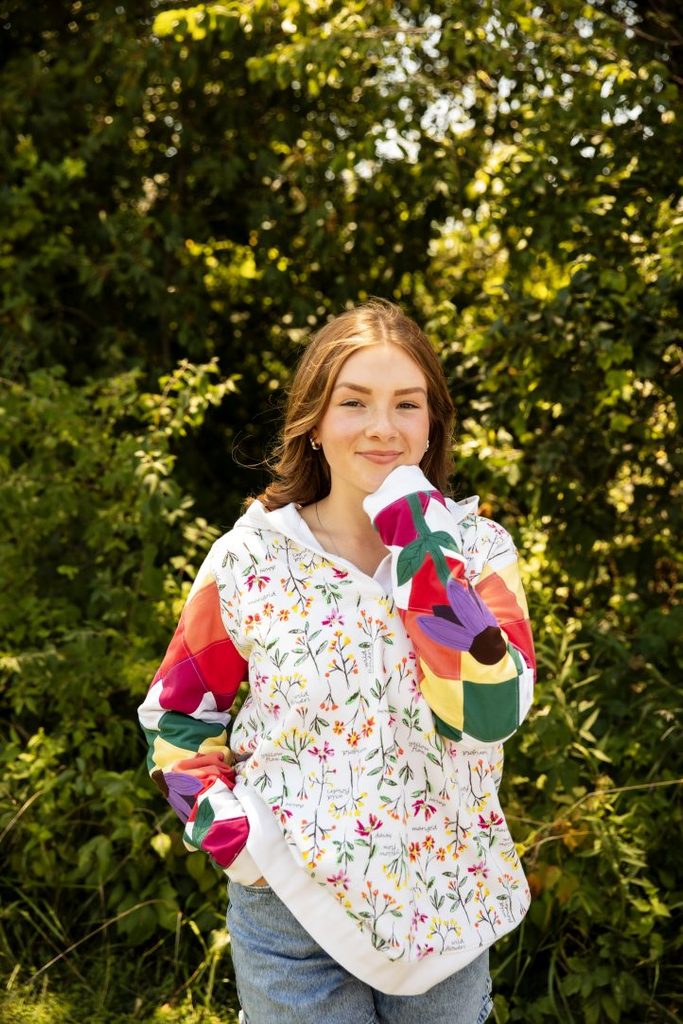
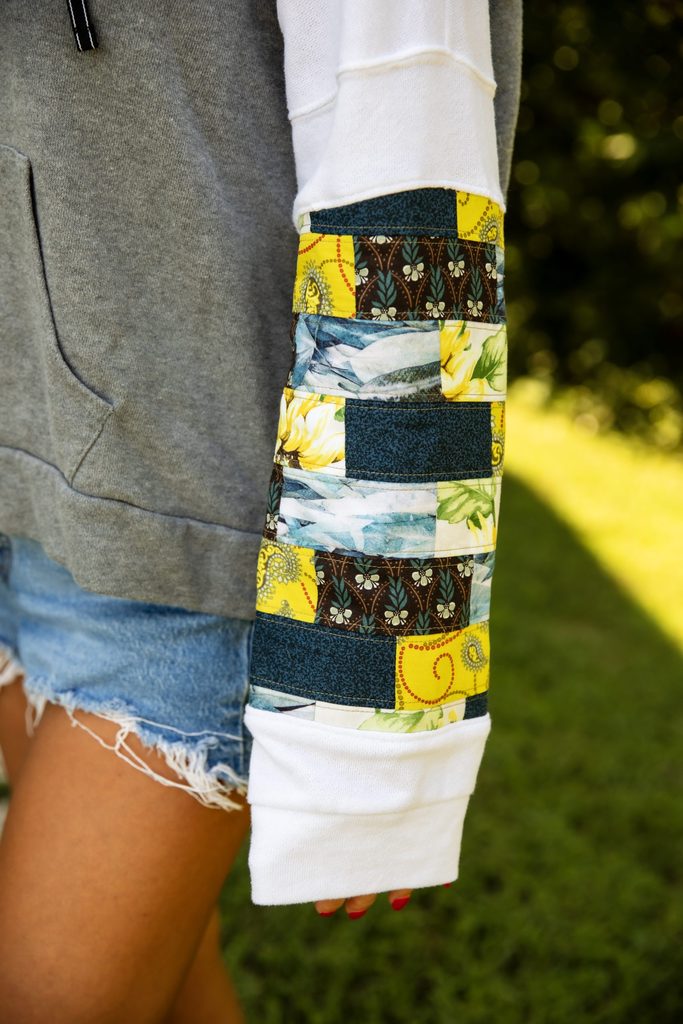
“Game On, Quilters: A Thrifty Sweatshirt Refashion Challenge”. That’s what the cover says…and we’re the instigators! Deborah and I challenged each other to a quilted sweatshirt sleeve challenge and extended it to the readers of We Like Sewing. We set the rules, wrote instructions, and provided some tips for success. Join us!

Refashion a sweatshirt and tag your pictures online #QuiltedSweatshirtSleeve. Not sure where to start. Learn how in the We Like Sewing online magazine.

Photo used by permission from We Like Sewing

We Like Sewing 2026 October Issue

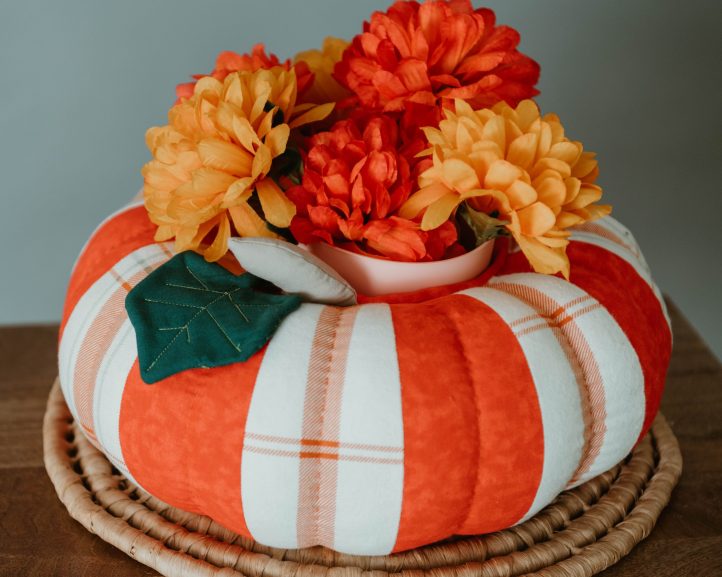
This must read and sew issue just hit the web. We Like Sewing 2026 October is a blast to browse. It has fashion, fun and festive patterns in it. I adored the Halloween projects. The butterfly wings for children looks super adorable. There’s also a roundup of 15 weekend projects you can work on this fall including Deborah’s pumpkin plant holder.

Photo used by permission from We Like Sewing

Why and How Do We Upcycle?

The #1 reason we love refashion and upcycling is that old clothes are getting dusted off and worn again. And we love that we can plot and sew and wear our creativity on our sleeves.

  • First and foremost, we shop our own closets.
    Deborah found a sweatshirt she hadn’t worn in years…and decided to quilt the sleeves.
  • Second, we pick through our fabric stashes.
    They aren’t large and our fabrics are very random, but we always turn here to get the project rolling.
  • Third, we go thrifting.
    This is where the real hunt begins. We browse for beautiful fabrics in several departments including: bed linens, curtains, fabric remnants, pillow shams, and even clothing.
    Bed linens are a great place to source solid fabrics.
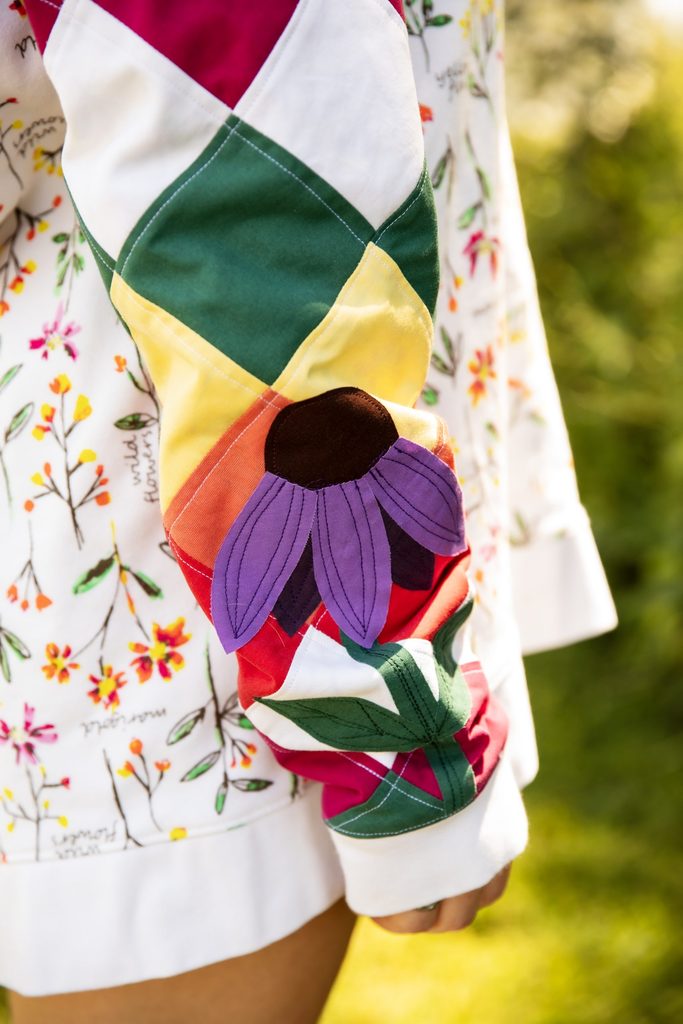
    The sunflower used on my sweatshirt was a thin polyester valance.
  • Fourth, I rummage through the “free” table at my sewing and quilting guild meetings.
    Most of the fabrics people bring to the free table are small…which is great for small quilted projects like sweatshirt sleeves.

Here are some close up shots of our refashioned sleeves from upcycled fabrics. The printable template for the flower is available in the magazine, too.

Photo used by permission from We Like Sewing

Ready to sew your own sweatshirt sleeves? Get started with the We Like Sewing 2026 October issue.

Tag your photos online: #QuiltedSweatshirtSleeve

Can’t wait to see your quilted sleeves!

Dana

Diamond Handbag – Cover Project

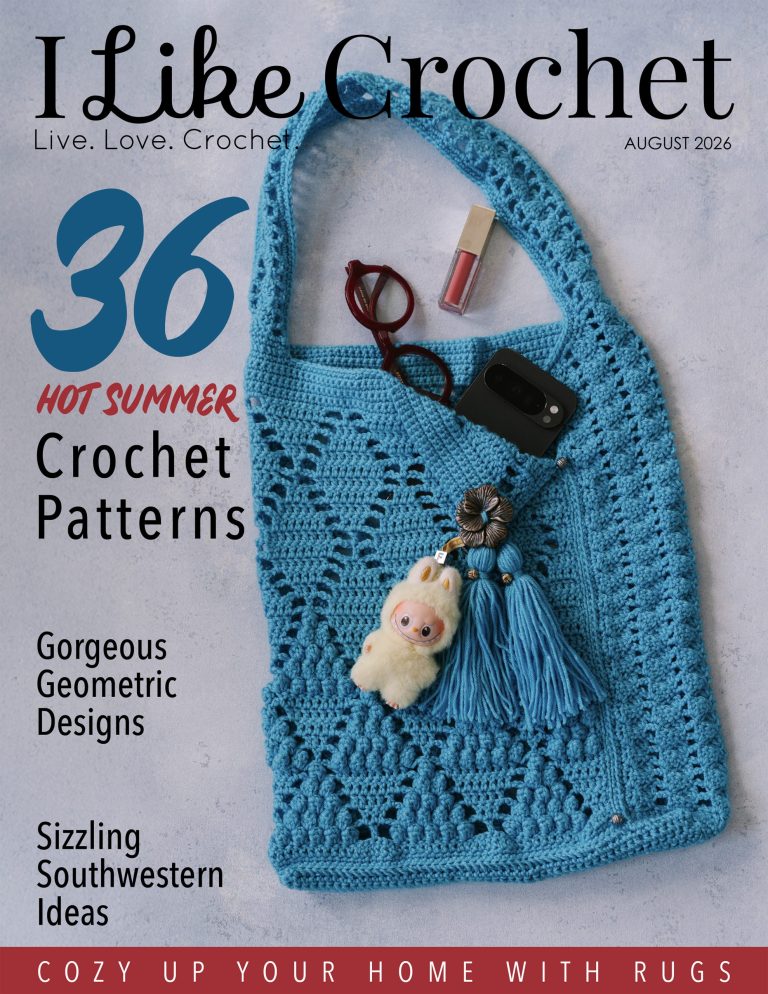
I am excited to share that my Diamond Handbag is not only in I Like Crochet magazine August 2026 issue…it is the cover project!

This is such a fun project to crochet. I purposely set out to create something that can be made in panels. Why? I wanted something that would be relaxing enough to watch tv, and something that had lots of texture. There are so many wonderful crochet stitches and techniques in this bag, you’ll love it.

One of my favorite features of this bag is the folded over front corner adorned with big chunky tassels and a large flower button. The dip in the front panel makes it so much easier to reach into the bag for your belongings. I added a few silver beads where panels are joined, too.

I Like Crochet August 2026

As you can see from the cover text, this is a really fun issue with rugs galore, gorgeous geometric designs and sizzling southwestern ideas. I’ve taken a peek at a few of the projects and they are scrumptious.

I Like Crochet is a digital magazine, so you can access your pattern right away. Learn more about the August Issue of I Like Crochet and get your copy, today!

Premier Anti-Pilling Everyday DK

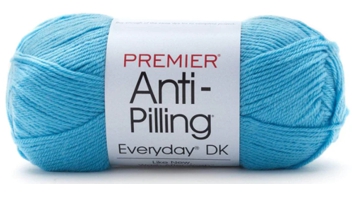
I love it when a great yarn is available in different yarn weights. I’ve crocheted with Everyday Worsted for years and years. This was my first project with Everday DK. And it was fabulous. This thinner yarn allows for more opportunity to make intricate designs. The diamond motif takes center stage…and the side panel still has room to wrap around the front.

As of this writing, Premier Anti-Pilling Everyday DK is available in 74 colors! I’m confident you can find just the right one for your Diamond Handbag.

Jimothy the Raccoon & Friends Sewing Patterns

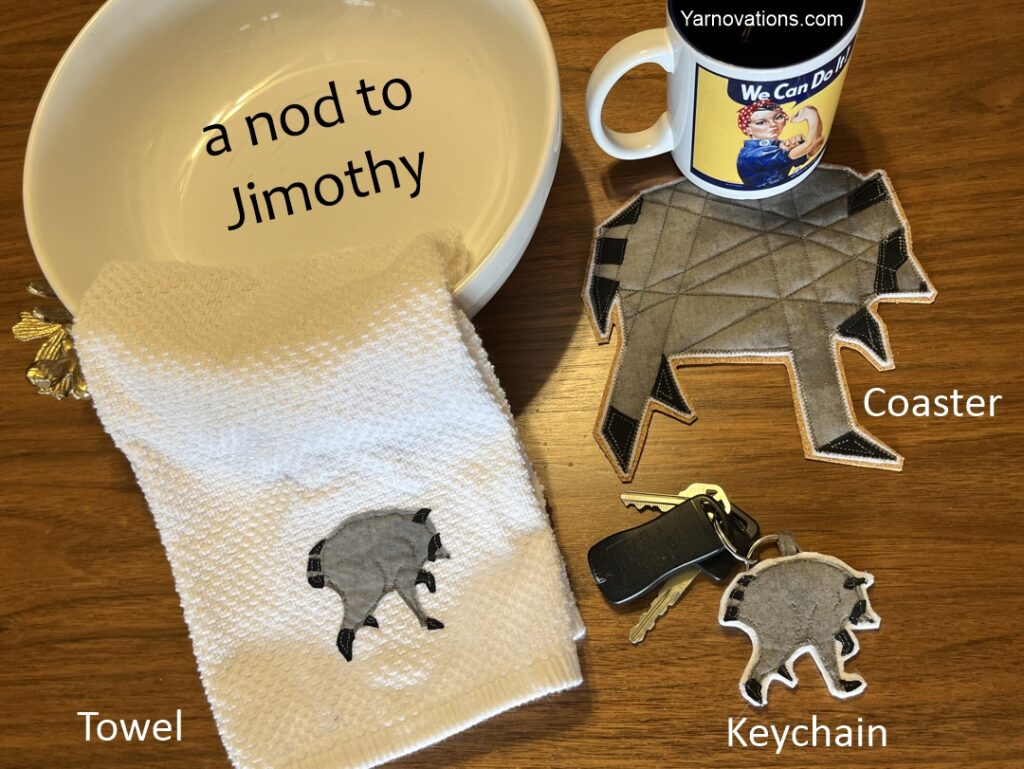
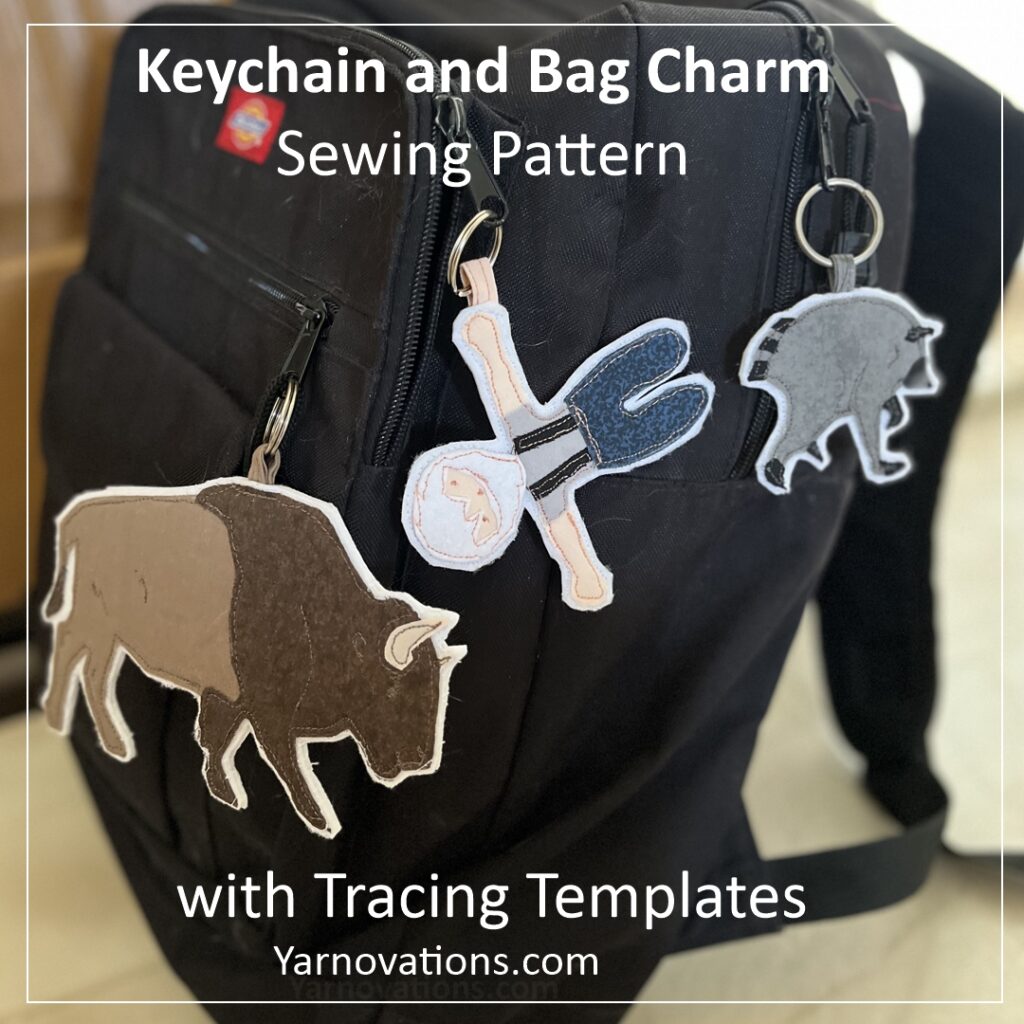
Love Jimothy the raccoon? Sew him with us. This trio sewing pattern is fun, easy and great for new sewists. Make a coaster, a keychain or an Christmas ornament … or applique a towel or shirt. This Jimothy sewing pattern has step-by-step instructions for 3 projects but once you learn how to make the applique, you can put Jimothy on a whole host of things.

Jimothy Sewing Pattern Includes

  • Tracing Templates for Jimothy the Raccoon
  • Tracing Templates for a Bison / American Buffalo
  • Tracing Templates for a Boy
  • Tracing Templates for a Girl
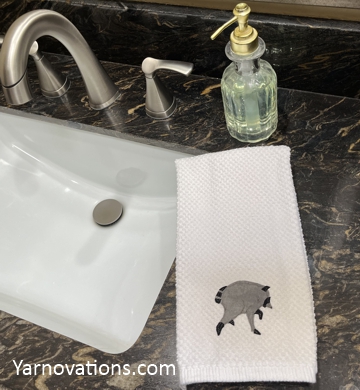
  • Step-by-Step Written Instructions for an Applique (shown on towel)
  • Step-by-Step Written Instructions for Keychain (or bag charm or Christmas Ornament)
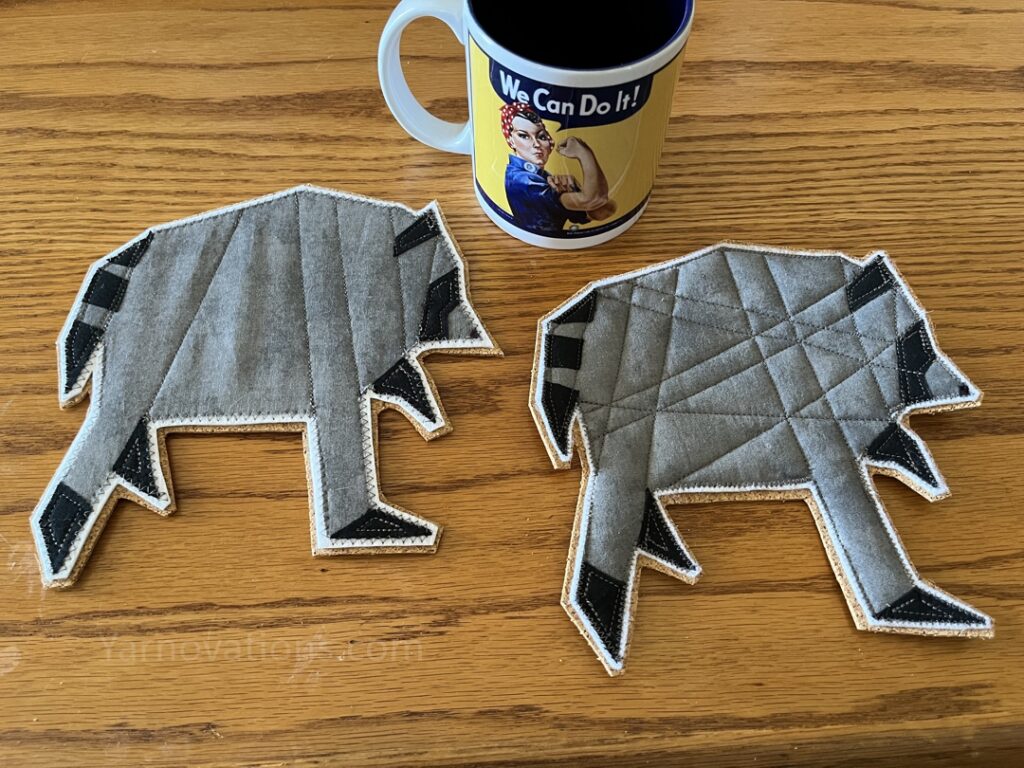
  • Step-by-Step Written Instructions for “Quilted” Coaster (shown with 2 options – Jimothy only)
  • Lots of photos

Sewists love to capture moments in time in fabric and thread. Commemorate and sew a fun Jimothy raccoon, bison / American buffalo, or tourist for your bag. Or tie ribbon on them and make Christmas ornaments. The bison reminds us of our brother who attended CU Boulder. CU Buffs have an American Buffalo as their mascot. If you’re a fan of professional football like us, then you probably know someone that’s a fan of Buffalo Bills. Whatever your reason, this pattern makes it easy to sew fun projects.

Sewing Pattern Now Available

The easy step-by-step sewing pattern for Jimothy, Bison / American Buffalo, Boy and Girl is now available in our Etsy shop. It includes tracing templates for Fimothy and Friends and 3 different step-by-step instructions for making a towel, keycahins and coaster.

Buy the pattern on etsy

Jimothy Sewing Pattern – Melting Our Hearts

When we saw Jimothy online, the first thing on our To-Sew List was the keychain. And we fell in love with it. The keychain is light weight and melts our hearts.

Second on our To-Sew List was the towel. We fell even more in love with Jimothy upon appliqueing him to a towel. It looks soo good next to the sink. Guests will get a real kick out of it.

Third and finally, we had to “quilt” a coaster. For this project we decided to go old school and sewed Jimothy with simple straight lines. Top stitching can be done with any technique like swirls or jagged “fur” scruff. But we opted for a geometric look.

Get the Jimothy & Friends Sewing Pattern Trio

Sew with us. Get your copy of Jimothy and Friends Sewing Pattern in our Etsy shop.

Make Jimothy as a coaster, keychain or applique for a towel or shirt – the pattern includes tracing templates for all three. But it also includes tracing templates to make a bison / American buffalo and a guy and gal tourist as a keychain or applique. Customize them with different fabrics to your hearts content.

Why Do You Need a Jimothy and Friends?

  • Bag charm
  • Luggage Tag
  • Christmas Ornament
  • Coaster
  • Towel Applique
  • Shirt Applique
  • Santa Gift Exchange
  • White Elephant Gift
  • Gift for Animal Lover
  • Fun Home Decor
  • Gift for Silent Auction
  • Quirky Coaster for Special Event

Jimothy & Friends Upcycle

If you want quick and easy projects to make with your stash, this is it! We upcycled and stash busted for all of these projects. The fabrics were all remnants and bed linens picked up at a second hand store. The cork on the back of the coasters is an old roll we inherited from our dad when he retired from woodworking. We used snippets of stabilizer and batting we had in a remnants pile. This is the ultimate upcycling and sewing project to make practical and whimsical gifts.

Get your copy of Jimothy and Friends Sewing Pattern, today.

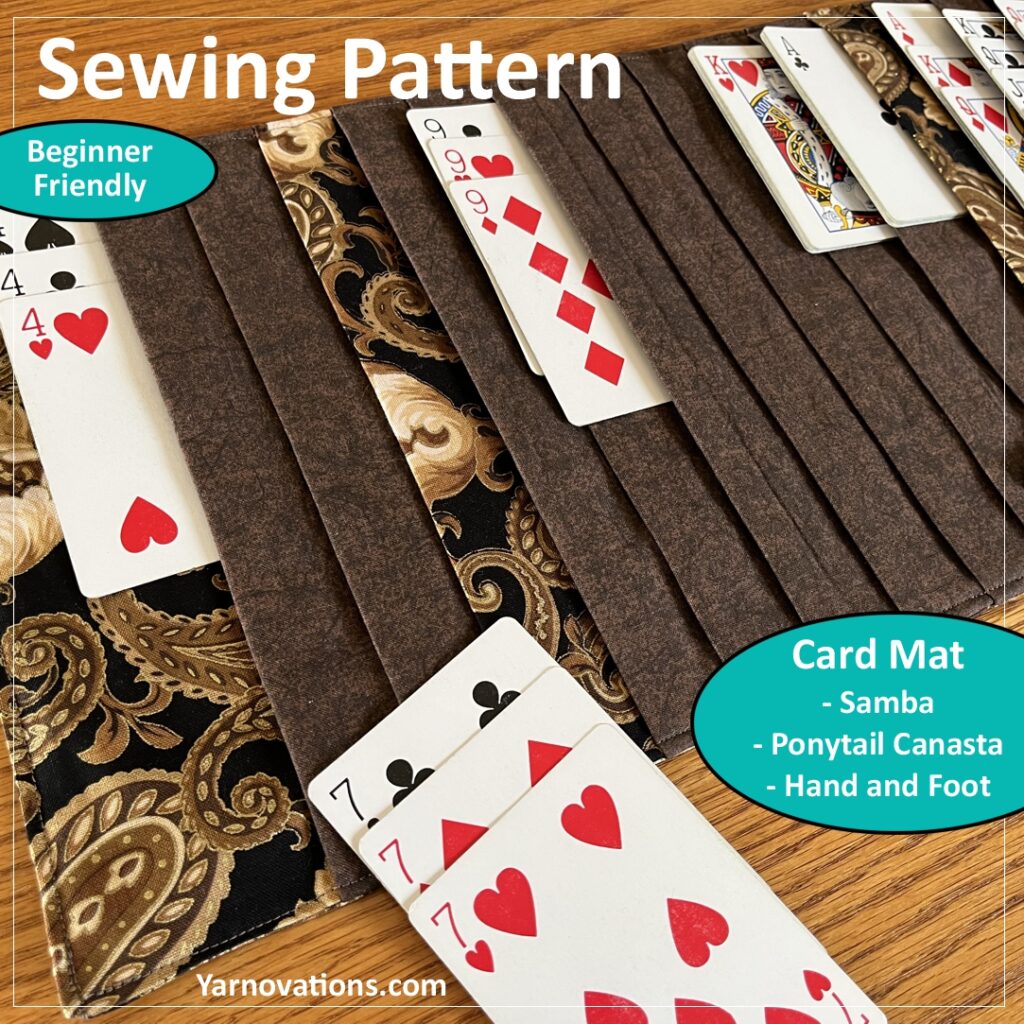
Card Playing Mats Sewing Pattern – Samba and More

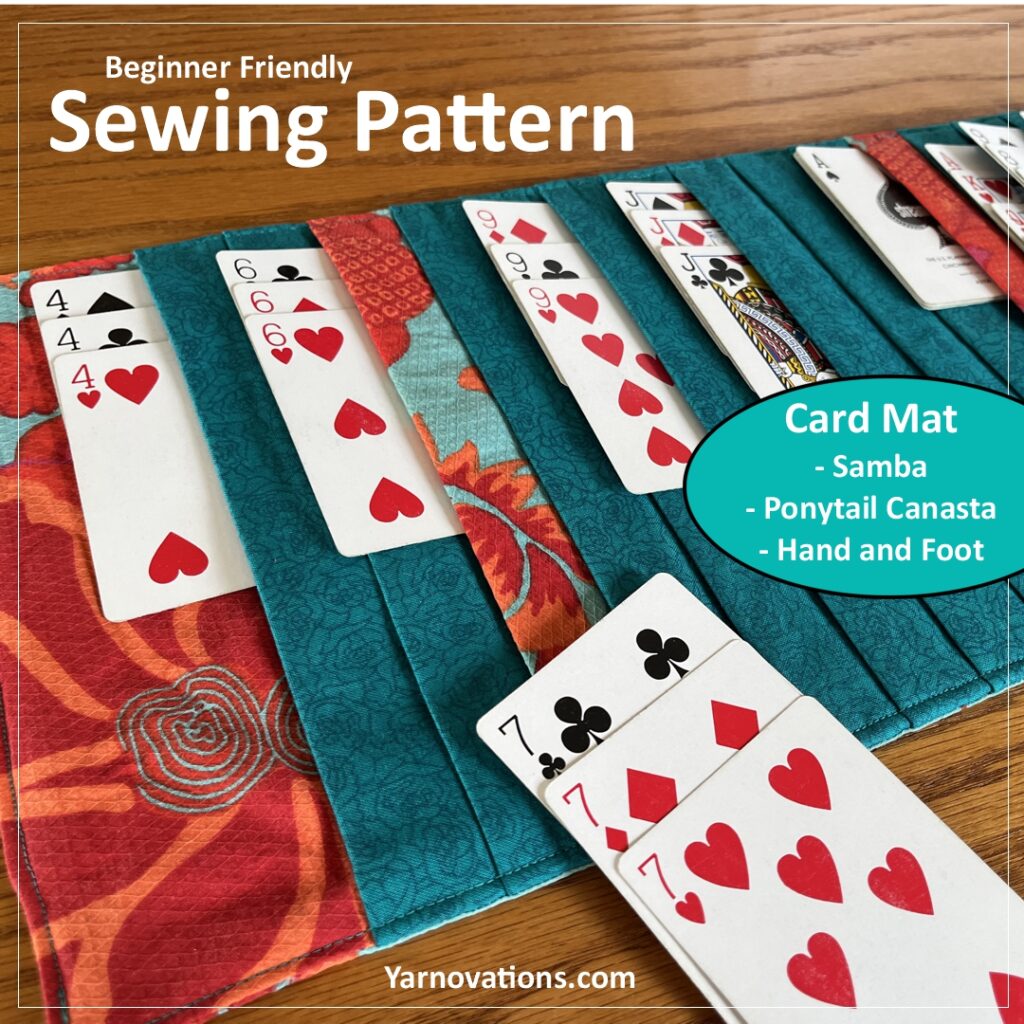
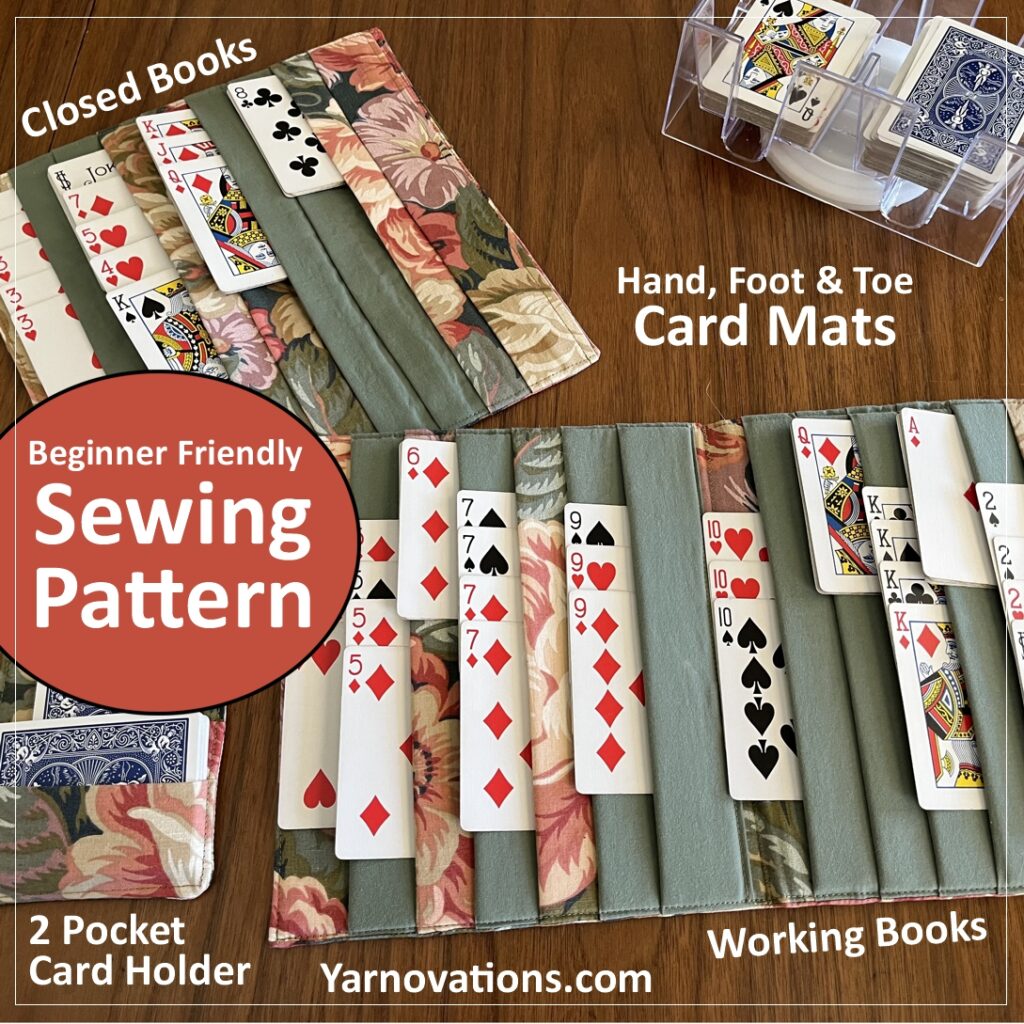
Attention Card Sharks! The hottest game in town is Samba. And card holders and card mats are all the rage. I’ve made several for my mom’s card groups and now you can too with this fun and easy sewing pattern. They aren’t just for Samba. My mom uses her card mat for Ponytail Canasta and Hand, Foot & Toe, too.

I created several proto-types and included my top favs in the sewing pattern. Choose between a rollable style card playing mat or a foldable style. Both styles are beginner friendly sewing patterns with step-by-step instructions and lots of photos.

Card Playing Mat Sewing Pattern includes:

  • 18 Pocket Foldable Card Playing Mat
  • 16 Pocket Rollable Card Playing Mat
    • Modifications to make this as a 12 Pocket Rollable Card Playing Mat
  • 12 Pocket Foldable Card Playing Mat
  • 8 Pocket Card Playing Mat
  • 2 Pocket Card Holder (single sided)
  • Step-by-Step Written Instructions
  • Lots of Photos
  • Helpful Tips and Tricks

Available now on Etsy

The fun and easy Card Playing Mat Sewing Pattern is available now in our Etsy Shop.

Pockets, Pockets, Pockets

Choose the card playing mat that’s best suited for your card game of choice.

  • Samba needs 16 pockets for working books.
  • Ponytail Canasta needs 12 pockets for working books.
  • Hand, Foot & Toe needs 12 pockets for working books.
  • Hand & Foot needs 12 pockets for working books.
  • Closed Books can take a lot of space, so 8 pockets works great.
  • Hand, Foot, & Toe needs a 2 pocket card holder.
  • Most games have a foot and need a 1 pocket card holder (but ours comes with 2 pockets).

18 Pocket Foldable Mat – Samba

You really only need 16 pockets for Samba but the foldable card playing mat has 18 which is 3 sections with 6 pockets in each. I love this option because the 7’s can either be collected with the low cards or it can be collected with the Sambas.

How I Organize My 18 Pocket Samba Card Playing Mat

  • Section 1: Low Cards – 4, 5, 6, 7, 8, 9
  • Section 2: High Cards – 10, J, Q, K A
  • Section 3: Wilds, Sambas

How My Mom Organizes Her 18 Pocket Samba Card Playing Mat

  • Section 1: Low Cards – 4, 5, 6, 8, 9
  • Section 2: High Cards – 10, J, Q, K A
  • Section 3: Sambas, 7, Wilds

Card Playing Mats are a Space Saver

Card playing mats are practically essential at my mom’s club house. They play Samba on small card tables and people are (or were, rather) always elbowing each other for more table space. Cards would often drop on the floor because they were collecting books right to the very edge of the table.

The Samba card playing mats keep things nice and tidy…but most importantly, condensed. After repeated requests, I finally made my mom not just 1 card playing mat…but 2 (a foldable and a rollable mat).

You can make your own card playing mats, too. Sew some for your team, and if you’re feeling generous, make some for your opponents as well.

Samba Card Playing Mat Now Available

This Samba Card Playing Mat Sewing Pattern includes 5 mat sizes total (some foldable, some rollable). It’s available now in our Etsy Shop.

Get your card playing mat sewing pattern now on Etsy.

Buy Now on Etsy

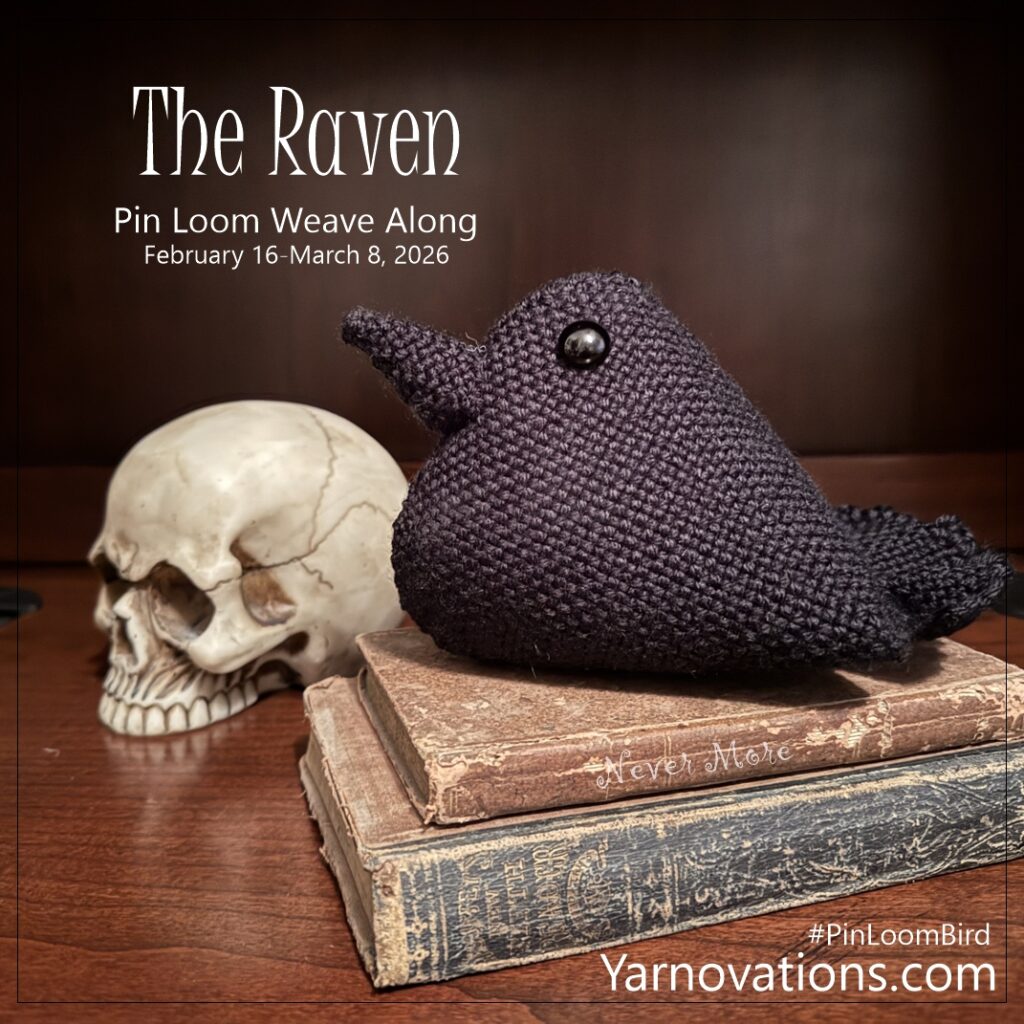
Raven Pin Loom Weave Along

Love to pin loom weave? Love to see how other people have woven the same pattern? Join us for a pin loom weave along February 16 – March 8, 2026 as we make The Raven. It’s completely free. Here’s how to participate in The Raven weave along:

  • Download The Raven pin loom pattern here or from the Facebook Group: Pin Loom Weaving Support Group files.
  • Weave your raven (or other bird from The Pin Loom Flock).
  • Watch video snippet on The Pin Loom Raven Assembly below or on YouTube.
  • Post pictures on social media with hashtag #PinLoomBird.
  • Email a photo of your bird to us (see pattern for instructions) between February 16 – March 8, 2026.
  • Look for compilation photo of other birds in the Facebook group: Pin Loom Weaving Support Group.

The Raven Assembly Video

The Raven pin loom bird is surprisingly simple to make. Even so, we decided an assembly video would make it even easier to visualize the process. View the Pin Loom Raven Assembly on YouTube or below:

The Raven Supplies

The Raven requires very few supplies. You’ll need a few looms, some yarn, stuffing and safety eyes. The weaving pattern includes this list…but if you want to see if you have them off hand, here’s what you’ll need to make your own raven:

  • Pin Looms Squares: 2” and 6”
  • Pin Loom Rectangle: 2” x 6”
  • Needle: 6” needle for weaving and yarn needle for sewing
  • Stuffing
  • Safety Eyes: 14mm – (2) per bird

The Pin Loom Flock is Part of the Weave Along

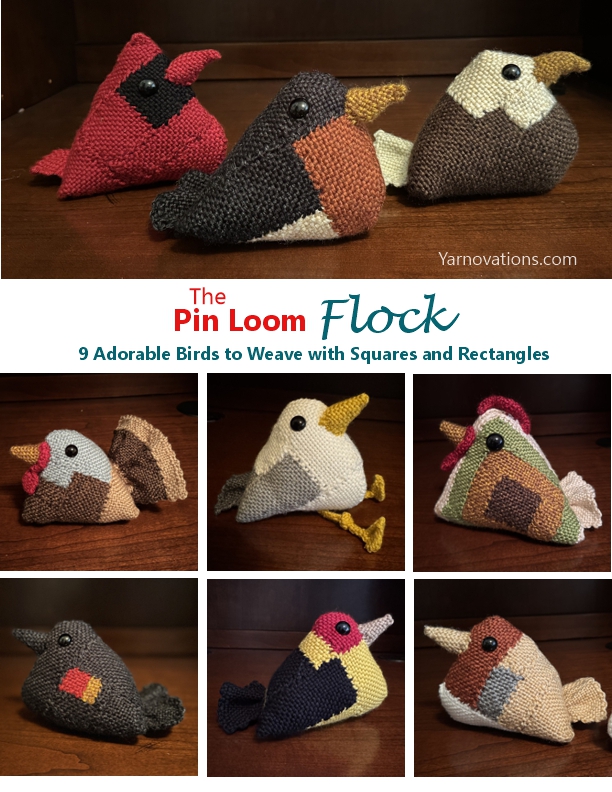
The Raven pin loom weave along is open for all the birds in our pin loom collection. We have an ebook with 9 adorable birds called The Pin Loom Flock on Etsy. Learn more about that in our Etsy shop: YarnovationsShop.

Weave the raven or bird of your choice, post it online with hashtag #PinLoomBird, and email us a photo per instructions in the pattern to be included in the compilation photo in the Facebook group.

eBook "The Pin Loom Flock: 9 Adorable Birds to Weave with Squares and Rectangles". Woven birds shown include cardinal, robin, bald eagle, turkey, seagull, chicken, red-winged black bird, western tanager, european robin.

We look forward to seeing everyone’s pin loom birds!

Mushroom Pin Cushion with Basket Crochet Pattern

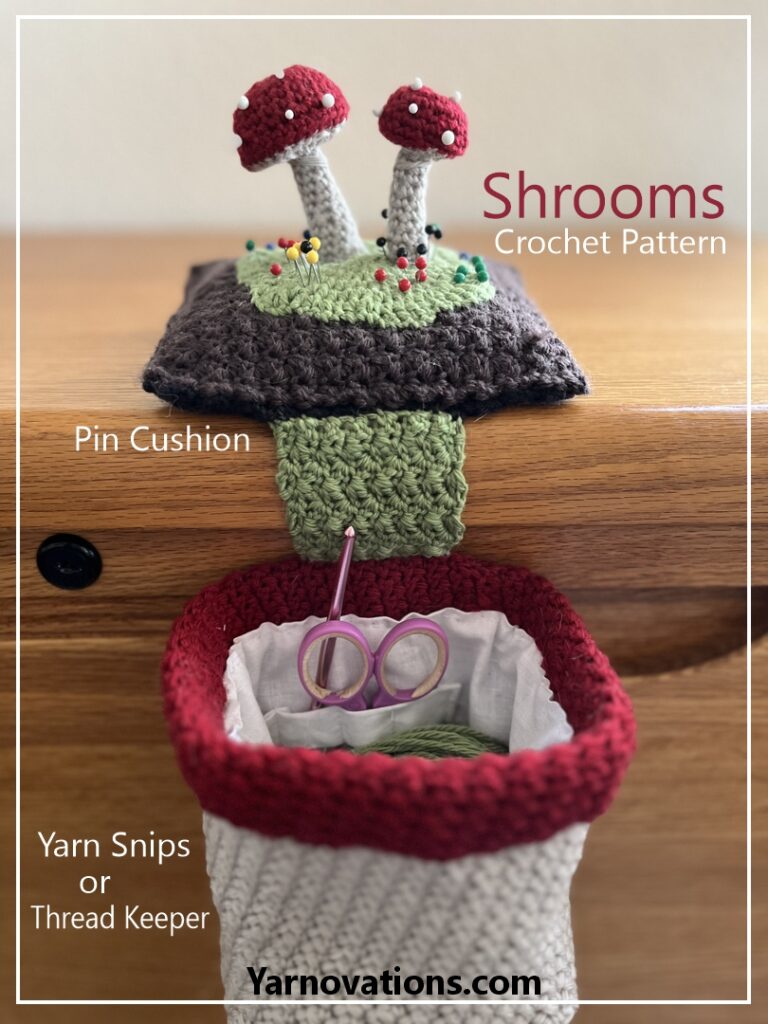
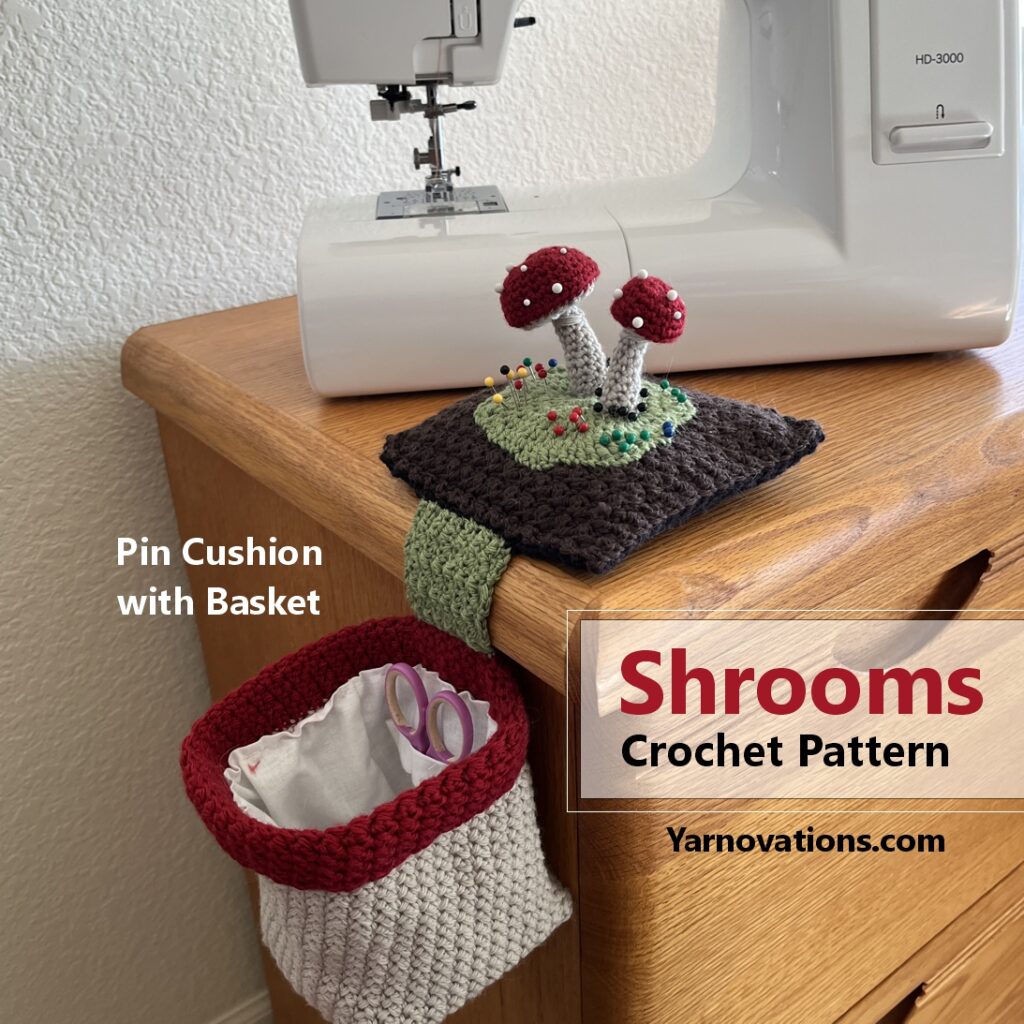
Mushroom Pin Cushion with Basket is an easy crochet pattern you can make in a weekend. It’s darling to display but even more fun to use. It’s the perfect size for collecting yarn snips (or candy wrapper). If you like to sew or embroider, it’s great for tossing thread snips as well. Or, you could store notions it it for crochet, knitting, weaving, sewing and quilting.

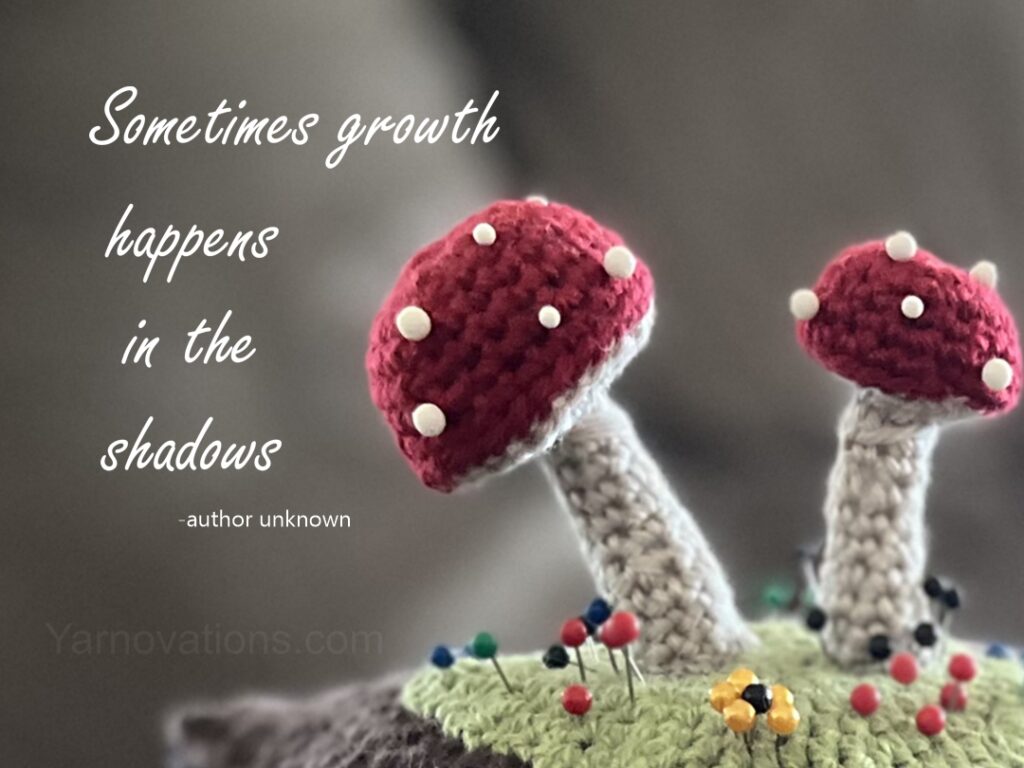
I, Dana, woke up one day with a vision for mushrooms on a grassy knoll. I wasn’t sure if I could recreate my vision…but it came out pretty much as I’d envisioned it. I love that it can be decorated with straight pins. I love that it’s cute…and practical at the same time.

About the Mushroom Pin Cushion and Project Bag Crochet Pattern

The crochet pattern includes everything you need to recreate a mushroom pin cushion with basket of your own. It includes:

  • Mushroom in 2 sizes
  • Basket
  • Connector Piece
  • Tab for holding mini scissors, crochet hook and pencil
  • Step by step written instructions
  • Written in US terms

The size is great for putting on a side table, arm of a chair or at your work table. My mushroom and basket has a permanant home on my desk which doubles as my sewing table. The measurements are approximately:

  • Pin Cushion: 5.75″ wide x 5.75″ deep x 3.5″ tall
  • Basket: 4″ wide x 4″ deep x 5″ tall

The crochet pattern is rated easy because there aren’t lots of stitch patterns. It is made with stitches as small as a slip stitch and as large as a double treble. Pieces are worked in the round and in rows. It’s interesting to note that the same stitch pattern is used on the bean bag (base of pin cushion) and on the basket. But they look different because one is crocheted in rows and the other in the round.

Mushroom Pin Cushion and Basket on Etsy

The Mushroom Pin Cushion and Basket first appeared in Crochet World Summer 2024. We have the rights back to sell direct to you. Find it now in our Etsy Shop.

Buy the pattern on etsy

The Mushroom Pin Cushion and Basket is So Useful!

One of the things I love most about this Mushroom Pin Cushion with Basket is that it’s useful for lots of different hobbies. It has a little tab sewn to the lining with 3 sections to hold small things like pencils, mini scissors and crochet hooks. Here are my favorite ways to use the mushroom pin cushion and basket…and yes, I’ve used it for each of these things:

  • Project bag
  • Yarn snips trash basket (for knitting, crochet and weaving)
  • Thread keeper (trash basket) (for sewing, quilting and embroidery)
  • Notions keeper (sewing clips, stitch markers, etc).

Yarn for Mushroom Pin Cushion and Basket

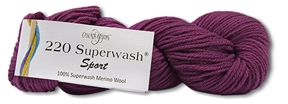
The yarn used to make the Mushroom Pin Cushion and Basket is Cascade 220 Superwash Sport. It’s a light weight (size 3) superwash merino wool yarn. As of today, it comes in 83 colors! We chose this yarn specifically for color options and yarn weight. It is thin enough to create beautiful stitch definition and sturdy enough to hold the 3D shape of the mushrooms (with fiber-fill stuffing inside).

Get your copy of the Mushroom Pin Cushion and Basket now.