Tips and Tricks: Faux Fur

Working with Faux Fur Yarn

There is no doubt that a little faux fur yarn can add a lot of pizazz to a hand crafted project. And with a little practice, one can learn to crochet or knit with it a little easier.

Tip #1: Crocht Double Stranded

It is nearly impossible to see the stitches when crocheting with faux fur. The furry strands nearly completely hide the stitches. That’s great on a finished product, but not so great when you have to work in those stitches. The problem is not as pronounced when knitting since the stitches are on the needle. If stitches have to be picked up, it will be difficult to find them.

Solution: Crochet with two strands at once, one faux fur and one non-furry yarn. It makes each stitch thicker and a little easier to see. If the non-furry strand is the same color (or nearly the same) as the fur, it almost disappears. The thicker stitches may still be difficult to see, but it is also possible to feel the stitches as you work.

A Furry Sitting

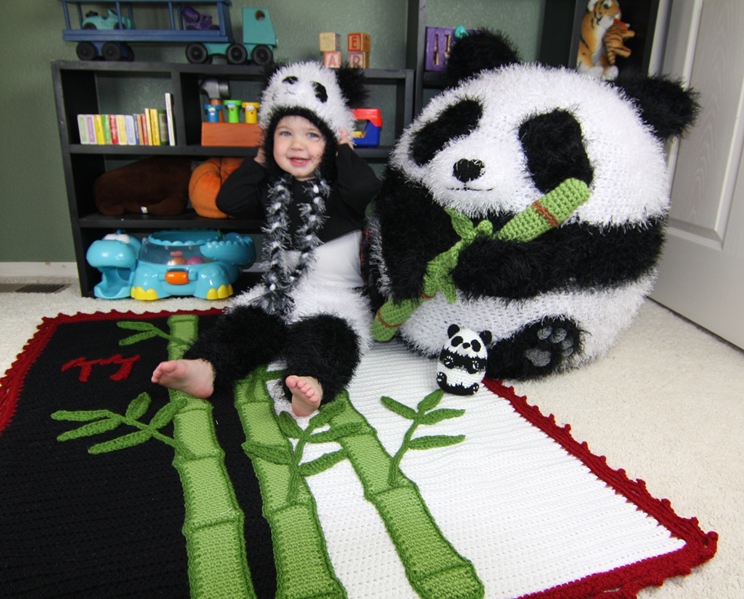
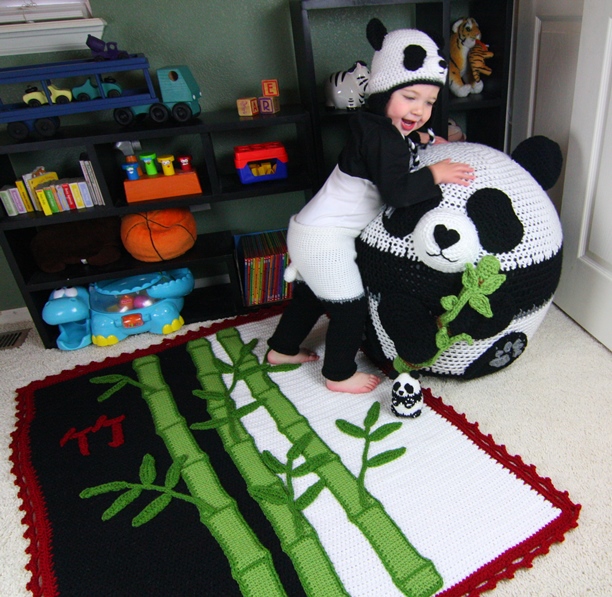
Crocheting with Vanna’s Choice and Fun Fur yarn made finding the stitches in this Panda Set Crochet Pattern much easier to find.

Panda Crochet Pattern Set available on Etsy.

Tip #2: Count every row.

Counting the number of stitches at the end of every row or round is generally a good idea, but it is almost critical when using faux fur. It is very easy to drop a stitch or lose  track of a stitch because it can be difficult to see. You might even add a stitch because it’s not always easy to tell if a stitch has been worked in already.

Tiger Striped Scarves Crochet Pattern

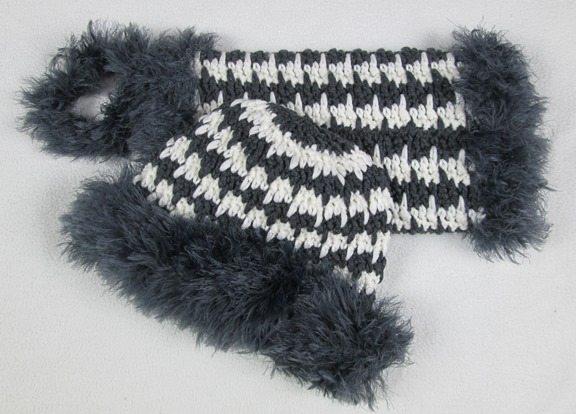
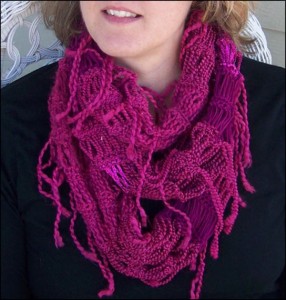
Keeping track of the number of stitches per row is crucial to keeping a neat edge in projects like the Tiger Striped Scarves.

Tiger Striped Scarves Crochet Pattern on Etsy.

Tip #3: There is a Right Side and a Wrong Side.

The little furry strands often get trapped within the stitches as they are worked. When working back and forth in rows, both sides will generally be equally furry. When working in the round, the inside tends to be furrier. For a furrier look, turn the project inside out when appropriate so that the furrier side is out.

A hat can often be turned inside out after it’s finished. Some items may need to be turned inside out before they are sewn together. Just note how furry the sides are before completing the project.

Monkey Hanging in Palm Tree with Banana

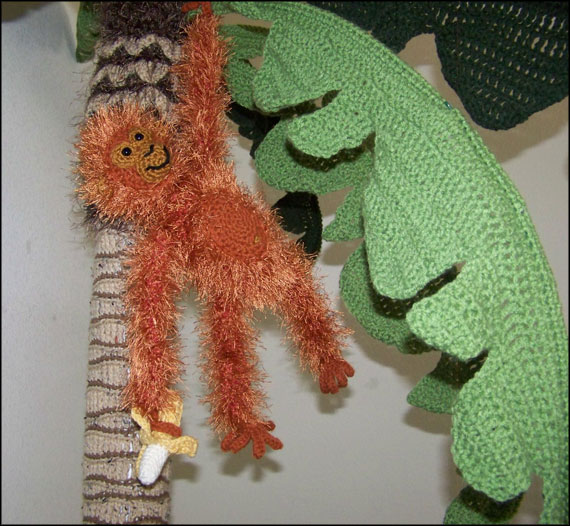
The parts of the monkey are turned inside out to keep the furrier side on the outside. A little faux fur on the tree makes the palm tree look more authentic too.

Palm Tree and Monkey Crochet Pattern set available on etsy.

Tip #4: Not all faux fur is equal.

Faux fur comes in varying lengths. The furry strands can be short or long, coarse or smooth. The type of fur can significantly impact the look and feel of the finished product. Projects with the longer strands of fur tend to look fuller and are softer than the shorter stranded fur. The size and nature of the project may determine which fur to use. Generally speaking, the longer stranded fur costs a little more.

Houndstooth Trio

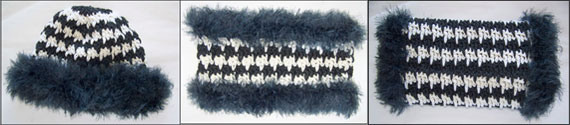
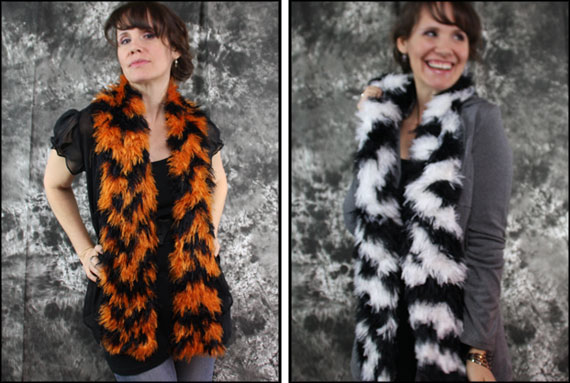
 La Furla from Trendsetter Yarns is long and soft making this houdstooth trio very luxurious.

Houndstooth Trio Crochet Pattern set available on Etsy.

Tip #5: Notice yardage.

Some faux furs come in small skeins. Generally speaking that means more skeins of fur yarn will be needed than non-furry yarn. Projects with smaller stitches will use more faux fur than larger stitches. For instance, a project  crocheted using single crochet will use more than the same project done in double crochet. Because the faux fur hides stitches anyway, you might want to change the stitch to a taller stitch to save on yarn. The project will get done faster and still look good.

Halloween Trick or Treat Bags

One skein of faux fur will work for small projects like the Trick or Treat Bags Crochet Patterns.

Trick or Treat Bags Crochet Pattern set available on Etsy.

How to Single Crochet Photo Tutorial

How to Single Crochet Photo Tutorial – with 7 Easy Crochet Dishcloth Patterns

How to Single Crochet Photo Tutorial

If you or a friend want to learn how to single crochet, this photo tutorial is the perfect guide. It includes step-by-step photos and step-by-step written directions, making it a great reference tool.

Tutorial includes:

  • How to create a slip knot
  • How to Yarn Over (YO)
  • How to Make a Chain
  • How to Single Crochet
  • How to Crochet in Both Loops
  • How to Crochet in Front Loops
  • How to Crochet in Back Loops
  • How to Change Color at the end of a Row
  • Includes 7 Crochet Patterns that Use ONLY Single Crochet and Chain Stitch

This photo tutorial is perfect for people just learning to crochet as well as those wanting to brush up on their skills. When you finish these 7 crochet patterns, you’ll single crochet with confidence…you’ll crochet like a pro!

Yarn pictured is Lion Brand Kitchen Cotton.

Buy the pattern on etsy

How to Single Crochet Photo Tutorial Available in Our Etsy Shop

7 Dish Clothes in the Set

Learn more about this Photo Tutorial on How to Single Crochet in our Etsy Shop.

It includes 7 fun crochet patterns.
Step-by-Step Photos.
Step-by-Step Written Instructions.

Single Crochet like a pro!

Buy the pattern on etsy

Fair Isle vs. Intarsia

Fair Isle vs. Instarsia

Many knitting patterns involve color changes while most crochet patterns do not. Why is that? Having changed colors in knitted and crocheted projects I will say that it’s not because it’s easier to do when knitting. I actually found it easier to change colors while crocheting. There are two ways to change colors when knitting or crocheting, Fair Isle and intarsia. I have used both methods and the method I use depends on the project being made.

Fair Isle

Fair Isle, also called “stranded colorwork”, has several characteristics.

  1. It’s usually done in the round, like hats and sweaters.
Flame Hats and Mittens
  • It traditionally uses only two colors per round. Other rounds may use two different colors, but each round uses two.
  • The yarn is not cut but is crocheted over or dropped (to the back/wrong side)and picked up when needed. This leaves a strand of yarn on the back. For mittens, it is easy to snag the strands on the inside with a finger when putting the mittens on.
  • Mittens

    Pictured above is a pair of mittens from our Flame Beanies and Mittens Crochet Pattern Set. The mitten on the right shows the wrong / inside of the mitten. Strands of yarn are carried along the inside until it is needed again.

    As mentioned above, these are crocheted in the round. The beanies have a similar stranded look inside.

    Flame Beanie and Mittens Crochet Pattern available on Etsy.

    Intarsia

    Intarsia has several of its own characteristics.

    1. It’s usually done in rows on flat pieces.
    Panda Set
    Panda Set

    Panda Set Crochet Pattern available on Etsy.

    Both Fair Isle and Intarsia use charts/graphs instead of written out instructions. Generally one box in the graph equals one stitch. Graphed work looks best in single crochet though half double crochet can work, depending  on the graph. Keep in mind, stitches in crochet do not line up one on top of another like knitting does. When trying to make vertical lines and things like letters, they will end up looking a little wavy. The stitches will line up a little more when working in rows. A vertical line will tend to lean right when working in the round.

    There are just a few other tips for creating a successful piece of color work.

    1. When changing colors, you should use the new color for the last YO that is pulled through the loops on the hook.
    2. Tension can be a problem. If part of the project changes colors and part of it does not, sometimes one section is tighter than another. Be aware that you may need to relax during the color changing section.
    3. It is also easy to make a tighter section if there are long sections where a color isn’t used in Fair Isle. Crocheting over the unused yarn every 2-3 stitches helps keep the tension relaxed. Imagine trying to put on a hat that has no give because the strands are too tight.

    My first projects were hats and scarves. They were small enough to practice on and I could pull them out and try again if something wasn’t quite right. With a little practice, it is possible to get into a rhythm with dropping and picking up the different colors. There is no reason Intarsia and Fair Isle can’t be just as popular in crochet as it is in knitting.

    For a fun Fair Isle project, try the Flame Hats and Mittens Crochet Pattern available on Etsy.

    For a fun Intarsia project, try the Panda Set Crochet Pattern available on Etsy.

    Behind the Scenes: Designing a Houndstooth Pattern

    Behind the Scenes: Designing a Houndstooth Crochet Pattern

    How is it my husband knew what houndstooth was and I did not? A friend of mine said she was going to try to come up with a crocheted houndstooth pattern.  I had seen this pattern many times before but never knew what it was called. Trying to come up with a pattern intrigued me and I, too, made several attempts at getting an approximate pattern.

    Lion Brand Fun Fur
    Lion Brand Fun Fur

    First I had to decide if I wanted a small houndstooth pattern or a large one. There are several lovely small patterns available online often using an alternating pattern of single crochet and double crochet. I wanted to come up with a larger pattern, one that really incorporated the diagonal lines of the houndstooth. However, the diagonal spike stitch patterns I came up with seemed jumbled and messy. I finally decided to use a spike stitch that went straight down. The effect was quite lovely.

    Trendsetter La Furla
    Trendsetter La Furla

    I first proposed the houndstooth trio to a crochet magazine with Lion Brand’s Fun Fur. Paired with Vanna’s Choice yarn it made a lovely set. The magazine’s editor suggested I redo the set in Trendsetter’s Merino wool and La Furla. These are quite luxurious yarns. They are both incredibly soft and warm. The La Furla is thicker and softer than Fun Fur. They are stylish and functional for even the coldest of weather. Lion Brand has since come out with an equally soft and thicker fur like called Romance. Both yarn brands make for a beautiful houndstooth set.

    So, just how did my husband know what houndstooth was? From football, of course. College football coach Paul Bryant was often seen at games wearing a houndstooth hat!

    Buy the pattern on etsy

    Houndstooth Trio Crochet Pattern available on Etsy.

    Crochet Technique: Broomstick Lace

    Broomstick Lace – Easier Than You Think

    Traditional Broomstick Lace

    My (Dana) first impressions of broomstick lace were 1) it creates a gorgeous texture and 2) it will be difficult to learn. I may have been right on the first point, but I was oh, so wrong on the second.

    At first, it felt a bit clunky working with a knitting needle while crocheting (especially one with the diameter of a broomstick handle). But in a short amount of time it became easy and even relaxing to create broomstick lace. In fact, I taught a friend how to broomstick lace in her second crochet lesson ever! Once she mastered the single crochet, she had all the skills she needed to create a beautiful broomstick lace scarf.

    The Crimson Cowl pictured above was made with traditional broomstick lace. It originally appeared in Love of Crochet magazine.

    Broomstick Lace – The Basics

    Broomstick is created without turning your work, in two stages. First, there is a loop row where loops are put on a knitting needle (#50 is traditionally used). Then, there is a crochet row where crochet is worked around the loops (sc is traditionally used).

    traditional broomstick lace

    Below are the stages used to create traditional broomstick lace:

    Start Your Project

    • Chain the length you want (i.e. 26 ch)
    • Sc in 2nd ch and each ch across. Do not turn work. (25 sc)

    Stage One: Loop Row
    Work from Left to Right (for right handed crocheters)

    • Make the loop on your hook larger and transfer it to a knitting needle.
    • Put your hook through the back loop of next st, yo (yarn over), draw up a loop and transfer it to a knitting needle. Repeat across work. Do not turn work. (25 loops on knitting needle)

    Stage Two: Crochet Row
    Work from Right to Left (for right handed crocheters)

    • Carefully remove knitting needle from loops. Be mindful not to tug on the loops because they are all connected.
    • Starting at the right side, put the first five loops on your hook and ch 1 around the loops. This brings your working yarn to the top of your work.
    • Work 5 sc around the first 5 loops. Insert hook through next 5 loops, work 5 sc around them:repeat across the row. (25 sc made: 5 sc around 5 sets of 5 loops)

    Repeat Stage One and Two to desired length.

    Broomstick Lace Variation – Similar to Knitting Drop Stitch

    One of my favorite variations is to work one sc in one loop. This creates something that looks similar to drop stitch in knitting. I call it single stranded broomstick lace.

    This technique is worked just like traditional broomstick lace but with only one stitch per loop. So, following the instructions above, you would still have 25 loops on your hook and 25 sc at the end of each row.

    Single Stranded-2 needles

    This technique also looks great with various sized knitting needles. Use a #17 and a #50 alternately to create different lengths of single stranded broomstick lace.

    There are lots of other variations that can be worked with broomstick lace. You can twist the loops prior to working sc around them. You can work other stitches besides sc around the loops such as hdc and dc. You can grab more or less than five loops at a time.

    Broomstick Lace – Video

    I’ve created a short video on broomstick lace: both traditional and single stranded are highlighted.

    Broomstick Lace – Yarn Selection

    Milky Whey Yarn

    If you want your broomstick lace texture to stand out, select a yarn with good drape. Yarns like silk, bamboo or linen work great. I also recommend lighter colors.

    Pictured above is Milky Whey yarn by Kollage Yarns. This pattern was made with stranded broomstick lace on knitting needles #17 and #50. There is also a section of puff stitch and sc work.

    Broomstick Lace Cowl Crochet Pattern available on Etsy.

    Textured yarn like boucle or thick yarn like wool and acrylic will hide the texture of broomstick lace, so I wouldn’t recommend them if you want good stitch definition.

    That being said, a yarn that has multiple textures may look quite nice. The stitch definition may suffer, but the various yarns will showcase broomstick lace stitches differently making the whole project very interesting.

    Single Stranded Changes

    Pictured above is a single stranded broomstick lace cowl using yarn that has six different textures in one skein. This followed the same instructions as the crimson cowl above only working one sc in each loop.

    If you haven’t tried broomstick lace, I hope this article has helped you understand a bit more about it and offered you some encouragement to try it. Find us on Facebook and to let us know.