Rag Quilt – Creating Squares

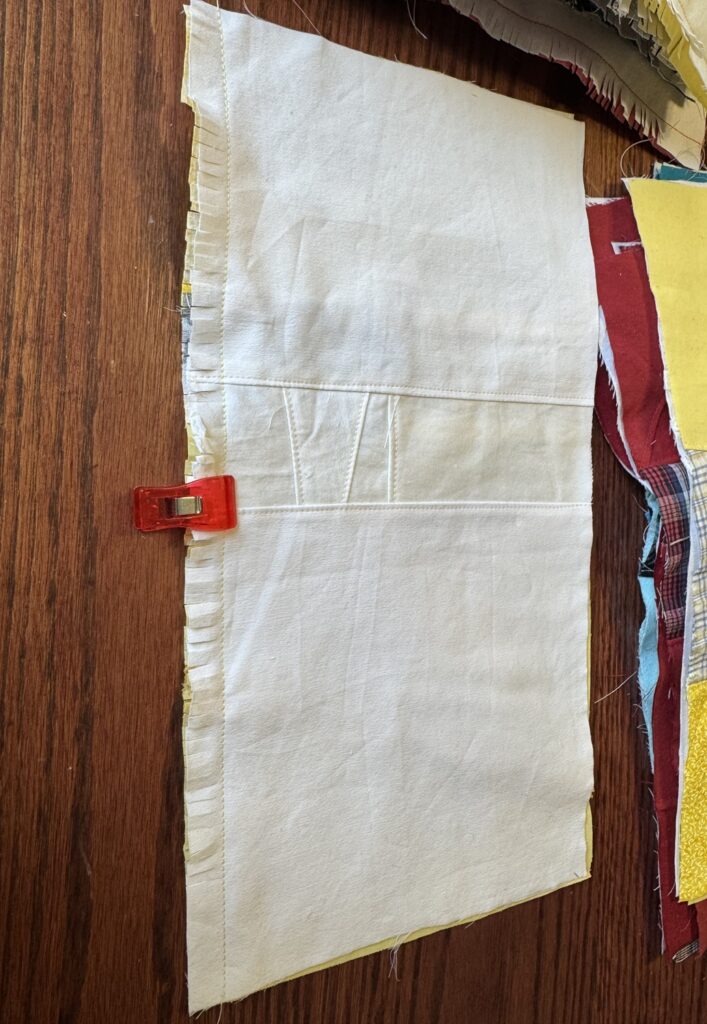
Part 2: After making a plan and creating colorful scrap triangles and rectangles, I sewed the triangles and rectangles together to make squares. The pieces were sewn together with the wrong side facing so the seam would be on the front to be ragged. I cut the seam with little slits about 1/8″ apart. I cut very close to the seam stitches. Once in awhile, I accidentally cut the stitches. I put a sewing clip on the cut section to remind myself to sew that area together as I sewed the large “X’s”.
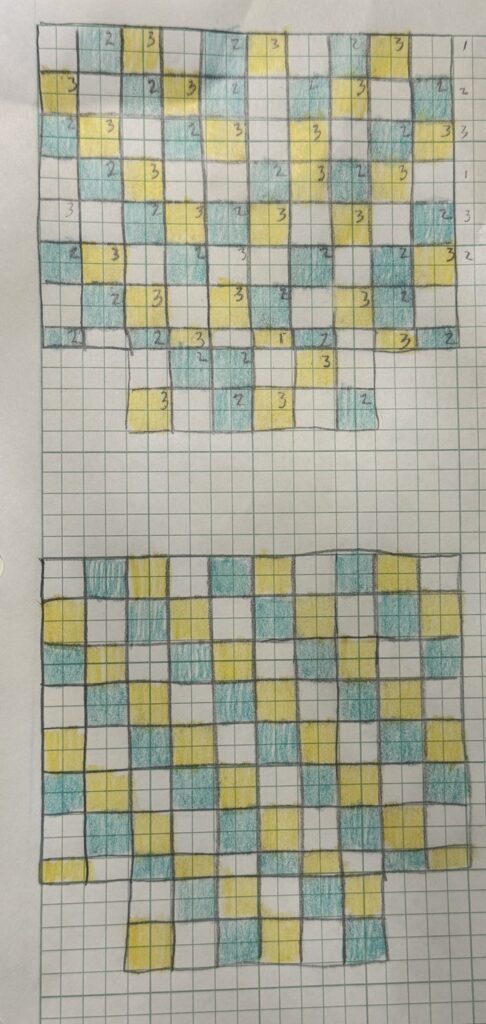
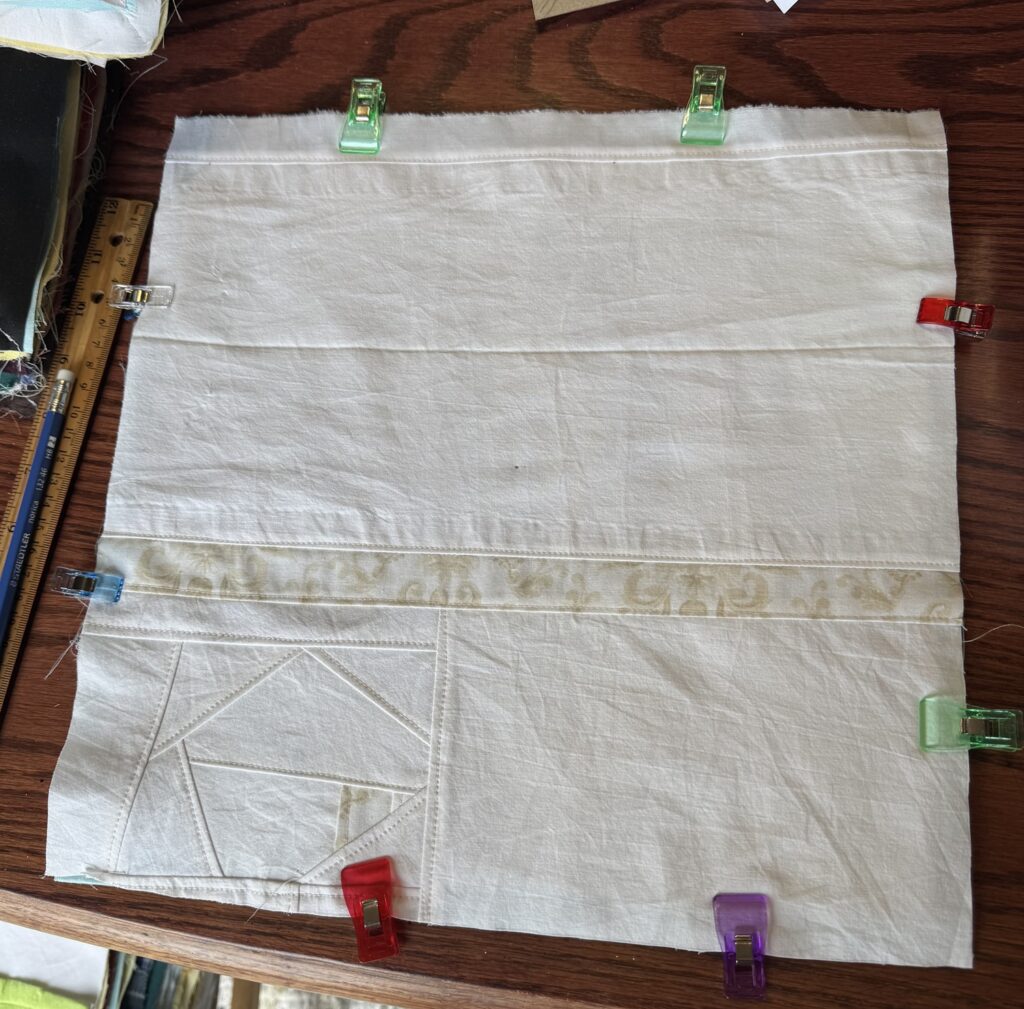
Next, I began working on the second major part of the scrap rag quilt, deciding on the bottom fabric and layout, and cutting the center layer. I chose three colors of cotton for the bottom layer, and a random pattern. I sketched it out so I could place the colors in the correct place.
I decided on fleece for the center as an inlay. I cut the fleece squares to 12″. This meant there wouldn’t be fleece in the ragged seam.
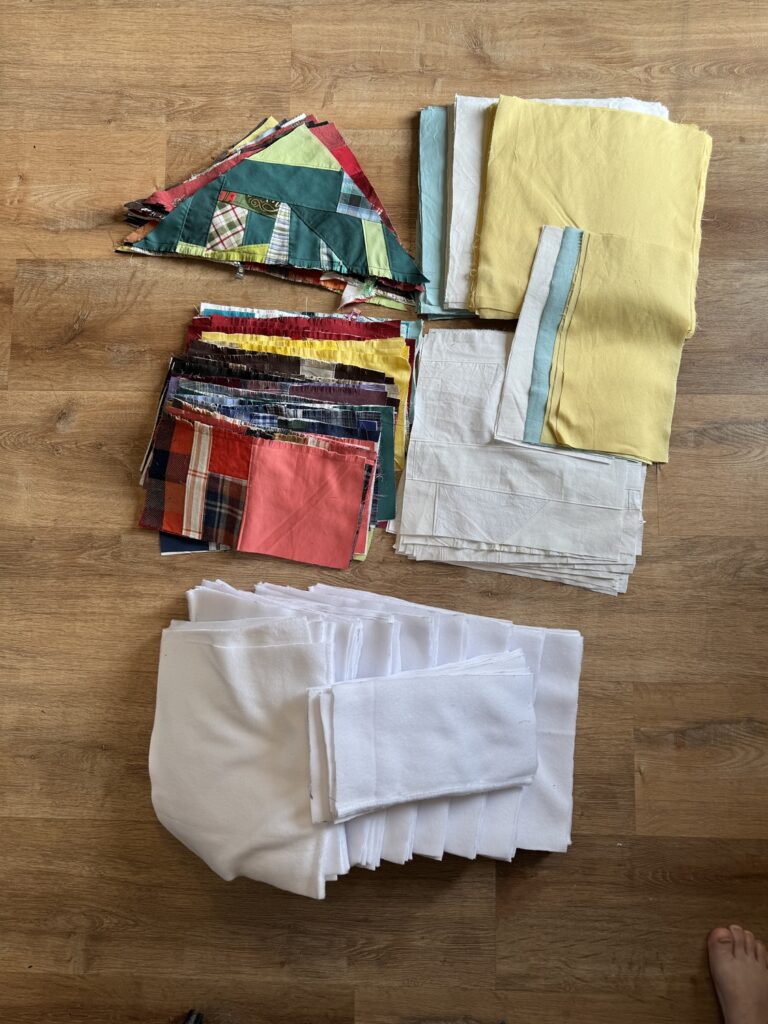
Once all the top squares, middle inlays, and bottom squares were cut, I decided to stack all the square layers together square by square. I laid the bottom layer down, centered a fleece on that, then the top piece on top.
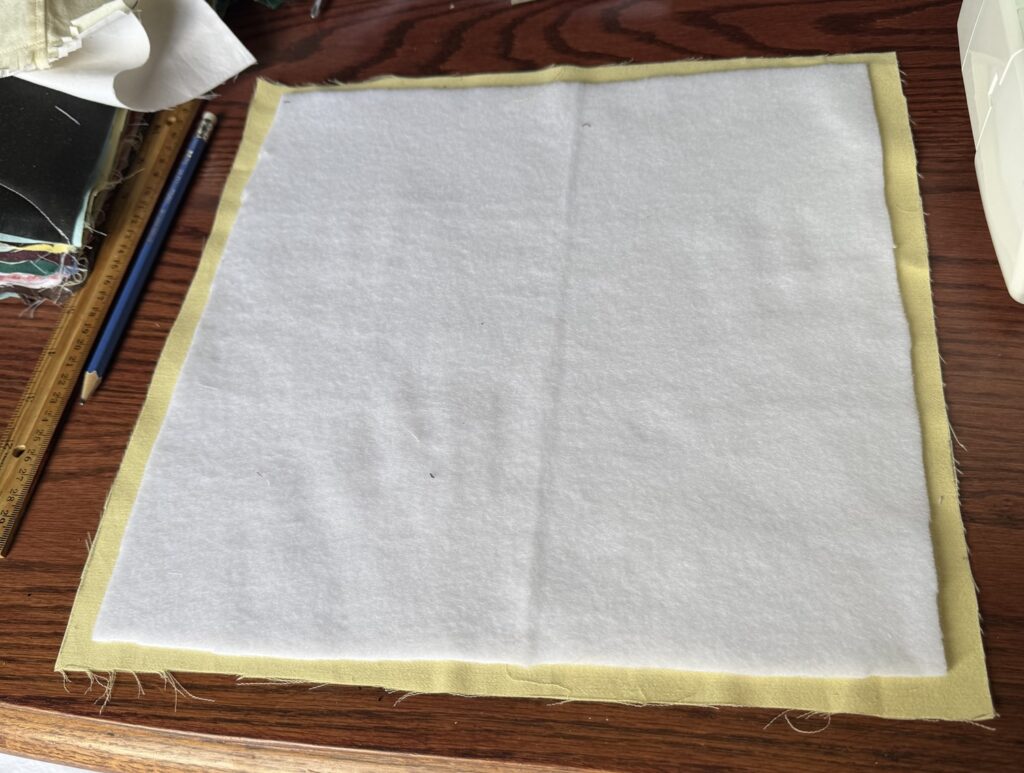
I made a nice tall pile of these layers to get them ready to sew “X’s” on them.
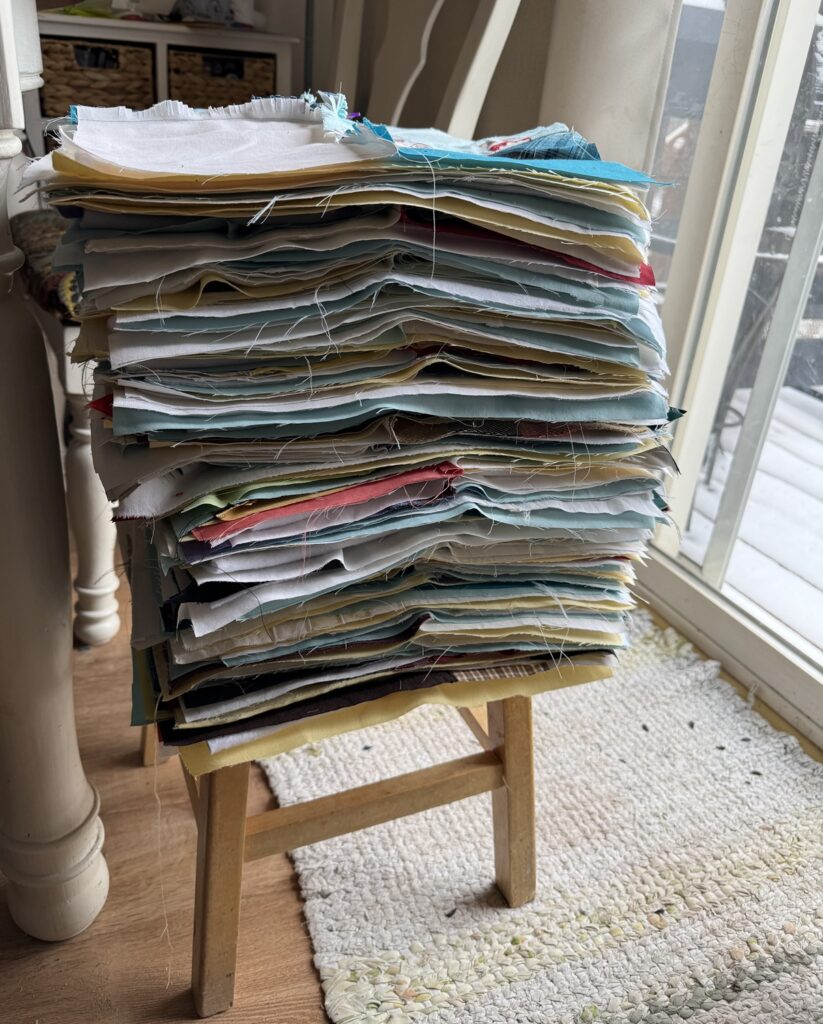
Before sewing the “X’s”, I made sure each layer was centered neatly. 2 Clips per side is a nice amount to keep the layers steady.
I kept the sewn layers in order so it would be easy to sew them into strips. Does this look like a CA king quilt?
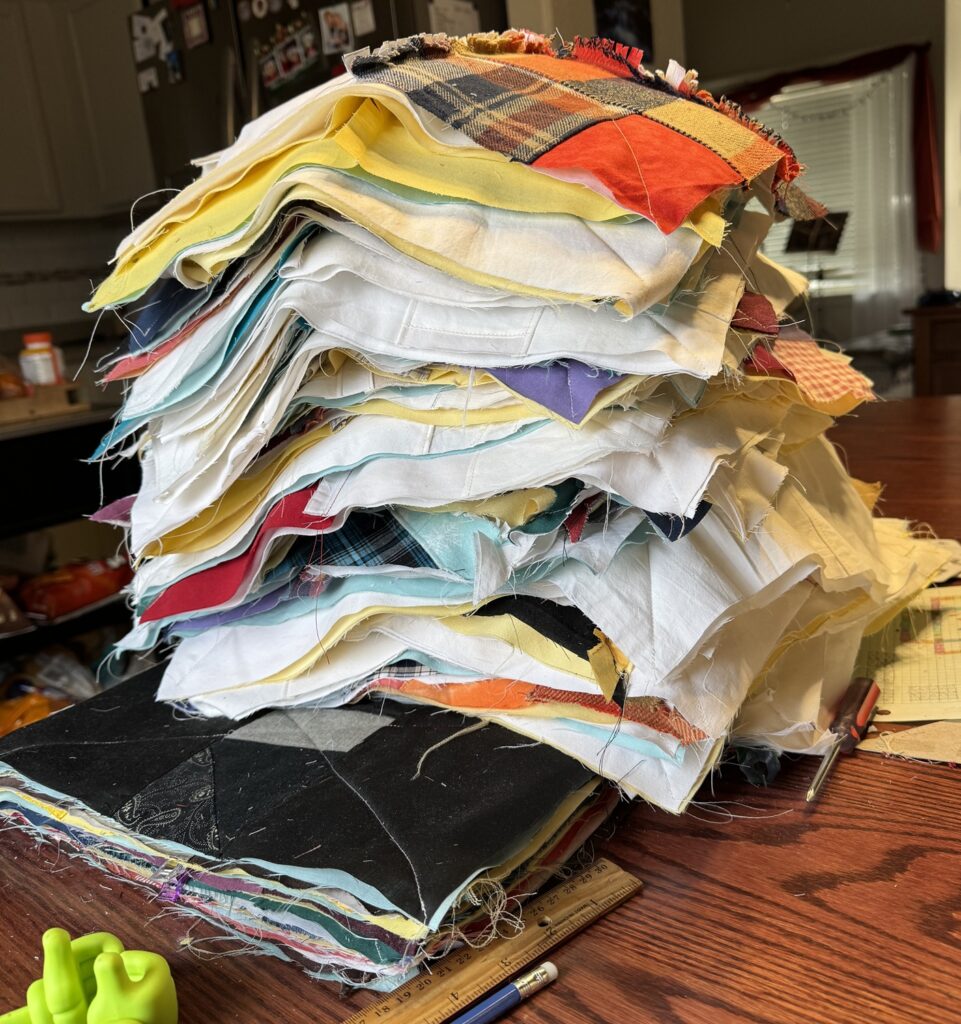
The plan is to sew them into strips, rag them, then sew 2 strips together at a time so it isn’t hard to sew the whole blanket together. This step took about 2 weeks, bringing the total working time up to 8 weeks.

**Some people sew two straight stitches per square or strip for extra durability.
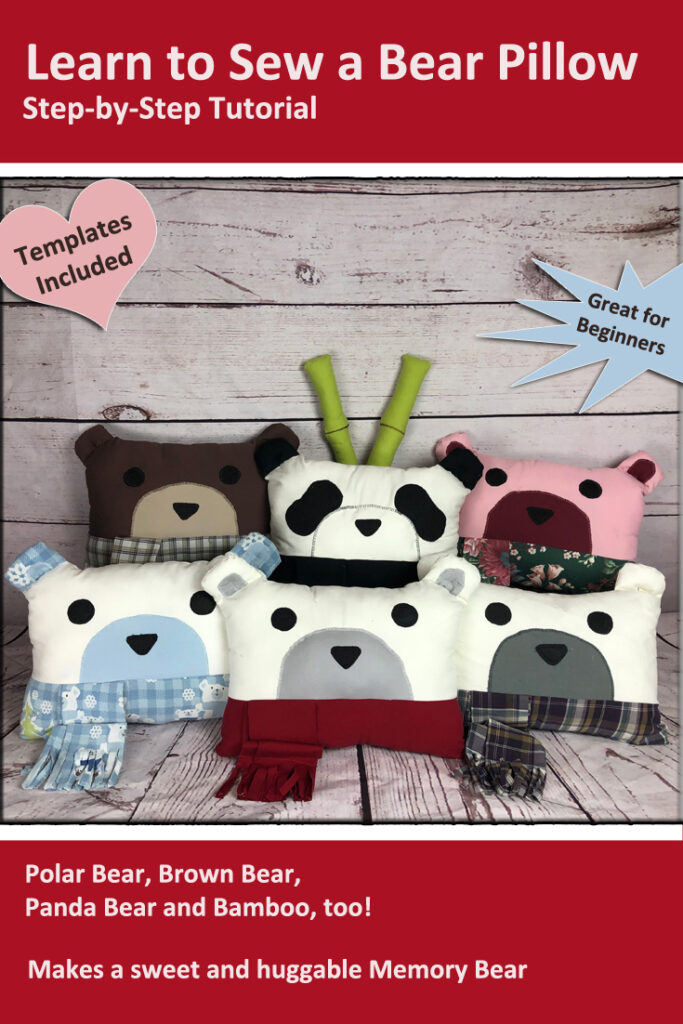
Bear Pillow Sewing Pattern

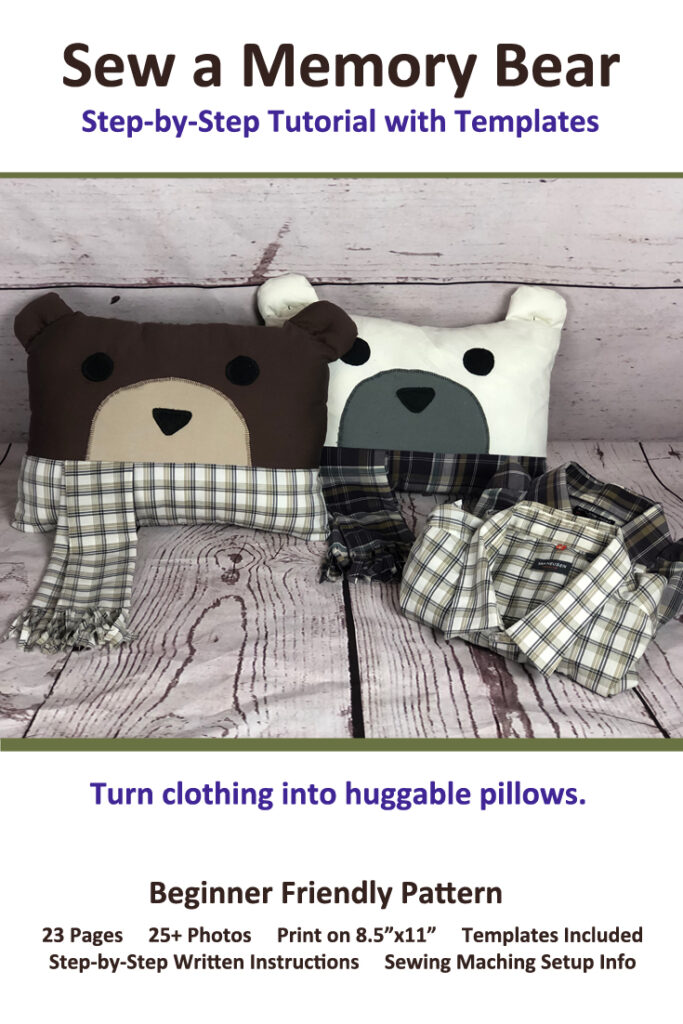
Looking for a bear sewing pattern? Look no further. This step-by-step tutorial will guide you through each step of turning fabric into a cute and cuddly bear pillow. Mix and match your fabric to make your own one of a kind bear.

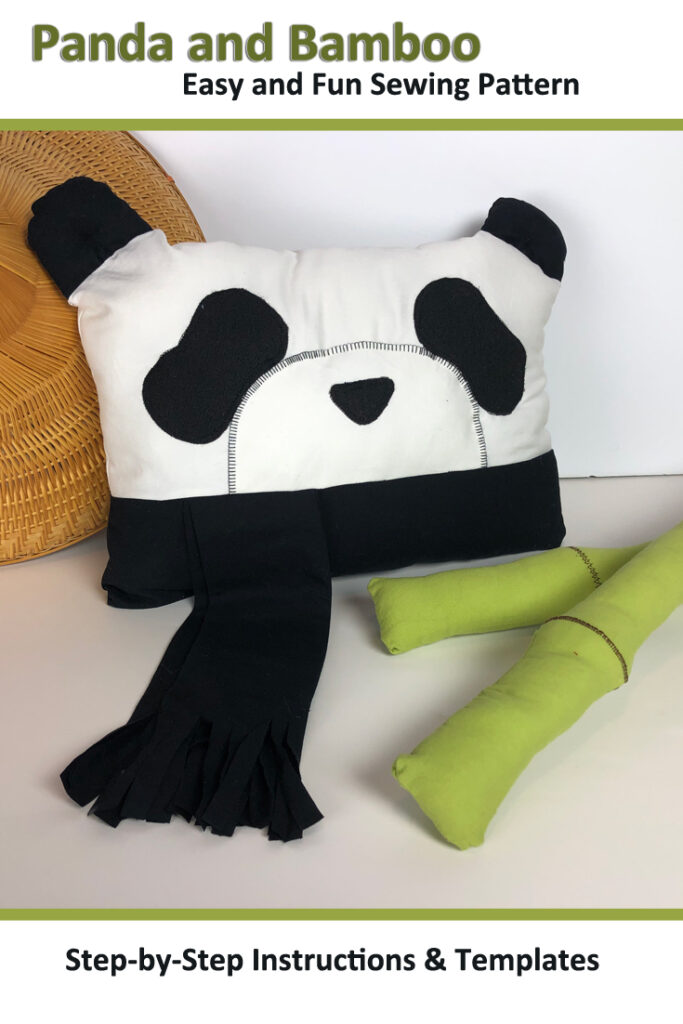
This sewing project is so much fun, and easy, that we kept coming up with more bears to make. This tutorial is great for making all kinds of bears such as: Asiatic black bear (moon bear), brown bear (including grizzly), giant panda, North American black bear, polar bear, sloth bear, Andean bear (spectacled), and sun bear!

Not only that, this bear pillow is festive, too. One can be made for various holidays by changing out the fabric on the scarf. These are great for new baby, nursery and baby shower gifts, Christmas, Halloween, and going away to college gifts. They also make great gifts for boys and gifts for girls, memory bears, gifts for bear enthusiasts and bears for those who love to cuddle.

They can also be a heartfelt and thoughtful gift for someone that has lost a loved one. Sew the bear with a shirt that belonged to their special person and they can hug it in times of sorrow.

The bear sewing pattern includes:

  • Bear Pillow Pal Rectangular Pillow Pattern
  • Panda Bear Instructions
  • Bamboo Instructions
  • Step-by-Step Written Instructions
  • 25+ Color Photos
  • 10 Printable Template Pages (8.5″x11″)
  • Complete Materials List
  • Helpful Tips
  • Information About Sewing Machine Settings
  • Links to helpful videos

The finished measurements of the bear pillow are approximately 16″ wide x 3 1/2″ deep x 12″ tall. The templates are drawn at 100% and can be printed on 8.5″ x 11″ paper. So you’ll need to cut out the templates and tape pieces together.

Bear Pillow Available on Etsy

Our bear pillow sewing pattern is available in our Etsy Shop.

Available now on Etsy.

Buy Now on Etsy

More About the Bear Pillow Pattern

Bonus: Panda and Bamboo are included!

This bear pillow pattern can be sewn in an afternoon if you have all the supplies. Here’s what you’ll need to sew your own bear pillow:

  • Pattern Pieces: Template included with pattern
  • Fabric: Head Color: 20” x 10”
  • Snout Color: 12” x 5”
  • Scarf Color: 25” x 12”
  • Bamboo: 25” x 4” per stalk
  • Felt: Black – 1 sheet (10” x 5”)
  • Thread: To match felt and fabric
  • Straight Pins and Needle
  • Stuffing: Approximately 8-10 oz of Poly-fil or 12”x16” pillow form
  • Scissors
  • Sewing Machine
  • Pencil, Pen or Chaulk

Pin a Picture to Pinterest

Share the love, pin these pictures to Pinterest.

Even More about the Bear Sewing Pattern

This is a great pattern for sewists of all abilities from the brand new to the seasoned enthusiast. The tutorial includes information about how to set up your sewing machine and different stitches to use. Three different stitches were used on the bear because sometimes the fabric is sewn on the right side and sometimes on the wrong side.

The pattern will take you step-by-step with written instructions and helpful color photos. Helpful tips and included as well as links to videos that will show you different sewing techniques.

So, pick out your fabric and head over to Etsy for your copy of the Bear Pillow Sewing Pattern.

This pattern is for your eyes only. We encourage you to give away or sell your finished projects and ask that you mention Yarnovations.com as designer. Thanks.

Get your copy of the Bear Pillow Sewing Pattern on Etsy.

Buy Now on Etsy

A Motivation to Make Beginner Friendly Sewing Patterns

Though we’ve been life long crafters, we have sewed out of utility rather than pleasure (i.e. lining for crochet bags). Our mother was much the same. She dutifully, if a little grudgingly, sewed costumes for our high school drama performances.

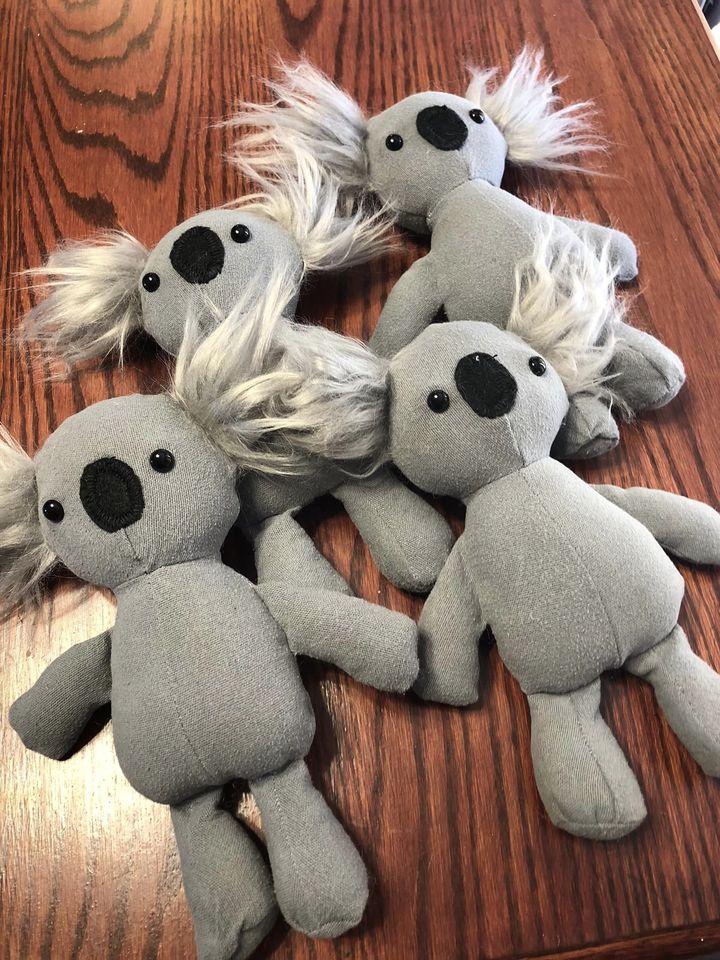
But when the spark ignites, sometimes a scarcely used skill can grow into a new passion. It began as a simple desire for Deborah; to make a few stuffed animals to hand out at Vacation Bible School. She poked around the internet a bit, searched Pinterest and Etsy. Then down the rabbit hole she plunged.

Sewing for Vacation Bible School

With a mix of free online patterns and some purchased on Etsy, Deborah began to sew. She made six koalas and found it kind of fun. She found another pattern, then another. Soon she was creating a large collection of creatures. She sewed and sewed.

And sewed some more. She made koalas, fish, dingos, kangaroos and many more animals.

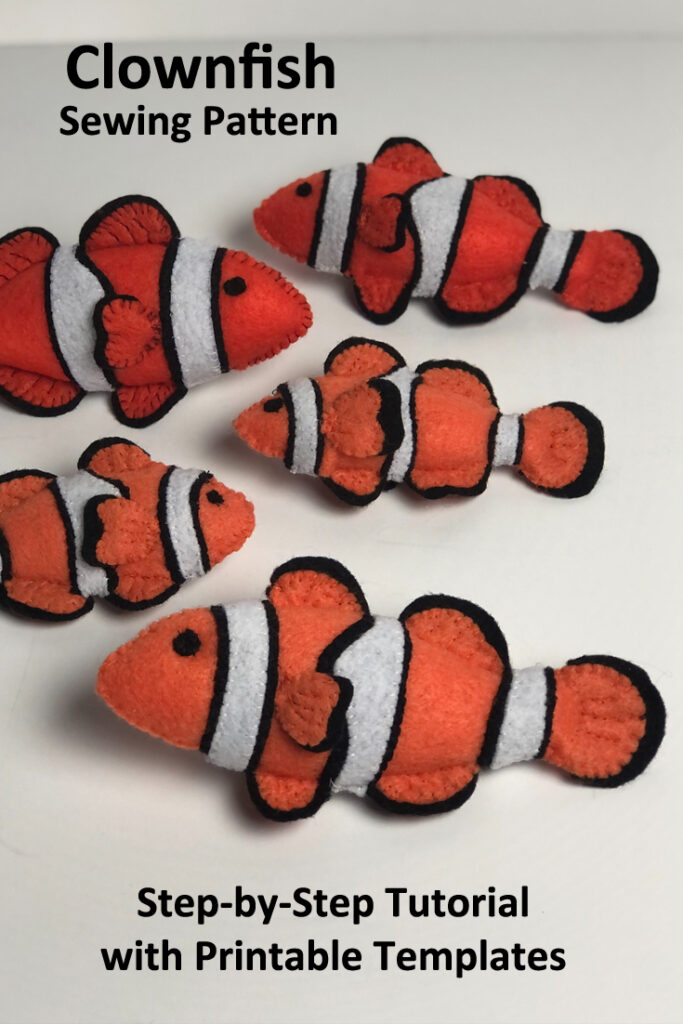
clown fish sewing pattern

This adorable little orange fish was our first sewing pattern inspired from the VBS experience. The Clown Fish Sewing Pattern is stitched entirely by hand with felt fabric. It’s super cute. As we’ll mention in a moment, this pattern also includes traceable templates.

Creating Sewing Patterns

Deborah soon found that although there are a lot of great patterns online, sometimes there’s a void; the variety may be limited or the style not quite right. So Deborah began creating her own patterns.

A well written pattern makes the sewing experience more enjoyable, as recent experience would show. So we decided that we wanted our beginner friendly sewing patterns to have 3 key components:

  • Step-by-Step Written Instructions
  • Lots of Color Progress Photos
  • Printable and Traceable Templates at 100% Scale

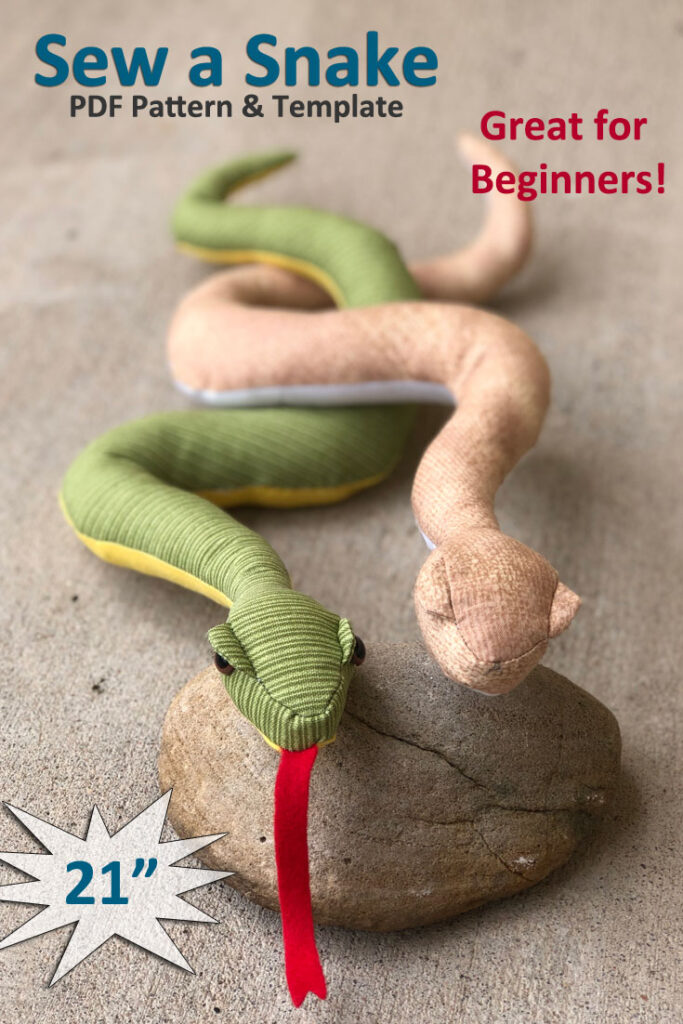
Snake Sewing Pattern

One of the first sewing patterns we put together was for a snake. This one has an exaggerated brow above the eye. It gives the snake attitude. Learn more about the Snake Sewing Pattern on our blog.

snake sewing pattern

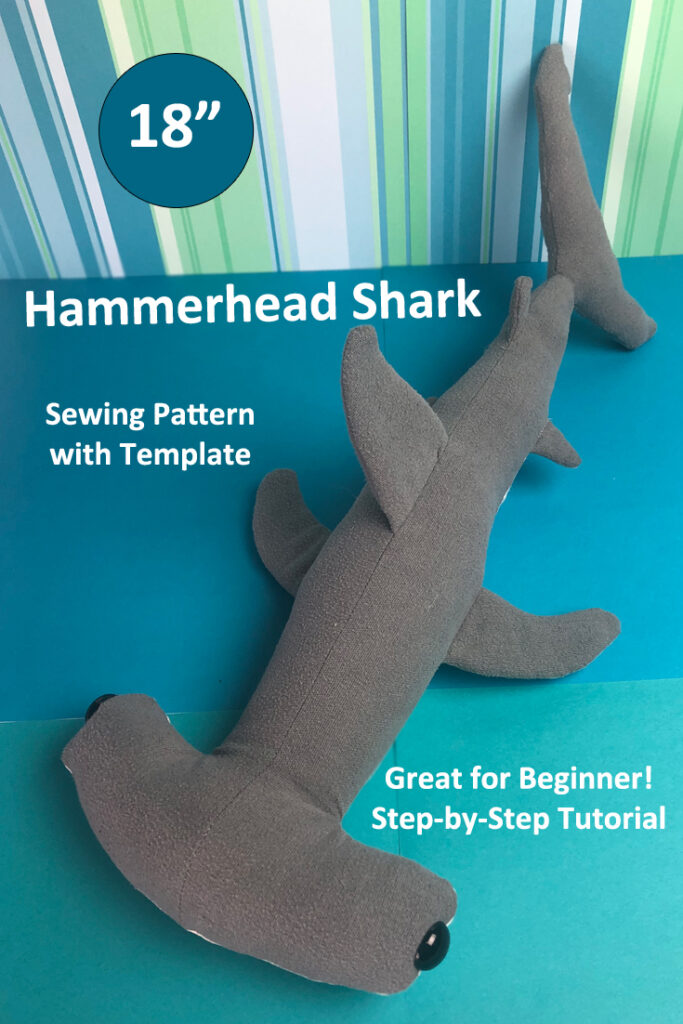
Hammerhead Shark Sewing Pattern

Another of our beginner friendly sewing patterns is the Hammerhead Shark. This time the emphasis was on the fins. Our shark stuffed animal has all the same fins that a real one has. Learn more about the Hammerhead Shark Sewing Pattern on our blog.

hammerhead shark sewing pattern

Bear Pillow Sewing Pattern

One last beginner friendly sewing pattern I’d like to highlight is the bear pillow. This character is 100% huggable. And with a few modifications, the bear can be a panda or a brown bear. Learn more about the Bear Pillow Sewing Pattern on our blog.

bear pillow sewing pattern

Whatever you sew, we wish you many happy stitchable moments.

Little Looms 2017 Patterns

Two New Pin Loom Patterns

Two of my pin loom patterns appear in the 2017 Little Looms magazine by Handwoven. You are going to love them.

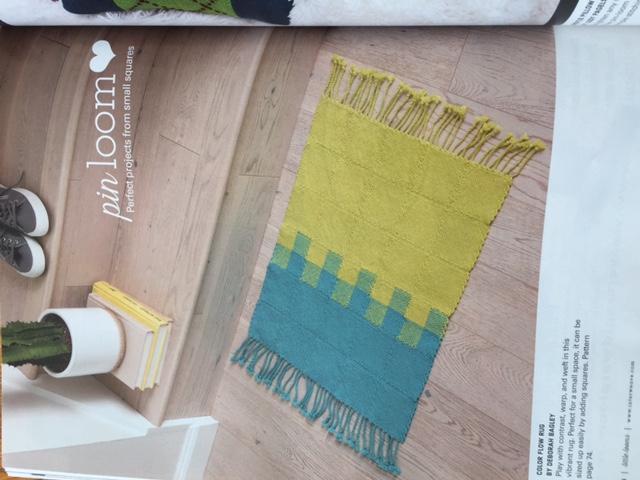
Pin Color Flow Rug

First, the Color Flow Rug. I call it Color Flow because the colors transition nicely due to the quadrant squares between the solid squares. Because you change colors during the warping and weaving process, part of the square is solid, and part of the square is a mixed color. The twisted cord tassels really finish off the rug nicely.

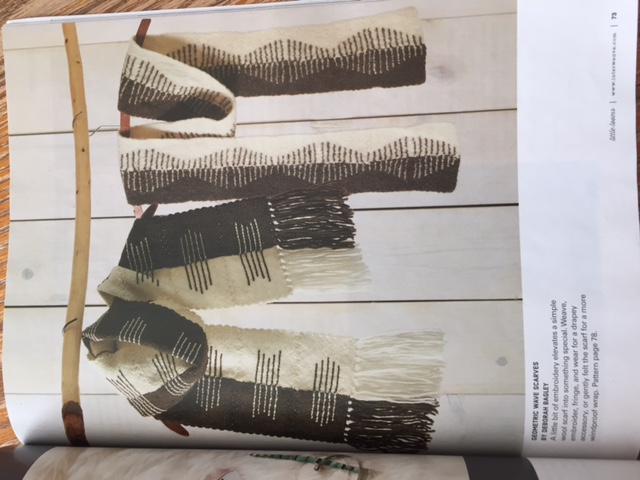
Pin Geo Waves Scarves

Second, the Geometric Waves Scarves. These striking scarves are actually just solid squares sewn with a dark color on one half and a light color on the other. The lines are all embroidered on. If you use wool, it can be felted. Just be sure to make it extra long as it will shrink in the felting process!

Check out these and more great patterns in the 2017 Little Looms magazine.

What are you weaving?

Tips and Tricks: Faux Fur

Working with Faux Fur Yarn

There is no doubt that a little faux fur yarn can add a lot of pizazz to a hand crafted project. And with a little practice, one can learn to crochet or knit with it a little easier.

Tip #1: Crocht Double Stranded

It is nearly impossible to see the stitches when crocheting with faux fur. The furry strands nearly completely hide the stitches. That’s great on a finished product, but not so great when you have to work in those stitches. The problem is not as pronounced when knitting since the stitches are on the needle. If stitches have to be picked up, it will be difficult to find them.

Solution: Crochet with two strands at once, one faux fur and one non-furry yarn. It makes each stitch thicker and a little easier to see. If the non-furry strand is the same color (or nearly the same) as the fur, it almost disappears. The thicker stitches may still be difficult to see, but it is also possible to feel the stitches as you work.

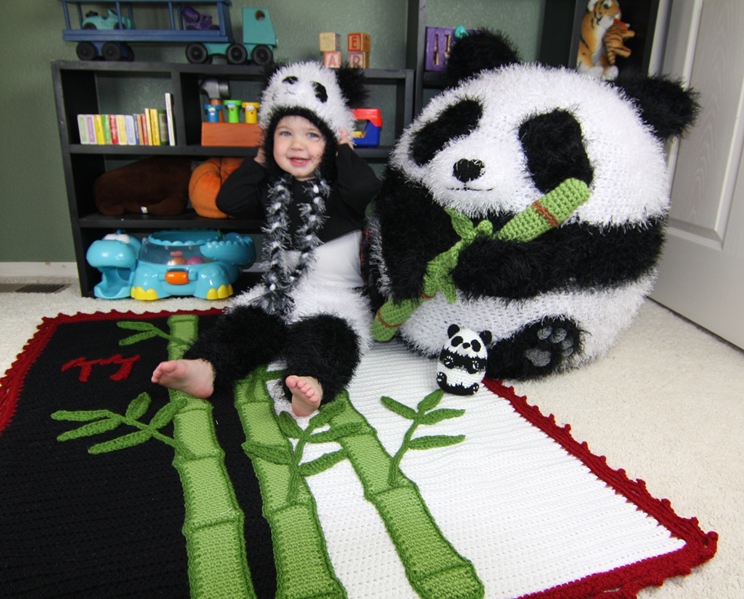
A Furry Sitting

Crocheting with Vanna’s Choice and Fun Fur yarn made finding the stitches in this panda set much easier to find.

Panda Pattern Set available on Etsy.

Tip #2: Count every row.

Counting the number of stitches at the end of every row or round is generally a good idea, but it is almost critical when using faux fur. It is very easy to drop a stitch or lose  track of a stitch because it can be difficult to see. You might even add a stitch because it’s not always easy to tell if a stitch has been worked in already.

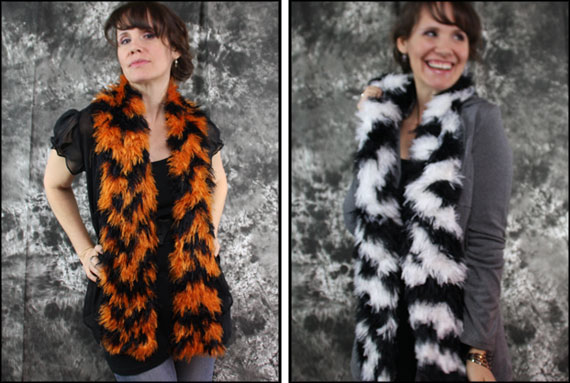
Tiger Striped Scarves Crochet Pattern

Keeping track of the number of stitches per row is crucial to keeping a neat edge in projects like the tiger striped scarves.

Tiger Striped Scarves pattern on Etsy.

Tip #3: There is a Right Side and a Wrong Side.

The little furry strands often get trapped within the stitches as they are worked. When working back and forth in rows, both sides will generally be equally furry. When working in the round, the inside tends to be furrier. For a furrier look, turn the project inside out when appropriate so that the furrier side is out.

A hat can often be turned inside out after it’s finished. Some items may need to be turned inside out before they are sewn together. Just note how furry the sides are before completing the project.

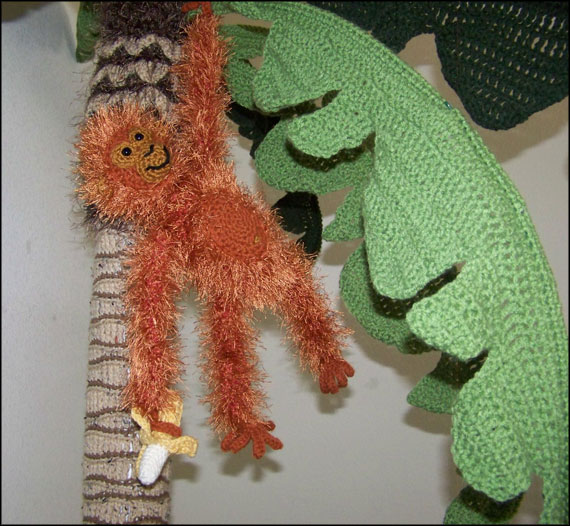
Monkey Hanging in Palm Tree with Banana

The parts of the monkey are turned inside out to keep the furrier side on the outside. A little faux fur on the tree makes the palm tree look more authentic too.

Palm Tree and Monkey pattern set available on etsy.

Tip #4: Not all faux fur is equal.

Faux fur comes in varying lengths. The furry strands can be short or long, coarse or smooth. The type of fur can significantly impact the look and feel of the finished product. Projects with the longer strands of fur tend to look fuller and are softer than the shorter stranded fur. The size and nature of the project may determine which fur to use. Generally speaking, the longer stranded fur costs a little more.

Houndstooth Trio

 La Furla from Trendsetter Yarns is long and soft making this houdstooth trio very luxurious.

Houndstooth Trio pattern set available on Etsy.

Tip #5: Notice yardage.

Some faux furs come in small skeins. Generally speaking that means more skeins of fur yarn will be needed than non-furry yarn. Projects with smaller stitches will use more faux fur than larger stitches. For instance, a project  crocheted using single crochet will use more than the same project done in double crochet. Because the faux fur hides stitches anyway, you might want to change the stitch to a taller stitch to save on yarn. The project will get done faster and still look good.

Halloween Trick or Treat Bags

One skein of faux fur will work for small projects like the trick or treat bags.

Trick or Treat Bags pattern set available on Etsy.

Considering a Membership Site Option

We’re Considering a Membership Option

Poll for MembershipFor our fellow yarnies that love our quirky and fun style, we are considering offering a membership option to Yarnovations. Would you be interested?
Membership would include:

  • Access to our entire library of patterns
  • A new pattern delivered to you every Friday

We would still make our patterns available for individual purchase for those not interested in a membership, but are considering an offer that makes it affordable for you to gain access to everything in our shop while promising to deliver you a fun and quirky crochet pattern at least once a week.

Would you be willing to join a Yarnovations Club for $10 a month?

Please take our poll and let us know what you think.

[poll id=”3″]

Winner in 2014 CGOA Design Contest

 -Winner at the Crochet Guild of America 2014 Design Competition

Congrats to Deborah for her winning entry at the CGOA 2014 Design Competition. That’s two years in a row! (See her owl bean bag chair winning entry from 2013 – on Etsy) I may be a little bias since she’s my sister…but I think she totally ROCKS!

3rd Place in the Afghan and Home Decor Category

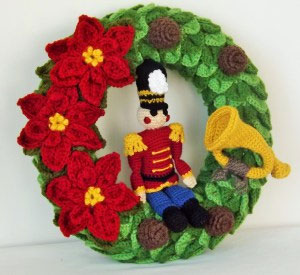
Toy-Soldier-Christmas-Wreath

Photo: Doris Chan

Title: A Soldier’s Christmas

Soldier’s Christmas Wreath pattern now available on Etsy!

Do you want one of these on your front door this Christmas as much as I do? I (Dana) was blown away with this crocheted Christmas wreath. I really wish you could see it in person it’s so rich in color and texture.

There are a lot of fun details that make this so breathtaking. I love the texture that the crocodile stitch leaves add to the base of the wreath. I’m in love with the soldier (don’t tell my husband) and all the detailing on his jacket. And I adore the scales on the pine cones. I can hardly wait for Deborah to write up this pattern so I can make one of these for my home!

Special Thanks & Links to Other Winners and Entries

cgoa-20

A big thank you once again to Doris Chan for organizing a fabulous design competition. We are super thankful for all the work Doris puts into this annual competition. (And I’m sure she’s thanking Deborah for not sending in another bean bag chair like last year!)

And thank you to the judges: Jenny KingSusan Lowman and Karen Manthey. I’m sure it was a challenge to pick just three winners in each category.

It’s the 20th anniversary of the Crochet Guild of America and some of the designers incorporated that theme into their designs which was fun to see.

Visit Doris Chan’s website for all the winners and entries:

Deborah had two more entries in the competition that didn’t place. See if you can spot them in the slide show!

Soldier Christmas Wreath pattern now available on Etsy!

Published in Love of Crochet Magazine Summer 2014

Published in Love of Crochet Magazine, Summer 2014

Pattern 1: Mulberry Stitch Sampler – page 51

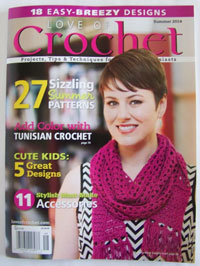
Summer 2014 Love of Crochet MagazineThe cover girl is wearing one of two designs I (Dana) have featured in “Love of Crochet” magazine, Summer 2014. I am thrilled!

The scarf is named “Mulberry Stitch Sampler” because it features several techniques like vertical and horizontal cables, star stitch and the shell stitch.

This was crocheted in Milky Whey by Kollage Yarns. This yarn is super soft, making it a dream to wear. It blocks well and has delightful drape.

We love extra long scarves…and as you can see, this one has been draped around the neck of this slender model several times.

Mulberry Stitch Sampler pattern available on Etsy.

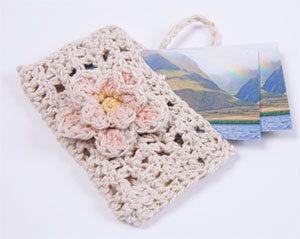
Pattern 2: Victorian Lace Card Holder – page 22

Victorian Lace Card HolderI needed a gift for a friend who loves everything Victorian. So I created this Victorian Lace gift card holder for her, which she raved over, then promptly started using for her business cards.
This design was crocheted with two strands of crochet thread held together allowing the use of a D hook instead of a steel hook.

Color is added to the floral button with colored chalk.

New Crochet Patterns in the Store

Several patterns we had published in magazines are now available here on the website. Check out what’s here:

As seen in Love of Crochet magazine, Holiday 1013

Pet-Lovers

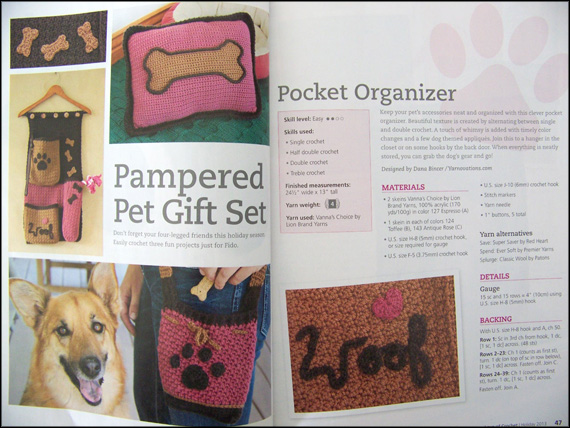
This Pampered Pet Gift Set is now available in our Shop as the Dog Days Trio.

The three items are available as a set or for purchase individually.

___________________________

As seen in Love of Crochet, Fall 2013

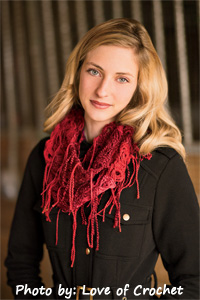
Crimson Cowl Love of CrochetThis Broomstick Lace Crimson Cowl is now available for free in our shop!

This is a simple broomstick pattern, perfect for those new to the technique.

Get the free Crimson Cowl pattern.

Vote for Mad Mad Makers 2013 Contest

Vote for your favorite!

Mad Mad Makers is having a contest and giveaway. Vote for your favorite hand made item.

The Owl Set has been entered into the contest…might we suggest you vote for that?

Here’s how it works:

  1. Enter the drawing…lots of ways to get extra changes of winning.
  2. Scroll down (below the entries) and browse shops.
  3. Click on heart in the top right corner of your favorite item.

VOTE by November 30, 2014.

logo


vote