Apple Dumpling Recipe with 4th of July Crochet American Flag Cozy
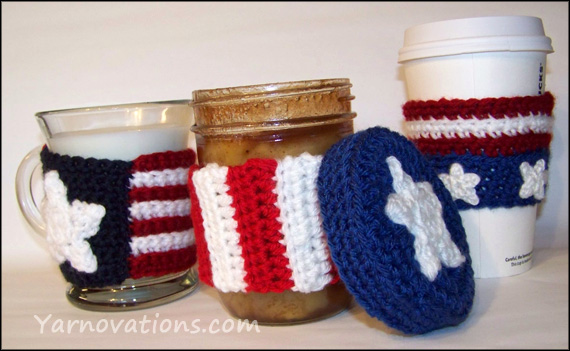
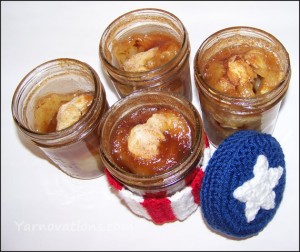
This super sweet, super easy, Apple Dumpling Recipe is another one of our family favorite desserts (most often requested by my brother)! Dress it up in this crochet American Flag cozy and you’ve got a fun 4th of July dessert and decorating idea (perfect for any American holiday, really)!
Let’s start with the Apple Dumplings. While they bake and cool, you can whip up the mason jar cozies.
Apple Dumpling Recipe / Pie in a Jar
I modified an Apple Dumpling Recipe to be a Pie in a Jar…and IMHO it was the best Apple Dumplings dessert my family has ever had (my parents agree)! My husband loved it so much…he requested I make it again with other fruits like peaches!
Serves 4 (makes 4 extra large desserts).
Pie Ingredients:
4 wide mouth pint size mason jars
2 ready-made pie crusts
3 Granny Smith Apples
4 Tablespoons sugar
4 1/2 teaspoons cinnamon
1/2 teaspoon nutmeg
Syrup:
1 cup sugar
1 1/2 cups water
1/4 teaspoon cinnamon
1/8 teaspoon nutmeg
Topping:
2 teaspoons sugar
Directions:
Preheat oven to 375°.
Mix all Syrup ingredients together in a pot and bring to a boil. Remove from heat and set aside.
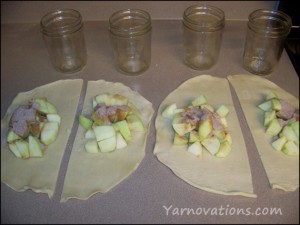
Unroll two pie crusts and cut each in half. You now have dough for 4 dumplings.
Peel, core and dice apples (approximately ½” cubes).
Divide apples evenly and place in center of dough.
Mix remaining Pie ingredients (4 T sugar, 4 ½ t cinnamon, ½ t nutmeg) together in a bowl. Sprinkle 1 Tablespoon of mixture on each dumpling over top the apples.
Dab your finger in water and moisten the edges of the dough. Wrap the dough around the apples creating a cocoon around the apples pressing edges together (if dough breaks or tears, don’t worry. A few holes in the dough is fine).
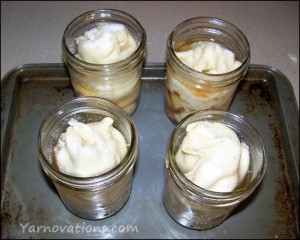
Spray the bottom of each jar with cooking spray. Place one dumpling in each jar.
Pour ½ cup of Syrup in each jar making sure the syrup reaches the bottom of the jar (use a knife to press the dumpling away from the side of the jar if needed).
Sprinkle ½ teaspoon sugar on top of each dumpling.
Place jars on cookie sheet and bake in oven for 1 hour.
If you’d like to add a bit more color to this dessert, try adding a little red food coloring to the syrup.
Want it a little more “spicy”? Add some Red Hots candies to the apples.
This recipe makes 4 extra large servings. For a smaller dessert, cut each pie crust into either 3 or 4 pieces to create 6 or 8 desserts. Divide all ingredients evenly among each dumpling.
Crochet American Flag Cozy
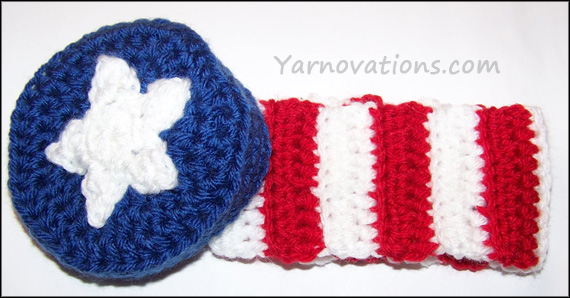
It’s the stars and stripes that make this look like a crochet American Flag. While it is possible to crochet an exact replica of the American Flag (50 stars and 13 stripes), we also think it’s fun to get a little artistic and a bit fanciful with this cozy project. Have fun with it.
We used Vanna’s Choice for this project. This is a great way to use up remnants from your stash. We showcase this in two different reds and two different blues to illustrate that most any red and blue will work.
Skill Level: Easy
Stitches Used: Chain, Slip Stitch, Single Crochet, Half Double Crochet
Techniques Used: Crochet in the Round, Crochet in Rows, Crochet in Back Loop, Crochet in Both Loops, Crochet Increase (work two stitches in next st)
SUPPLIES:
Vanna’s Choice:Worsted Weight (4)
Jar Cozy: SCARLET, WHITE, COLONIAL BLUE
(Mug: CRANBERRY, WHITE, NAVY)
(Cup: CRANBERRY, WHITE, COLONIAL BLUE)
Crochet Hook: H/8/5.00 mm
Yarn Needle for sewing
AMERICAN FLAG JAR COZY INSTRUCTIONS
Scarlet
Hook: H
Ch 12
Row 1:Hdc in 3rd ch from hook. Hdc across. (10)
Finish off and weave in ends.
Attach White
Row 2:Ch 2, turn. In back loops only, hdc across. (10)
Row 3:Ch 2, turn. In both loops only, hdc across. (10)
Finish off and weave in ends.
Attach Red
Row 4:Ch 2, turn. In back loops only, hdc across. (10)
Row 5:Ch 2, turn. In both loops only, hdc across. (10)
Finish off and weave in ends.
Row 6-23Repeat Rows 2-5 until you have 23 Rows. End with White.
Attach Red
Row 24:Ch 2, turn. Hdc in back loops only across. (10)
Finish off leaving a long tail for sewing.
Join Row 24 to foundation ch with whip st across.
WIDE MOUTH LID COVER INSTRUCTIONS
Colonial Blue
Hook: H
Ch 3
Rnd 1: 8 hdc in 3rd ch from hook. Join with a sl st. (8)
Rnd 1: 10 hdc in 2nd ch from hook. Join with a sl st. (10)
Rnd 2: In back loops only, sl st into next st. (work next group in the same st as sl st you just worked) * work: ch 2, dc, ch 1, sl st into top of dc, ch 2, sl st. 2 sl sts into next sts of Rnd 1* around.
Finish off leaving a long tail for sewing.
Pin then sew Star to top of Lid.
More Cozies in Store
Love this flag cozy? There are more seasonal, holiday and just for fun cozies in our Crochet Cup Cozy Patterns eBook. We’ve created an entire collection with 28 designs one ebook.
Looking for the cup and mug version? They’re in the ebook.
Each design in the ebook has instructions to fit Mugs, Cups and Mason Jars. Every design has a delicious recipe or fun craft.
All 3 flags pictured at the beginning of this post are in this ebook! AND the ebook includes 4 new designs – Dracula, Vampire, Mummy and Blue Jeans.
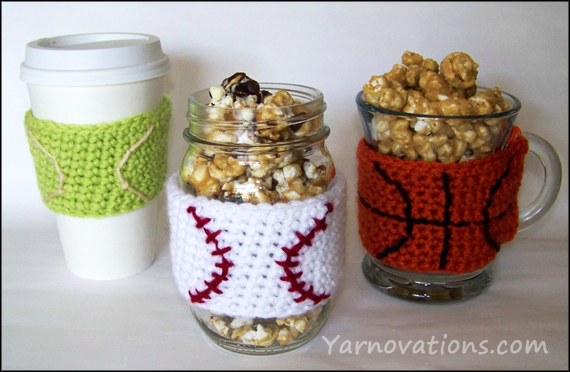
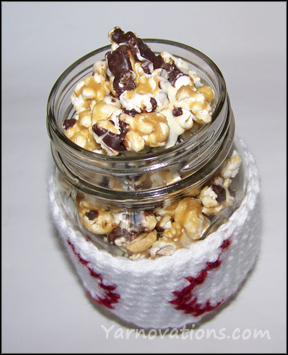
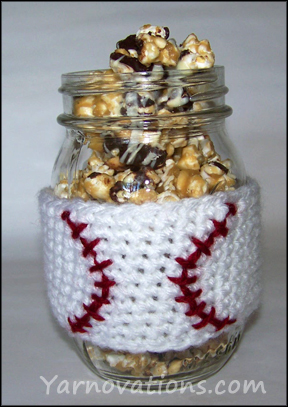
Make this delicious and easy caramel corn recipe to be stored in a mason jar with a crochet baseball cozy! Just in time for the next big game…a tasty treat for players and fans alike.
Peanuts and Cracker Jacks are synonymous with baseball. We’re celebrating American’s favorite pastime with this fun baseball cozy and caramel corn combo.
Let’s dig in and make some caramel corn. It’ll need time to cool…which will give you time to whip up a cozy or two!
Caramel Corn Recipe
This caramel corn is very versatile. Make a rich chocolate drizzled caramel corn (more like moose munch) by following the recipe below. Make an extra thick and rich caramel corn (more like Cracker Jacks) by doubling the sauce and omitting the chocolate. If you love peanut butter, add ½ cup of peanut butter with the corn syrup (step 4).
We asked friends and family to tell us which version of the caramel corn they liked the best (chocolate vs. extra thick and rich caramel). It was a tie! Since there is no clear favorite, you should make the one that you’d prefer.
INGREDIENTS & SUPPLIES:
12 cups popped white popcorn (½ cup unpopped)
1 cup dry roasted peanuts
1 cup light brown sugar
¼ cup light corn syrup
¾ teaspoon salt
½ cup butter
¼ teaspoon baking soda
½ teaspoon vanilla extract
1 (4 oz) dark chocolate bar (Ghirardelli 60% Cacao)
1 (4 oz) white chocolate bar (Ghirardelli White)
DIRECTIONS:
Preheat oven to 225°. Lightly grease a 9×13 pan. Set aside.
Lightly grease a large soup pot (stock pot).
Pop popcorn (we used an air popper), remove any unpopped kernels. Pour popcorn then peanuts into soup pot.
Melt brown sugar, corn syrup, butter and salt in sauce pan on medium heat stirring regularly bringing it to a boil. Boil and stir constantly until temperature reaches 250° to 260° (approximately 5 minutes). Caramel will be bubbly and a bit stretchy.
Remove from heat. Combine baking soda and vanilla extract and stir into caramel sauce.
Pour caramel over popcorn. Stir until popcorn is evenly coated with caramel.
Pour popcorn into prepared 9×13 pan. Bake for 45 minutes stirring every 15 minutes.
Line cookie sheet with wax paper. Pour caramel corn onto wax paper. Break into pieces if needed. Cool completely.
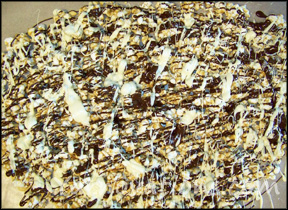
Melt dark chocolate over low heat stirring constantly. Drizzle over popcorn.
Melt white chocolate over low heat stirring constantly. Drizzle over popcorn.
Refrigerate for 10 minutes or until chocolate solidifies.
Store and serve in mason jars. Serve within 10 days.
I’ve been told that by adding a bit of molassas to the sauce (step 4) this caramel corn will taste like Cracker Jacks!
Crochet Baseball Cozy
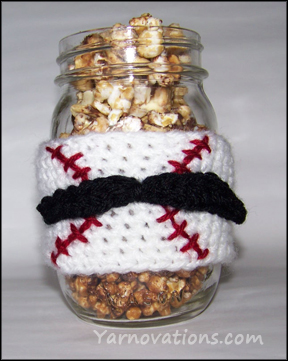
We created this fun cozy and caramel combo in honor of the baseball team the Oakland A’s…AKA: the Mustache Gang. In 1972, right fielder Reggie Jackson refused to shave off his mustache which prompted the team owner Charles Finley to pay all the players to grow a mustache. And on June 18th, anyone wearing a mustache got into the game free. So…when you head to your next baseball game, wear a ‘stache and bring some caramel corn!
The crochet baseball cozy is another great stash buster. We’ve used Vanna’s Choice yarn for this project. She has several colors that are a perfect match for various types of sports balls.
Skill Level: Beginner
Stitches Used: Chain, Slip Stitch, Single Crochet
Techniques Used: Crochet in the Round
SUPPLIES:
Vanna’s Choice: Worsted Weight (4)
Baseball: WHITE, CRANBERRY
(Basketball: TERRECOTTA, BLACK)
(Tennis Ball: LIME, BEIGE)
Crochet Hook: H/8/5.00 mm
Yarn Needle for sewing
BASEBALL JAR COZY INSTRUCTIONS
White
Hook: H
Ch 34, join with a sl st.
Rnd 1-10: Sc around. (34)
Join with a sl st. Cut yarn; weave in end.
With Cranberry, embroider baseball threads.
More Cozies in Store
Love this baseball cozy? There are more seasonal, holiday and just for fun cozies in our Crochet Cup Cozy Patterns eBook. We’ve created an entire collection with 28 designs one ebook.
Looking for the cup and mug version? They’re in the ebook.
Each design in the ebook has instructions to fit Mugs, Cups and Mason Jars. Every design has a delicious recipe or fun craft.
All 3 balls pictured at the beginning of this post are in this ebook! AND the ebook includes 4 new designs – Dracula, Vampire, Mummy and Blue Jeans.
Father’s Day Gift Ideas – Steak Rub Recipe and Crochet Mustache!
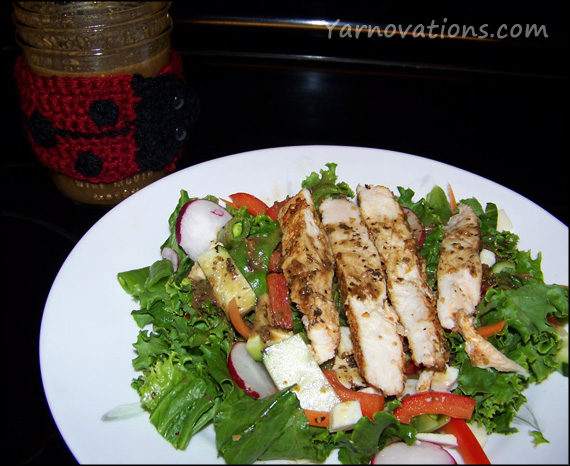
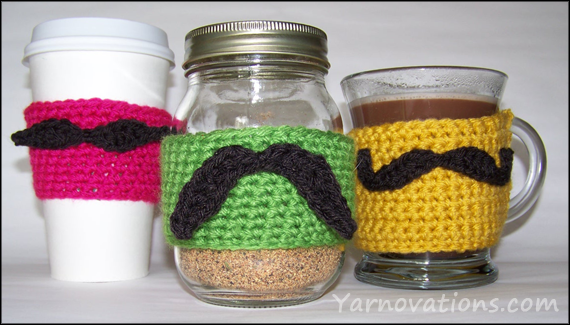
We have two Father’s Day gift ideas for you…a steak rub recipe and a crochet mustache jar cozy. Combine the two and not only will you create a tasty gift for dad, but a stylish one, too!
I’m not spoiling the surprise by sharing this gift idea with you. My dad likes plain old table salt. So, he’s not getting this particular rub. My husband, on the other hand, loves seasonings so much that his friends have nicknamed him “flavor boy”. He’ll be grilling with this rub for sure!
To round out this Father’s Day gift idea, we have created a crochet mustache jar cozy. Mustaches are distinctively masculine and 100% fun!
Let’s start with the Steak Rub Recipe. You may need to order our secret ingredient online if you can’t find it at a grocery store or seasoning shop.
Steak Rub Recipe
Father’s Day is just one excuse for grilling. This steak rub recipe is another!
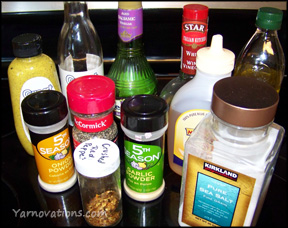
You’re going to love the rich bold flavor of our secret ingredient…smoked sea salt. Smoked salt captures both the scent and flavor of campfire cooking. It is my husband’s favorite seasoning, and it’s the #1 ingredient in our steak rub.
Note: we recommend getting a strong smokey salt. Look for words like “extra bold” or “bonfire”.
We’ve kept the quantity of this rub recipe small so you can sample it before committing to a large jar of it.
INGREDIENTS & SUPPLIES:
3 Tablespoons Smoked Sea Salt
2 Tablespoons Coarse Black Pepper
1 Tablespoon Garlic Powder
1 Tablespoon Spiced Ranch Mix (dry packet)
1 teaspoon Chili Powder
1 teaspoon Paprika
1 teaspoon Onion Powder
1/2 teaspoon Ground Mustard
1/4 teaspoon Cumin
DIRECTIONS:
Mix all ingredients together in a bowl.
Store in mason jar.
SERVING:
Brush steak with olive oil.
Sprinkle dry rub on steak. (We like lots of flavor so we spinkle approximately 1 Tablespoon on each side of a thick Ribeye)
Allow steak to rest at room temperature for 30 minutes before grilling.
Grill steak to desired temperature.
Enjoy!
Note: This tastes great on Pork Chops, too! Just sprinkle 1/2 teaspoon on each side. This rub is a little spicy.
Caution: Always use a clean spoon when scooping out seasoning for use on steak. You do not want raw meat to come into contact with seasonings that are being stored for later use.
Crochet Mustache Jar Cozy
Now that the rub is out of the way, let’s get to the crochet mustache jar cozy. This cozy can be used on jars and cups. Super fun!
We’re using Vanna’s Choice (worsted weight: 4) for this project. This is a great stash buster!
These are fun for everyday use…but here are some other “special” days you may want to break out these cozies for public admiration:
International Fake Mustache Day – February 3rd
National Fake Mustache Day – February 24th
Oakland A’s Mustache Day – June 18th
Movember: National Grow a Mustache Month– November
Techniques Used: Crochet in the Round, Crochet in Rows, Increase
SUPPLIES LIST:
Vanna’s Choice (Worsted Weight: 4) – Approx 21 yards total
Green Jar Cozy: FERN, ESPRESSO
(Pink Cozy: BERRYLICIOUS, ESPRESSO)
(Yellow Cozy: MSUTARD, ESPRESSO)
Hook: H / 8 / 5.00 mm
Yarn Needle for sewing
Crochet Mustache Cozy Pattern
JAR COZY INSTRUCTIONS
Fern
Hook: H
Ch 34, join with a sl st.
Rnd 1-10: Sc around. (34)
Join with a sl st. Cut yarn and weave in end.
MUSTACHE INSTRUCTIONS
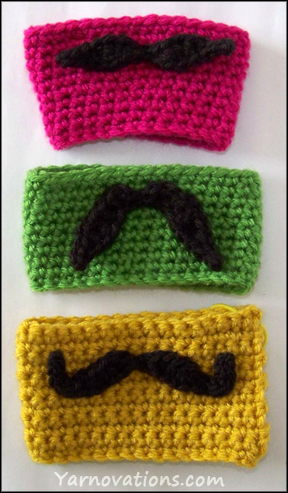
Creating mustaches with yarn was so much fun…I made three. Which is your favorite?
NOTE: Additional shaping of the mustaches is accomplished in the pinning and sewing of them to the cozy.
ENGLISH MUSTACHE INSTRUCTIONS (as seen on the pink cozy)
Espresso
Hook: H
Ch 16
Row 1: Sl st in 2nd ch from hook. Sl st, sc, hdc, dc, hdc, sc, sl st, sc, hdc, dc, hdc, sc, 2 sl st. (15)
Pin then sew mustache to top of cozy.
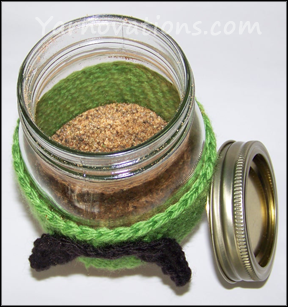
FU MANCHU MUSTACHE INSTRUCTIONS (as seen on green cozy)
Espresso
Hook: H
Ch 18
Row 1: Sl st in 2nd ch from hook. Sc, hdc, 2 dc, hdc, sc inc, sc, sl st, sc, sc inc, hdc, 2 dc, hdc, sc, sl st. Finish off leaving a long tail for sewing.
Pin then sew mustache to top of cozy.
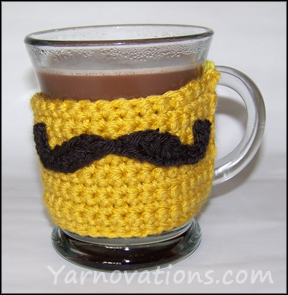
HANDLEBAR MUSTACHE INSTRUCTIONS (as seen on the yellow cozy)
Espresso
Hook: H
Ch 25
Row 1: Sl st in 2nd ch from hook. 5 sl st, sc, 4 hdc, 2 sl st, 4 hdc, sc, 6 sl st. (24)
Pin then sew mustache to top of cozy.
More Cozies in Store
Love this mustache cozy? There are more seasonal, holiday and just for fun cozies in our Crochet Cup Cozy Patterns eBook. We’ve created an entire collection with 28 designs one ebook.
Looking for the cup and mug version? They’re in the ebook.
Each design in the ebook has instructions to fit Mugs, Cups and Mason Jars. Every design has a delicious recipe or fun craft.
All 3 mustaches pictured at the beginning of this post are in this ebook! AND the ebook includes 4 new designs – Dracula, Vampire, Mummy and Blue Jeans.
We’re celebrating armed forces day with soup in a jar.
We are thankful for the men and women who serve our country in the military. We couldn’t resist creating an “MRE” (meals ready to eat) type recipe for this week’s mason jar.
This project is very simple to make. In fact, this cozy may be the easiest one’s we’ve made to date!
Armed Forces Day – Jar Cozy
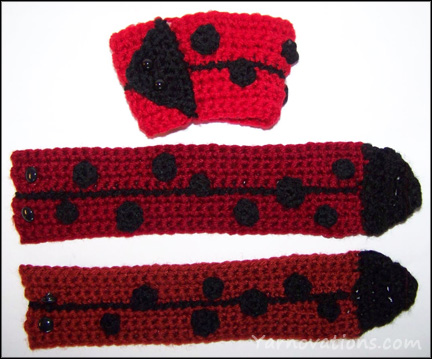
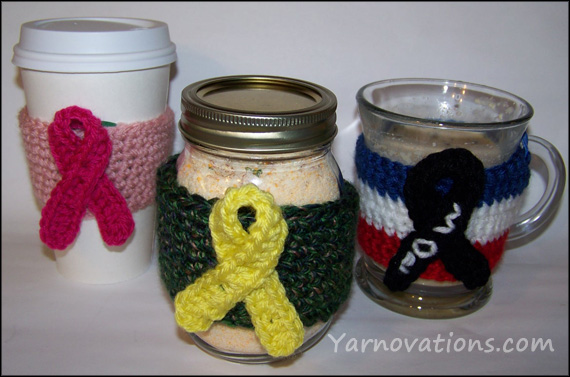
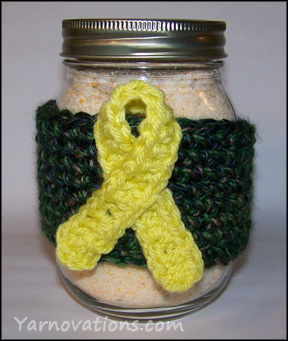
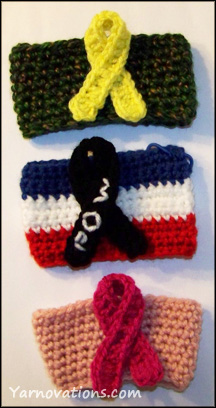
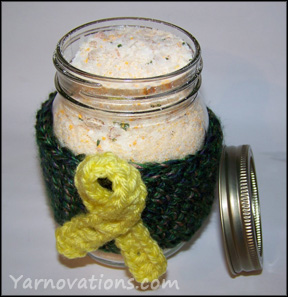
Many organizations use a crossed ribbon to help raise awareness of their cause. The yellow ribbon signifies a wish to see our troops come home. A black ribbon helps us remember prisoners of war and those missing in action.
Though it’s not military related, we are demonstrating how this cozy can be used for most any cause with a change of color. The pink ribbon is used to raise breast cancer awareness.
Rnd 9: 2 sl st. Leave remaining sts unworked. Finish off and weave in ends.
Ribbon Instructions
Radiant Yellow
Hook: H
Ch 30
Row 1: Work in the back loop only. Dc in 3rd ch from hook, dc across. Ch 2, sl st into base of last st made. Finish off leaving a long tail for sewing.
Embroider if desired.
Cross ribbon and sew to cozy. Weave in ends.
“Just Add Water” Soup in a Jar
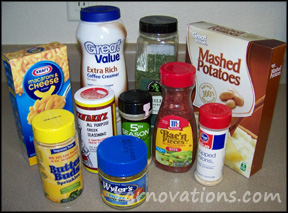
Most soup in a jar recipes require additional ingredients like meat, oil and dairy when the soup is being prepared. Those extra ingredients aren’t usually available to those who are roughing it. So we came up with the following “just add water” recipe.
As a side note: this recipe would be great for those who are camping or backpacking. And it would be a great snack item or quick meal for the kids, too!
Potato Cheese Soup Recipe
1 ½ cups instant mashed potatoes
1 cup instant coffee creamer (or powdered milk)
1/3 cup cheddar cheese powder (or 1 ½ packets of Kraft Mac and Cheese packets)
1 ½ teaspoons chicken bouillon
1 teaspoons dried onion flakes
½ teaspoon dried parsley
¼ teaspoon garlic
¼ teaspoon pepper
¼ teaspoon Greek Seasoning (or seasoning salt)
¼ cup imitation bacon bits (optional)
Mix all ingredients together thoroughly. Store in mason jar.
To serve, mix ½ cup soup mix with 1 cup boiling water. (For a thicker soup, use ¾ cup soup mix to 1 cup water).
Note: The imitation bacon bits are an over powering ingredient. Only add them if you know you like them.
“Just add water” Recipe Alternatives
There are other “just add water” foods you can use instead of the Potato Cheese Soup. If you’re looking for a simple alternative – buy pre-mixed foods. Be sure to include cooking instructions if these are a gift item.
Pancake Mix (Aunt Jemima)
Brownie Mix (Krusteaz)
Cornbread Mix (Marie Callender’s)
More Cozies in Store
Love this cause ribbon cozy? There are more seasonal, holiday and just for fun cozies in our Crochet Cup Cozy Patterns eBook. We’ve created an entire collection with 28 designs one ebook.
Looking for the cup and mug version? They’re in the ebook.
Each design in the ebook has instructions to fit Mugs, Cups and Mason Jars. Every design has a delicious recipe or fun craft.
All 3 of the cause ribbons pictured above are in this ebook! And there are 4 new designs – Dracula, Vampire, Mummy and Blue Jeans.
We celebrated Mother’s Day a week early…so I can reveal the mason jar cozy I made for her jar of bath salts.
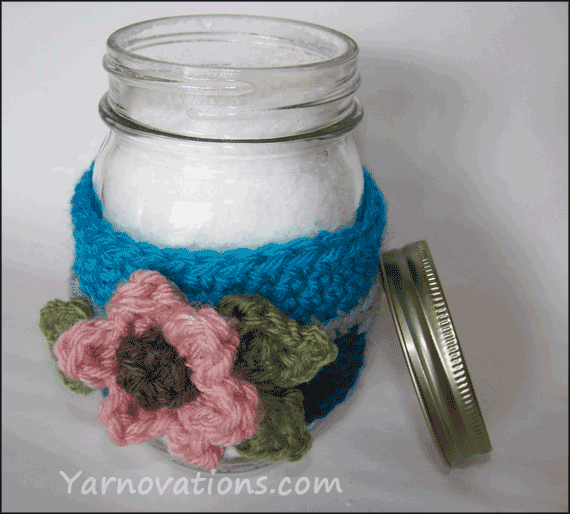
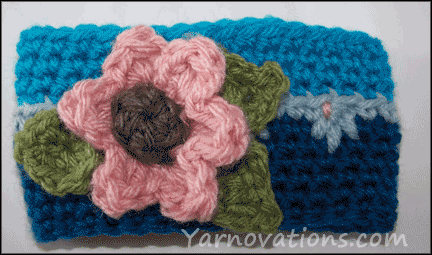
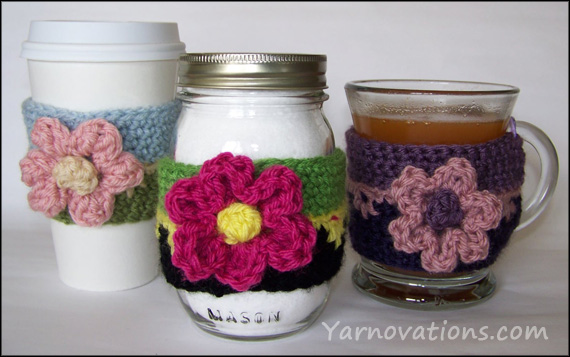
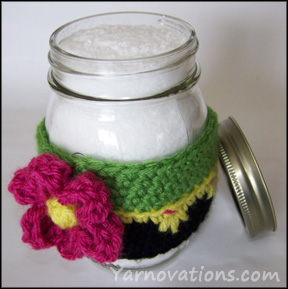
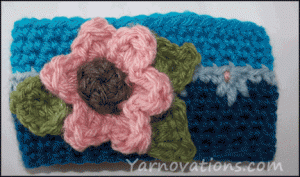
This cozy follows the FREE pattern on our post: How to make bath salts and a crochet flower cozy. This Mother’s Day cozy was crocheted with Vanna’s Choice yarns with a strong emphasis on teal colors to coordinate with my mother’s bathroom.
For this particular cozy, I added leaves. The pattern for those are below:
CROCHET LEAF PATTERN:
Hook: H
Ch 5
Rnd 1: Dc inc in 3rd ch from hook. Sc inc, sl st. Ch 2. Turn to other side of foundation Row. Sl st, sc inc, 3 dc in last st. Join with sl st. Finish off leaving a long tail for sewing.
That’s it. Make three (or as many as desired).
Wishing a Happy Mother’s Day to our mom and yours.
Learn how to make bath salts and pamper yourself (and your mom). Store the crystals in a mason jar and wrap it with a fun crochet flower cozy. This is a beautiful Mother’s Day gift idea. (Mom, if you’re reading this…I guess you know what you’re getting for your special day!)
The bath salts are surprisingly simple to make. We’ll start with them because you’ll want them to be completely dry before storing (otherwise the salt may get clumpy).
How to Make Bath Salts
As I mentioned, learning how to make bath salts is easy. The hardest part is figuring out what scent you want! Think about who the bath salt is for. If it’s for you, do you like floral? Do you want something relaxing or energizing? Do you like a lot of scent or just a hint of it?
Essential Oils are available in natural grocery stores. The bottles will list their scent as well as their characteristics. Some will even list whether they work well in a bath. Common scents include: peppermint, lavender, rosemary, eucalyptus and orange.
Scented Bath Salts Ingredients:
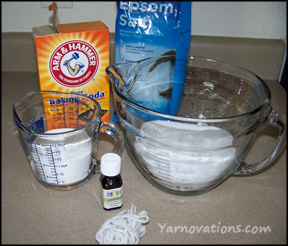
2 cups Epson Salts
1/2 cup Baking Soda (optional)
Essential Oil (as desired)
Scraps of Yarn
Aluminum foil
Cookie sheet
Note: Sea Salt can be used in exchange or in addition to Epson Salt. Table salt cannot be used.
Baking soda is a skin softener and is an optional ingredient. It can be used in equal parts to the salt.
Scented Bath Salts Directions:
Mix salt and baking soda together.
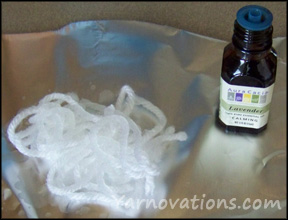
Sprinkle several drops of Essential Oil onto scraps of yarn. Stir yarn through bath salt mixture to desired strength of scent.
Repeat Step 2 if needed.
Line cookie sheet with aluminum foil. Spread salt mixture onto cookie sheet to dry.
Periodically stir salts. Allow to dry completely (overnight).
Store in mason jar.
How to Make a Crochet Flower Cozy for Mason Jar of Bath Salts
This crochet flower reminds me of the annual tradition my family had of planting flowers in my mother’s yard on Mother’s Day. That tradition was the inspiration for this cozy.
This crochet flower can be sewn directly to the cozy or affixed with a pin (something like a coiless pin would work well). Using a pin will allow the flower to be removed and used to decorate other things.
This is a great stash buster project. We’ve used Vanna’s Choice yarn (medium worsted weight). We love her blend of bright colors and pastels.
Skill Level: Intermediate
Stitches Used: Slip Stitch, Single Crochet, Double Crochet, Treble Crochet
Technique Used: Crochet in the Round. Cluster Stitch
Note: Replace the cluster stitch with a single crochet and this Intermediate pattern would be rated Easy.
Cluster Stitch:Insert hook into next stitch (the current working stitch), YO, draw through stitch, YO, pull through one loop on hook, insert hook in the stitch one row below and one stitch back, YO (pulling yarn from the inside of the project), pull through stitch, YO, pull through one loop on hook, insert hook two rows below the current working stitch (pulling yarn from the inside of the project), YO, draw through stitch, YO, pull through one loop on hook, insert hook in the stitch one row below and one stitch ahead of the current working stitch (pulling yarn from inside the project), YO, pull through stitch, YO, pull through one loop on hook, YO, pull through all five loops on hook. *Note, the next working stitch is under the last YO.
Black
Ch 34, join with a sl st.
Rnd 1-4: Sc around. (34)
Rnd 5: Sc around. Change color to Radiant Yellow with sl st. Ch 1. Finish off Black and weave in ends. (34)
Rnd 6: 2 sc, *cluster st, 3 sc* around. End with 3 sc. Change color to Fern with sl st. Ch 1. Finish off Radiant Yellow and weave in ends. (34)
Rnd 7: Working in the back loop only, sc around. (34)
Rnd 8-9: Working in both loops now and throughout, sc around. (34)
Rnd 10: 33 sc, sl st. Finish off and weave in ends. (34)
With 12” length of Raspberry yarn, embroider a small stitch into the center of the cluster st.
FLOWER INSTRUCTIONS
Center
Radiant Yellow
Ch 3
Rnd 1: 5 dc in third ch from hook. (Count ch-3 as first dc). (6)
Rnd 2: Working in back loops only, sc around. Finish off leaving a long tail for sewing. (6)
Attach Raspberry to the front loop of any stitch of Rnd 2.
Rnd 3: Work the following stitches in the front loop of each stitch around, (sc, dc, trc, dc, sc). Finish with a sl st in the first sc made. Finish off and weave in end. (6 petals made)
Sew flower to cozy.
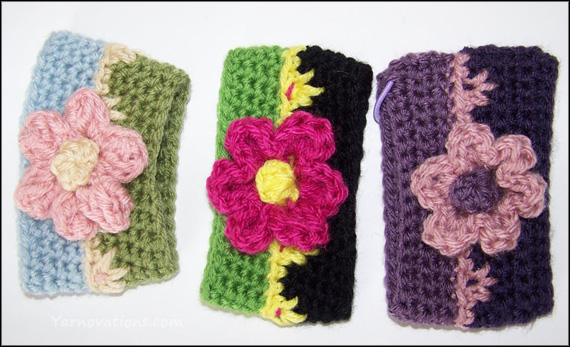
Note: Turn the edges of the flower under for a puffy looking flower (as seen in the pastel cozy on the far left). Or leave ends of Rnds out for a layered look (like the two on the right).
UPDATE: I recently added leaves to this cozy. You can get the pattern to the leaves on the Crochet Mother’s Day Gift post.
More Cozies in Store
Love this flower cozy? There are more seasonal, holiday and just for fun cozies in our Crochet Cup Cozy Patterns eBook. We’ve created an entire collection with 28 designs one ebook.
Looking for the cup and mug version? They’re in the ebook.
Each design in the ebook has instructions to fit Mugs, Cups and Mason Jars. Every design has a delicious recipe or fun craft.
All 3 flowers pictured at the beginning of this post are in this ebook! AND the ebook includes 4 new designs – Dracula, Vampire, Mummy and Blue Jeans.
There are many Spiced Tea Recipes, but this is my all time favorite. Some people call it Russian Tea. And because I have a sweet tooth, I like this really sweet blend.
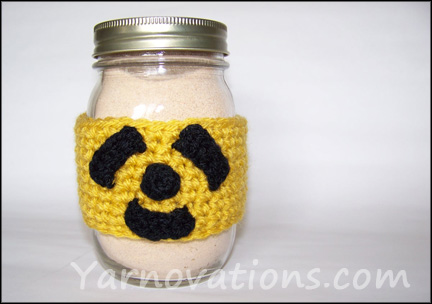
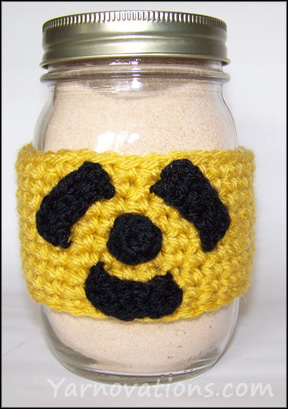
We’re packaging this tea in a mason jar which is perfect for gift giving. Since it’s loaded with sugar, the crocheted cozy with the radioactive symbol on it is definitely fitting! This cozy would be perfect for any “toxic” drink (tea, coffee, hot chocolate) or food (bean or split pea soup).
Let’s start with the Spiced Tea. Then you can enjoy a cup while you crochet the radioactive cozy!
Spiced Tea Recipe
This Spiced Tea Recipe has been in the family for years. So I’m not sure who to credit for this particular combination (if you know, please leave me a comment below). You can adjust the sweetness of your tea by adding more or less to your cup of hot water.
This spiced tea is a cross between hot apple cider and orange juice. Yum!
Ingredients:
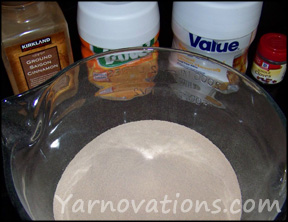
1 cup Instant sweetened lemon tea
1 cup Tang
½ to 1 ½ teaspoon cinnamon
¼ teaspoon cloves
Directions:
Mix all ingredients together in a bowl.
Store in mason jar.
Serving:
Add 3 teaspoons to 1 cup boiling water (adjust quantity to desired sweetness).
Crochet Mason Jar Cozy with Radioactive Symbol
If you like your beverage a little stronger than most, the radioactive symbol is the perfect image for your cup cozy! It’s also a cute way to adorn a gift for April Fools Day (April 1)…just sayin’.
This is a quirky and delightful way to use up your yarn stash. We’ve used Vanna’s Choice. Use Mustard or Radiant Yellow for a traditional cozy or try a Radiant Lime to represent the radioactive material inside your cup or mason jar!
Skill Level: Intermediate
Stitches Used: Chain, slip stitch, single crochet, no foundation chain double crochet
Techniques Used: Crochet in the Round
Supplies:
Vanna’ Choice Yarn: MUSTARD, BLACK
Mason Jar
Jar Cozy Instructions
Mustard
Hook: H
Ch 34, join with a sl st.
Rnd 1-9: Sc around. (34)
Join with a sl st. Cut yarn; weave in end.
Radioactive Symbol Instructions
Center Circle Instructions
Black
Hook: C
Ch 3
Rnd 1: 7 hdc in 3rd ch from hook. Join with a sl st. (7)
Finish off leaving a long tail for sewing.
Outer Semi-circle Instructions (make 3)
Black
Hook: C
Ch 4
Row 1:Ncfdc in 4th ch from hook, 3 ncfdc, Ch 3. Sl st in base of dc. (5)
Finish off leaving a long tail for sewing.
Assembly Instructions
Pin then sew Radioactive symbol to cozy. Weave in ends.
More Cozies in Store
Love this radioactive cozy? There are more seasonal, holiday and just for fun cozies in our Crochet Cup Cozy Patterns eBook. We’ve created an entire collection with 28 designs one ebook.
Looking for the cup and mug version? They’re in the ebook.
Each design in the ebook has instructions to fit Mugs, Cups and Mason Jars. Every design has a delicious recipe or fun craft.
The ebook includes 4 new designs – Dracula, Vampire, Mummy and Blue Jeans.
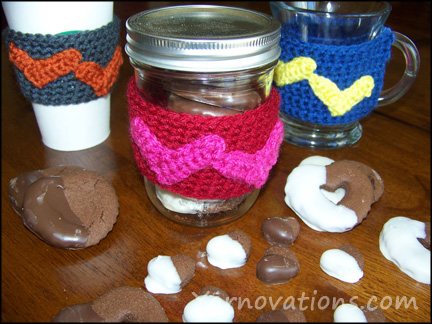
Chocolate Peppermint Cookie Recipe with Valentine Jar Cozy
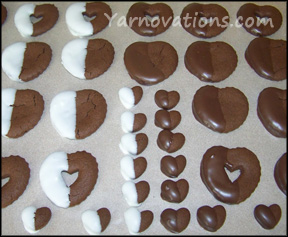
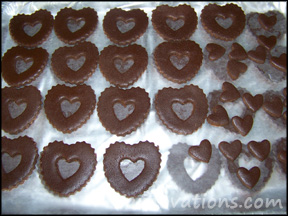
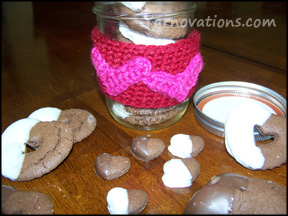
The heart shaped chocolate peppermint cookie recipe is so delicious…you may need to make a double batch! Wrap the mason jar with this Valentine cup cozy and you’ve got yourself a sweet minty gift!
We used a Linzer cookie cutter (you know, the cutter that makes jelly filled cookies). Check the seasonal/holiday aisle at your local craft store. Or, if you’re seeing this after Valentine’s Day, you may need to check the cake decorating aisle.
Fortunately or unfortunately, my hubby doesn’t like peppermint. So, this was a happy heart day to me…and my sister…and my parents…and my neighbors. Everyone else seems to like peppermint.
Let’s start with the cookie recipe. It needs to bake and cool and stuff.
Chocolate Peppermint Cookie Recipe
This chocolate peppermint cookie recipe makes crisy and crunchy cookies. They don’t raise too much in the baking which allows them to keep their shape. I found that the cookies with shapes cut out of the center hold their heart shape better than the ones that are solid hearts.
And if you do cut out a heart shape from the middle…you can bake those mini hearts for bite size minty treats!
INGREDIENTS & SUPPLIES:
Peppermint Chocolate Coookie:
1 ¼ cup flour
½ cup unsweetened cocoa powder
½ teaspoon baking soda
¼ teaspoon baking powder
¼ teaspoon salt
6 Tablespoons butter softened
1 cup sugar
1 egg
¾ teaspoons peppermint extract
1 Wilton Linzer Cookie Cutter
Mint Chocolate for Dipping
12 oz. chocolate – white or chocolate flavor
3/8 teaspoon peppermint extract
Wax paper
DIRECTIONS:
Wisk together flour, cocoa, baking powder, baking soda and salt. Set aside.
In electric mixer, beat butter, egg, sugar and ¾ teaspoon peppermint extract together.
Add flour mixture and beat until well blended. Dough will be crumbly.
Kneed dough on counter top. Roll out dough to about 1/8” thickness. Cut out cookie shapes. If shapes stick to counter, lift with a spatula. Lay on cookie sheet (separate with wax paper if needed) and refrigerate for 2 hours.
Bake on ungreased cookie sheet at 350° for 10 minutes. Cool on a wire rack.
Melt chocolate in microwave at 30 second increments until it can be stirred smooth. Do not over cook.
Stir in 3/8 teaspoon peppermint extract.
Dip one side of the cookie into chocolate. Lay on wax paper to dry and harden.
Store in mason jars!
Double Heart Cozy for Jar of Chocolate Peppermint Cookies
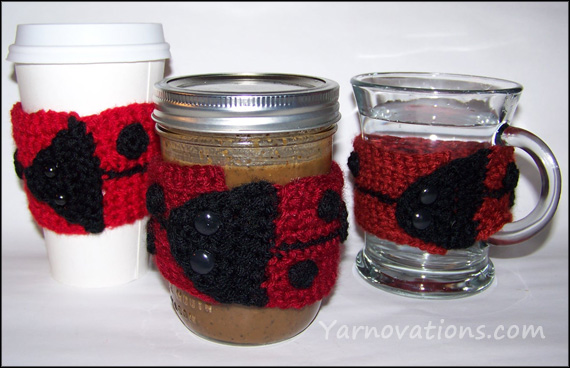
Crochet your special Valentine a whimsical jar cozy. This fits a Starbucks coffee cup, too, so he (or she) will be able to carry your love with him (or her) on the go!
The double heart cozy is quite simple and whips up in a jiffy. It’s designed to fit a pint size mason jar…which is the perfect size for storing chocolate peppermint cookies! Yum.
Stash buster! This is a great project to make with your remnants. We are using Vanna’s Choice. This line has a lot of great complimentary colors from which to choose.
Skill Level: Easy
Stitches Used: chain, single crochet
Techniques Used: increase, crochet in the round
Materials:
Vanna’s Choice Medium Worsted (4)
CRANBERRY, RASPBERRY
Crochet Hook: H and F
Mason Jar
COZY INSTRUCTIONS:
Cranberry
Hook: H
Ch 34, join with a sl st.
Rnd 1-10: Sc around. (34)
Join with a sl st. Cut yarn; weave in end.
PAIRED HEARTS INSTRUCTIONS:
Raspberry
Hook: F
Ch 7
Row 1:Sc in 2nd ch from hook. 4 sc, sc inc. (7)
Row 2:Ch 1, turn. Sc inc, sc across. (8)
Row 3:Ch 5, turn. Sc in 2nd ch from hook. 3 sc. 3 sl st in Row 2. (7)
Love this heart cozy? There are more seasonal, holiday and just for fun cozies in our Crochet Cup Cozy Patterns eBook. We’ve created an entire collection with 28 designs one ebook.
Looking for the cup and mug version? They’re in the ebook.
Each design in the ebook has instructions to fit Mugs, Cups and Mason Jars. Every design has a delicious recipe or fun craft.
All 3 hearts pictured at the beginning of this post are in this ebook! AND the ebook includes 4 new designs – Dracula, Vampire, Mummy and Blue Jeans.
It’s a hoot making this mason jar soap dispenser with crochet owl cozy! This woodland creature makes washing hands fun. Those great big eyes won’t miss a thing.
Dirty hands can spread germs. So take a few squirts of soap from this wise owl and wash that grime away.
This fun soap dispenser is great for bathrooms or kitchens. Crochet the cozy in colors that coordinate with your home décor.
Let’s start with the mason jar soap dispenser…and get our hands clean before we start on the crochet owl.
Mason Jar Soap Dispenser How-to
We’re taking the easy way out…and creating a mason jar soap dispenser from an existing soap dispenser. Its best if you select your yarn colors first…then you can bring them to the store to help select a dispenser pump in a color that will coordinate well.
SUPPLIES:
1 pint size canning jar with lid
16 oz liquid soap
1 soap dispenser (we used Softsoap® brand)
TOOLS:
Knife and cutting board
½” drill bit and drill
Clamp
Scrap wood
Paper, pencil and Scissors
Hammer and nail
Metal file
Glue Gun
DIRECTIONS:
Trace the flat lid on a piece of paper. Cut out the circle you just traced with scissors. Fold the paper in half twice to find the center of the paper.
Place the paper on top of the lid and clamp to a piece of scrap wood. With hammer and nail, put a small hole in the center of the lid.
Remove the paper and reclamp the lid to the scrap wood. Drill a ½ inch hole into the center of the lid. You may need to move the drill around a bit to make the hole slightly bigger than ½ inch.
If there are any sharp edges around the hole, sand down with a metal file.
Remove the pump from its original dispenser and wash and dry it. Test to see if it fits into the hole in the lid. If not, repeat steps 3 & 4 as needed.
Place lids and pump onto jar to make sure the parts fit. If the pump is too tall, cut the base of the stem off at the same angle using a knife and cutting board. You only want to cut off as much as needed to get the stem to almost touch the base of the mason jar.
You may need to secure the pump to the lid. To do so, insert pump into lid and turn to the bottom side. Use glue gun to adhere pump to lid.
Pour liquid soap into mason jar. Attach lid. Pump the dispenser several times until soap starts to come out of it.
Wash hands…you’re good to go!
Mason Jar Soap Dispenser Owl Cozy
So you’ve finished your mason jar soap dispenser. Now it’s time for the crochet owl cozy!
This is a fun little project that you can whip up in an evening. It’s a great stash buster, too. We used Vanna’s Choice because she’s got so many fun colors that work beautifully for a girl or boys room.
SUPPLIES:
Vanna’s Choice Yarn: Worsted Weight (4)
Chocolate, Terracotta, Mustard, Black, White
(other combos: Chocolate with Beige; Radiant Lime with Raspberry)
Crochet Hook: J / 10 / 6.00 mm
Crochet Hook: H / 8 / 5. 00 mm
Crochet Hook: F / 5 / 3.75 mm
Yarn Needle
COZY INSTRUCTIONS:
Chocolate
Hook: J
Ch 32, join with a sl st.
Rnd 1: Ch 1 (do not count as a st), hdc around. Skip the ch 1; join with a sl st. (32)
Rnd 2-3: Ch 1, hdc around. Skip the joining stitch and the ch 1, join with a sl st. (32)
Finish off. Cut yarn; weave in end.
Attach Terracotta to the back loop of any stitch.
Rnd 4: Work in back loops only. Ch 1, hdc around. Skip the ch 1, join with a sl st. (32)
Rnd 5-6: Work in both loops. Ch 1, hdc around. Skip the join and the ch 1, join with a sl st. (32)
Finish off, weave in end.
WING INSTRUCTIONS (make 2):
Chocolate
Hook: J
Ch 8
Row 1: Dc in 4th ch from hook (count first three ch as the first dc), 4 dc. (6)
Row 2: Turn. 5 dc down the post of the 3rd dc, ch 1, 5 dc up the post of the next dc, skip a dc, sl st in the top of the last st. (1 crocodile stitch made)
Finish of, weave in end.
Attach Terracotta to the last st made.
Row 3: Ch 4, turn. Dc in 4th ch from hook, work 6 dc across the top of Row 2, work a ncfdc in the last st, 2 nfdc. (11)
Row 4: Work 5 dc down the post of the 3rd dc, ch 1, work 5 dc up the post of the next dc, skip a st, sl st in the front loop of the next st, skip a st, 5 dc down the post of the next st, ch 1, work 5 dc up the post of the next st, skip a st, sl st in the last st. (2 crocodile stitches made)
Row 5: Ch 3, turn. Work 10 dc across. (11)
Row 6: Repeat row 4.
Finish off leaving a long tail for sewing.
EYES INSTRUCTIONS (make 2):
Black
Hook: F
Ch 2
Rnd 1: 6 sc in 2nd ch from hook. Join with a sl st. (6)
Finish off, weave in end.
Attach Terracotta any stitch.
Rnd 2: Sc inc around. Join with a sl st. (12)
Finish off, weave in ends.
Attach White to any st.
Rnd 3: *Hdc, Hdc inc* around. Join with a sl st. (18)
Finish off leaving a tail for sewing.
BEAK INSTRUCTIONS:
Mustard
Hook: J
Ch 4
Row 1: Sc in 2nd ch from hook, 2 sc. (3)
Row 2: Turn, sc the first and second stitches together, sc the second and third stitch together. (2)
Row 3: Turn, sc dec. Finish off. Cut yarn leaving a tail for sewing. (1)
Turn the foundation ch down under the beak.
ASSEMBLY INSTRUCTIONS:
Sew Eyes on Rnds 2-4 so they are touching or as desired. Weave in ends.
Sew Beak centered below and touching the Eyes.
Sew Wings just above the unused front loops. Sew up to the stitch next to the Eyes and 8 other stitches. There should be about 5 or 6 unused loops in the back between the Wings.
More Cozies in Store
Love this owl cozy? There are more seasonal, holiday and just for fun cozies in our Crochet Cup Cozy Patterns eBook. We’ve created an entire collection with 28 designs one ebook.
Looking for the cup and mug version? They’re in the ebook.
Each design in the ebook has instructions to fit Mugs, Cups and Mason Jars. Every design has a delicious recipe or fun craft.
All 3 owls pictured at the beginning of this post are in this ebook! AND the ebook includes 4 new designs – Dracula, Vampire, Mummy and Blue Jeans.
This peppermint bark recipe will melt in your mouth. You better give some away as gifts…cause you’ll be tempted to eat it all yourself! It looks deliciously adorable in a pint size canning jar all dressed up in a Santa cozy!
Let’s get right to the recipe…cause it needs to cool in the fridge. That’ll give you lots of time to whip up a cozy or two.
Peppermint Bark Recipe
INGREDIENTS:
10 oz Ghirardelli 60% Cacao Bittersweet Chocolate baking chips
11 oz Ghirardelli Classic White baking chips
1/2 teaspoon peppermint extract – divided
10 candy canes
DIRECTIONS:
Line a 9×13 pan with foil. Spray with non-stick cooking oil.
Melt Bittersweet chips in microwave stirring every 30 seconds. Stir in 1/4 teaspoon peppermint extract. Spread into foil-lined pan.
Place candy canes in ziplock back and crush into big chunks with a hammer. Lightly press 1/3 of the candy canes onto chocolate layer. Place in freezer for 5 to 10 minutes as you prepare the next ingredients. You want the chocolate just firm enough that you can spread the next layer on top without them swirling.
Sift remaining candy cane pieces. Set aside bigger chucks to be used as topping at the very end.
Melt White chips in microwave stirring every 15 seconds. Stir in 1/4 teaspoon peppermint extract. Stir in smallest pieces of crushed candy canes. Spread smoothly over chocolate layer. Sprinkle remaining larger chunks of candy canes on top and refrigerate for 2 hours or until completely firm.
Turn pan upside down on a towel and remove foil. Break from bottom side (Bittersweet layer) into large pieces. Breaking from the bottom will prevent the candy canes on the top side from being crushed.
This Peppermint Bark Recipe is Perfect for the Santa Jar Cozy – Here’s the Crochet Pattern
With the peppermint bark cooling in the refrigerator, let’s get right to the Santa Jar Cozy. This cozy fits nice and snug around a pint size canning jar. Which is the perfect size for storing home made goodies like soups, cookies, fudge and…peppermint bark!
This is a great stash buster! We used Lion Brand yarns from Vanna’s Choice, Vanna’s Glamour and Fun Fur. The colors of these yarns make the Santa cozy jolly and bright!
Supplies:
1 Pint size canning jar
Vanna’s Choice: Medium Worsted Weight (4)
CRANBERRY, BLACK, WHITE
Vanna’s Glamour: Fine (2)
GOLD
Lion Brand Fun Fur: Bulky (5)
WHITE
Crochet Hooks: H, C
Yarn Needle
COZY INSTRUCTIONS:
White and White Fun Fur held together
Hook: H
Ch 34 Join with a sl st.
Rnd 1: Working in counter-clockwise direction, sc around. Join with a sl st. (this allows the hairiest part to be on the outside). (34)
Finish off and weave in ends.
Attach Red and work in clockwise direction here and throughout.
Rnd 2: Ch 1, sc around in back loop only. (34)
Rnd 3-4: Sc around in both loops (now and until otherwise stated). (34)
Rnd 5: 33 sc, sl st. (34)
Drop red. Attach Black
Rnd 6: Ch 1, 33 hdc, sc, join with a sl st. (34)
Finish off Black and weave in ends.
Pick up Red.
Rnd 7: Working in the back loops only this Rnd: *4 sc, fptrc in the red post below the black (from Rnd 5)* 3 times. 8 sc, fptrc in the red post below the black (from Rnd 5). *4 sc, fptrc in the red post below the black (from Rnd 5)* 2 times (34)
Rnd 8-11: Sc around in both loops. (34)
Sl st. Finish off and weave in ends.
Trim white fun fur to ¼” length.
BELT BUCKLE INSTRUCTIONS
Gold
Hook: C
Ch 17
Row 1: Sl st in 2nd ch from hook. 3 sl st, ch 1, *skip ch-1, 4 sl st, ch 1* 2 times. Skip ch-1, 4 sl st. (16)
Finish off leaving a long tail for sewing.
Pin then sew belt buckle in a square over the black “belt” centered between the fptrc’s that have 8 stitches between them (sts 15-24). Weave in ends.
More Cozies in Store
Love this Santa cozy? There are more seasonal, holiday and just for fun cozies in our Crochet Cup Cozy Patterns eBook. We’ve created an entire collection with 28 designs one ebook.
Looking for the cup and mug version? They’re in the ebook.
Each design in the ebook has instructions to fit Mugs, Cups and Mason Jars. Every design has a delicious recipe or fun craft.
All 3 of the Santas pictured above are in this ebook! And there are 4 new designs – Dracula, Vampire, Mummy and Blue Jeans.
All patterns are written in US terms.
*****9/15/23 Great news! We are moving our store to Etsy. Some of our links will redirect you there for your convenience.
Dana (left) with Deborah (right) and her two boys.
Yarnivores have incredible appetites. But we should always remember our manners as we consume our fiber arts patterns.
YARNOVATIONS POLICY:
PURCHASED patterns may NOT be copied or distributed. They are for your eyes only.
FREE patterns MAY be copied and distributed as long as you credit the author and Yarnovations.com. Copyright information is in the footer of all the documents, so that should be pretty easy to do.
ALL items made following one of our patterns are yours to do with as you wish. You may give away and sell your handiwork. Share the art of crochet and yarn art with the world by sharing your hand made items.