Mushroom Pin Cushion with Basket Crochet Pattern

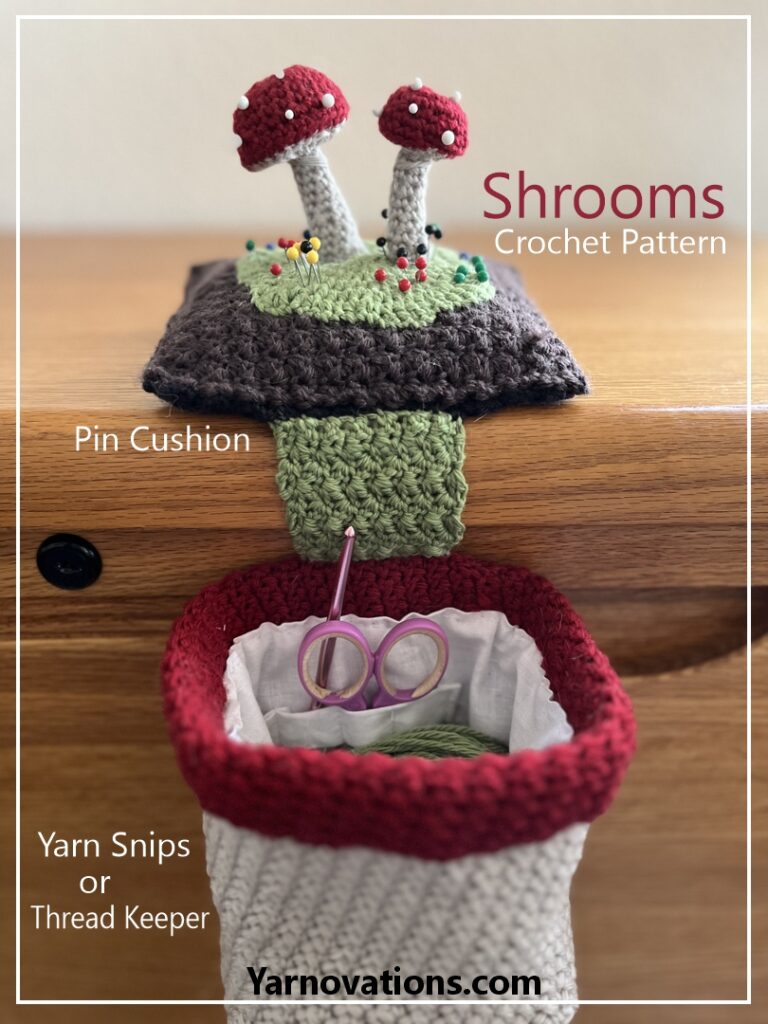
Mushroom Pin Cushion with Basket is an easy crochet pattern you can make in a weekend. It’s darling to display but even more fun to use. It’s the perfect size for collecting yarn snips (or candy wrapper). If you like to sew or embroider, it’s great for tossing thread snips as well. Or, you could store notions it it for crochet, knitting, weaving, sewing and quilting.

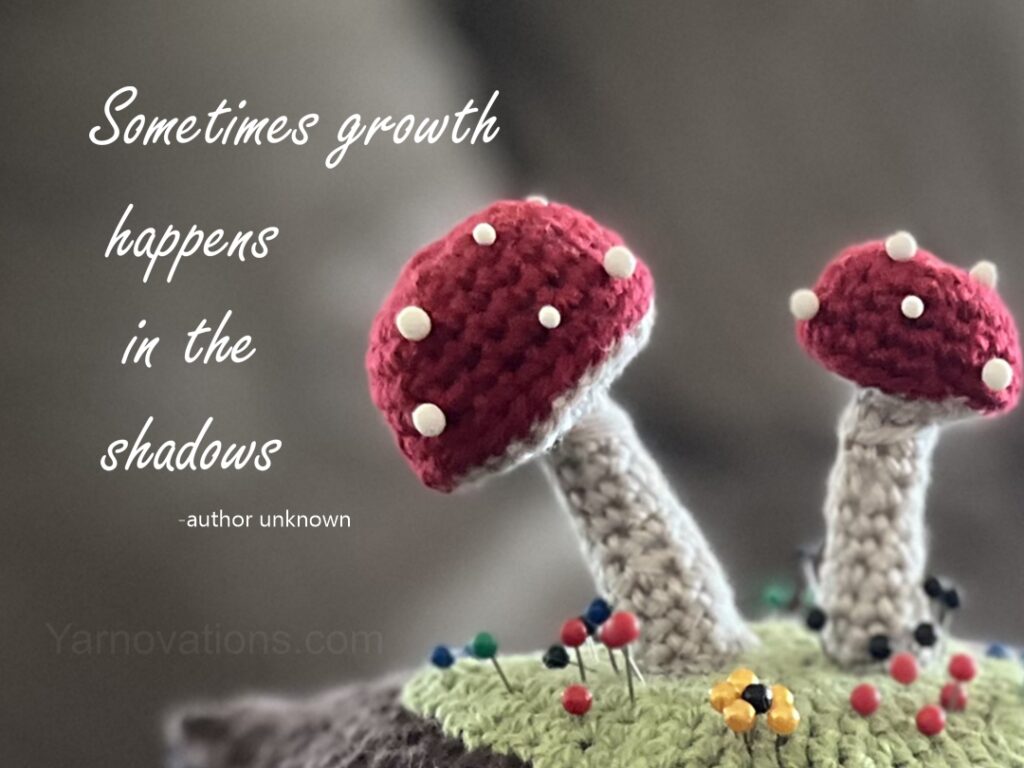
I, Dana, woke up one day with a vision for mushrooms on a grassy knoll. I wasn’t sure if I could recreate my vision…but it came out pretty much as I’d envisioned it. I love that it can be decorated with straight pins. I love that it’s cute…and practical at the same time.

About the Mushroom Pin Cushion and Project Bag Crochet Pattern

The crochet pattern includes everything you need to recreate a mushroom pin cushion with basket of your own. It includes:

  • Mushroom in 2 sizes
  • Basket
  • Connector Piece
  • Tab for holding mini scissors, crochet hook and pencil
  • Step by step written instructions
  • Written in US terms

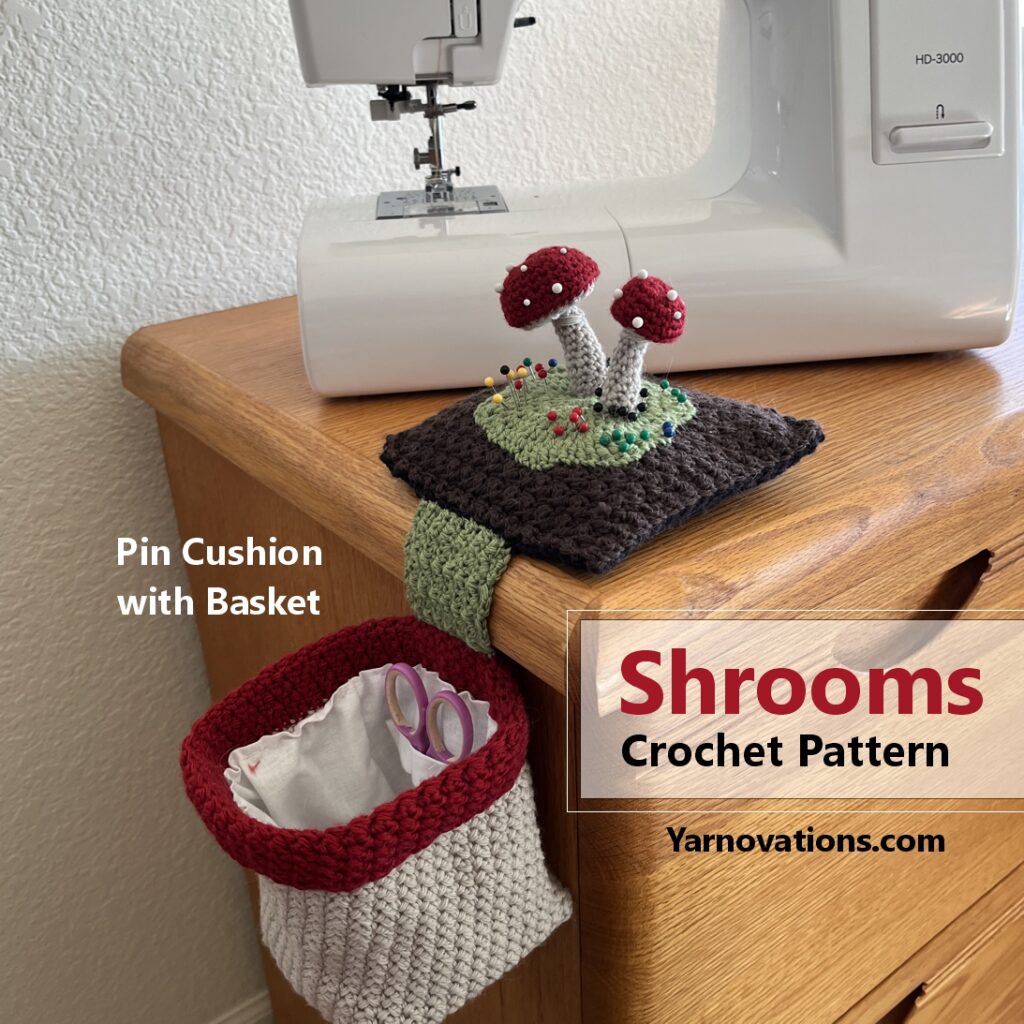
The size is great for putting on a side table, arm of a chair or at your work table. My mushroom and basket has a permanant home on my desk which doubles as my sewing table. The measurements are approximately:

  • Pin Cushion: 5.75″ wide x 5.75″ deep x 3.5″ tall
  • Basket: 4″ wide x 4″ deep x 5″ tall

The crochet pattern is rated easy because there aren’t lots of stitch patterns. It is made with stitches as small as a slip stitch and as large as a double treble. Pieces are worked in the round and in rows. It’s interesting to note that the same stitch pattern is used on the bean bag (base of pin cushion) and on the basket. But they look different because one is crocheted in rows and the other in the round.

Mushroom Pin Cushion and Basket on Etsy

The Mushroom Pin Cushion and Basket first appeared in Crochet World Summer 2024. We have the rights back to sell direct to you. Find it now in our Etsy Shop.

Buy the pattern on etsy

The Mushroom Pin Cushion and Basket is So Useful!

One of the things I love most about this Mushroom Pin Cushion with Basket is that it’s useful for lots of different hobbies. It has a little tab sewn to the lining with 3 sections to hold small things like pencils, mini scissors and crochet hooks. Here are my favorite ways to use the mushroom pin cushion and basket…and yes, I’ve used it for each of these things:

  • Project bag
  • Yarn snips trash basket (for knitting, crochet and weaving)
  • Thread keeper (trash basket) (for sewing, quilting and embroidery)
  • Notions keeper (sewing clips, stitch markers, etc).

Yarn for Mushroom Pin Cushion and Basket

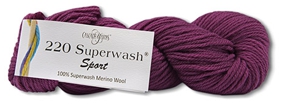
The yarn used to make the Mushroom Pin Cushion and Basket is Cascade 220 Superwash Sport. It’s a light weight (size 3) superwash merino wool yarn. As of today, it comes in 83 colors! We chose this yarn specifically for color options and yarn weight. It is thin enough to create beautiful stitch definition and sturdy enough to hold the 3D shape of the mushrooms (with fiber-fill stuffing inside).

Get your copy of the Mushroom Pin Cushion and Basket now.

Heartfelt Pillow Crochet Pattern

Vibrant, colorful, and floral, this crochet pillow is lovely not only around Valentine’s Day, but all year long. The rainbow of colors make it a great addition for spring and fall decorating…and summer, too! And placing the flowers in a heart shape captures how we all feel about them…we love them.

This Floral Heart Pillow Crochet Pattern includes lots of helpful photos to make everything you see. The pattern includes:

  • 8 Colorful Flower Patterns – each with Step-by-Step Photos
  • 1 Green Leaf Pattern – with Step-by-Step Photos
  • 1 Shell Stitch Throw Pillow
  • 1 Tassel Instructions

Make the pillow exactly as we did, or mix things up a bit. You can create pillow with a wreath by placing the flowers in a ring. Or, make the flowers individually, glue them to a chop stick and make floral picks. Make the pillow without the flowers for a nice textured accent pillow. Make the flowers for wedding bouquets or home coming corsages. Make flower accent pins, headbands, barrettes and more.

What will you make with your crochet flowers and pillow?

Heartfelt Floral Pillow Crochet Pattern on Etsy

The Heartfelt Floral Pillow Crochet Pattern is now available in our Etsy Shop.

Available now on Etsy.

Buy the pattern on etsy

Crochet Shell Stitch Dishcloth Plus Table Runner Pattern

The crochet shell stitch kicks off our journey to crochet a dishcloth each month using a different crochet stitch. This set, named January Snow, includes a lacy dishcloth and gorgeous table runner both using the crochet shell stitch. We especially love how the shell stitch pop next to solid sections of double crochet on the table runner. And this stitch creates a nice frilly edging, as well.

This crochet shell stitch creates a dishcloth that is simple, elegant and lacy. This open work design is very drapey and flexible. It’s especially well suited for washing cups and glasses and strong enough to handle pots and pans, too.

About the January Snow Crochet Dishcloth Pattern

We’ve rated this pattern easy. It’s very approachable for those who know how to single crochet and double crochet. It’s worked primarily in rows with edging worked in the round.

Dishcloth: 10 ¼” x 10 ¼”; Table Runner: 33 ½” x 11 ½”

Materials used in this crochet dishcloth and table runner include:

  • Yarn: FibraNatura distributed by Universal Yarn: Good Earth ‐ Medium (4)
    color: CRYSTAL ‐ 3 skeins (1 for dishcloth, 2 for table runner)
  • Hook: F/5/3.75mm
  • Needle: Yarn Needle for sewing

Dishcloth+ Series

This shell stitch dishcloth is the 1st in our Dishcloth + series. We’ve consolidated them into a single ebook called Dishcloth+ ebook: 12 Dishcloths & 12 Accessories Crochet Pattern PDF which is available in our Etsy shop: YarnovationsShop.

You’ll learn lots of fun crochet stitches including:

  • V Stitch
  • Berry Stitch
  • Corner to Corner C2C
  • Moss Stitch or Woven Stitch
  • Fantail Stitch
  • Bobble Stitch
  • Fan Stitch
  • Star Stitch
  • Basketweave Stitch
  • Bead Stitch
  • Pentagon Pattern
  • Crochet Cable

It’s full of fun and practical items for the kitchen and home including:

  • Placemat
  • Hot pad
  • Plant Hanger
  • Table Runner
  • Cup Cozies for mug with handle, tapered glass, mason jar
  • Casserole Cover with zipper
  • Tea Towel
  • Tea Towel Dress Topper
  • Apron
  • Market Bag
  • Bread Bowl Liner

Dishcloth+ on Etsy

January Snow and entire Dishcloth+ ebook are available now in our Etsy shop: YarnovationsShop.

If you love making dishcloths, we also have a pattern pack of 7 dishcloths made with the single crochet stitch!

Learn more about each dishcloth pattern set in Etsy shop.

Available now:

Cardinal Christmas

Cardinals aren’t just sport mascots, they are a gorgeous reminder of Christmas. The cardinal from Birds of a Feather, Volume 1 is a lot of fun to use for decorating and gifting. Here’s how I’d use the 3 pictured above:

  • Smallest cardinal (right) is crocheted in cotton thread and would be adorable looped on a handbag as a charm.
  • Medium sized cardinal is crocheted in medium worsted weight yarn and is the perfect size for hanging on a tree (see photo below).
  • Largest cardinal is crocheted in super bulky yarn and it’s big. It would be a noticeable accent on a dinner table or bookshelf.
cardinal made from yarn from 2 small granny squares. Hanging as an Christmas ornament on an evergreen tree.

Want to know more about how to crochet smaller or larger granny square birds? Check out our blog post: Granny Square Birds in Different Yarn Weights blog post.

Birds of a Feather on Etsy

We have 19 granny square birds available in 2 volumes. Learn more on Etsy:

Evergreens, Crochet World Winter 2025

Evergreens often remind me of winter and Christmas time. Why is that? They are green all year long! These darling crocheted evergreen trees are easy to make and can be enjoyed all year. I often put them out at Christmas, and put them away well into the new year. Now you can crochet your own evergreens as well!

Available on newsstands now, Crochet World magazine’s Winter 2025 is full of fun winter and Christmas-time projects perfect for wearing, decorating and gifting. We have another adorable pattern in the issue…Evergreen Trees! We show the trees in two different crochet stitch patterns and the instructions walk you step by step how to assemble them.

Each tree is crocheted with Omega Otono worsted weight yarn. They are crocheted with simple stitches and have simple construction making these fun and easy for beginner crocheters.

Just for added fun, I, Deborah, decided to create the little wooden reindeer as well! I saw a video of someone making one on a band saw, and cut one out myself using a scroll saw. I don’t do a lot of woodworking, but I was pleased with the result. It’s a cute little addition to my winter scene. Here’s the video of the reindeer using the band saw: https://www.youtube.com/watch?v=W335wRyLLiY&t=61s

Check out Crochet World Winter 2025 for the trees and 28 other fun and festive patterns to crochet.

Scrubby Yarn Tips & Tricks for Pin Loom Weaving

Tips and tricks are definitely needed if you plan to weave with scrubby yarn. It makes the BEST dishcloths for handwashing dishes but the yarn is definitely aggravating to work with. We’ve made lots of variations of an 8″ dishcloth and learned a thing or two…and maybe said a colorful word or two, as well.

How to weave scrubby yarn without pulling all your hair out!!

Scrubby yarn makes wonderful woven dishcloths that are pliable and durable. Made from polyester, this yarn has lots of little tendrils sticking out which give it an abrasive quality, without actually being abrasive. The rough texture makes it great for washing dishes, but a challenge for weaving on a pin loom using multiple warp layers, like the looms with a 3-pin configuration. Not only do all the little tendrils make it difficult to see each warp strand around which to weave, the needle invariably snags a tendril making it nearly impossible to pull the needle through each layer.

After weaving quite a few Scrubby squares, we found a few tricks to make weaving with this yarn a little less frustrating (though not completely fool-proof)!

Pin Loom Weaving with Scrubby Yarn Tip 1:

Push nearby warp strands out of the way as you weave to isolate the strand around which you are weaving. This helps you find the warp strands you want, as the tendrils often make it difficult to see the different strands. By pushing neighboring warp strands out of the way, you are also less likely to snag a stray tendril.

Pin Loom Weaving with Scrubby Yarn Tip 2:

Exaggerate the up and down of the needle. Make the needle go very high when weaving over, and very low when weaving under to try to go over the tendrils.

Pin Loom Weaving with Scrubby Yarn Tip 3:

Pull out a weft row. Unfortunately, you won’t know that you have snagged a tendril or split a warp strand until you start to pull the needle through. And you won’t know where the problem is until the eye of the needle gets to the problem. With extreme care, you can attempt to pull the weft from the needle and pull the row out from the side, but this will be a tiresome task.

Pin Loom Weaving with Scrubby Yarn Tip 4:

Hulk out! More than one square was made with me losing my cool. After much careful but (quite) forceful tugging, I’ve managed to force the needle to pass through the row. More often than not, this has ended up in some tendril pulling and breaking. Surprisingly, the square holds up. It doesn’t unravel and can still be used.

Pin Loom Weaving with Scrubby Yarn Tip 5:

Use the continuous strand weaving method. This method uses a hook, and creates the warp and weft as you go. No more piercing or splitting a strand or tendril with a needle, unless the pin loom shape you are weaving also has a plain weave section, like a hexagon.

Pin Loom Weaving with Scrubby Yarn Tip 6:

Weave with cotton and scrubby yarn in different layers. This is probably the best way to weave scrubby, or at least the least frustrating way!

Hip to Be Square Pin Loom Pattern

We love gifting dishcloths woven in cotton and scrubby yarn and created a super fun design using a 4″ square pin loom. We call it, “Hip to be Square” because there are 3 embossed square weaving designs along with a scrubby square. This 4″ pin loom square pattern includes all the tips listed here and more!

Hip to be Square pattern includes:

  • Hip to Be Square Dishcloth Pattern
  • 3 Embossed Squares Weaving Patterns
  • 6 Variations on cotton / scrubby dishcloths
  • 6 Weaving Tips
  • 3 Finishing Tips
  • Comparison of crochet vs weaving with scrubby

Hip to Be Square on Etsy

The Hip to Be Square Dishcloth Pin Loom Pattern is available in our Etsy shop. It includes all the tips, tricks and weaving variations.

Available now on Etsy.

More about Hip to Be Square Pin Loom Dischloth

One of the great features of pin loom weaving dishcloths is that the supplies needed are minimal and with only 2 balls of you yarn, you can made several dishcloths! And even better than that…you only need one pin loom, a 4″ square. Here’s what you’ll need to make this giftable dishie:

  • Yarn:         Lily: Sugar’n Cream – 100% cotton, Medium (4) – 1 skein
  • Red Heart: Scrubby – 100% polyester, Medium (4) – 1 skein
  • Pin Loom: 4” square
  • Needle:     6” weaving needle, yarn needle for sewing
  • Crochet Hook: G/6/4.00mm (optional)

This dishcloth first appeared in Little Looms magazine. We have the rights back to this project and have created a pattern packed full of more tips and tricks. Get your Hip to Be Square Pin Loom Pattern on Etsy.

Published in I Like Crochet August 2025

We have 3 fun designs featured in I Like Crochet August 2025. This issue features 3 exciting themes including: Boho, Modern Mariner, Bold Prints for Late Summer. You’ll find items such as bags, pillows, tops and more.

1. Peach Grove Backpack

Photo courtesy of I Like Crochet magazine.

Peach Grove Backpack is a fun and stylish backpack that features a wide variety of crochet stitches and techniques. The handle and drawstring are made with a super easy faux icord. The shoulder straps are stitched in Tunisian crochet using a standard crochet hook. The main body of the bag is made with mini bobbles. It’s an exciting project to crochet and fun to assemble. I particularly love how the metal grommets and buckles create a tailored look.

Universal Yarns Clean Cotton yarn provides great stitch definition allowing each element to really pop. This line has 21 bold and beautiful colors to choose from.

There are a few more photos on our Peach Grove Backpack Instagram post.

2. Leather & Stripe Pillow

Photo courtesy of I Like Crochet magazine.

This mariner style pillow is fast and easy project to crochet. The faux leather band creates a gorgeous transition between the 2 panels. It is so enjoyable to make, I’m tempted to make this in other color schemes for different rooms in my home. I’m thinking black and white stripe section…or maybe a pink and white stripe.

Pacific yarn from Cascade Yarn is really lovely to crochet with. And with 82 colors to choose from, you’re bound to find just the right combination for your crochet pillow.

There are a couple more photos on our Leather & Stripe Pillow Instagram post.

3. Rosy Knots Tote

Photo courtesy of I Like Crochet magazine.

Rosy Knot Tote combines yarn and fabric, one of my new favorite things to do. In this case, I purchased a scarf from a second hand store and turned it into a shoulder strap for a bag. I love how the bright white single crochet stitches contrast with the vivid colors of the scarf. This is a great project for a brand new crocheter.

There are a few more photos on our Rosy Knots Tote Instagram post.

The yarn for this bag is made from upcycled textile waste. It’s a t-shirt yarn called Zpagetti by Hoooked. You need to check their website for colors and prints. There are so many to choose from and the inventory changes.

It’s pretty rare for us to have 3 projects in a single issue of a magazine. We are thankful for the opportunity and encourage you to check out this fantastic issue of I Like Crochet August 2025.

Rag Quilt – Creating Squares

Part 2: After making a plan and creating colorful scrap triangles and rectangles, I sewed the triangles and rectangles together to make squares. The pieces were sewn together with the wrong side facing so the seam would be on the front to be ragged. I cut the seam with little slits about 1/8″ apart. I cut very close to the seam stitches. Once in awhile, I accidentally cut the stitches. I put a sewing clip on the cut section to remind myself to sew that area together as I sewed the large “X’s”.

Next, I began working on the second major part of the scrap rag quilt, deciding on the bottom fabric and layout, and cutting the center layer. I chose three colors of cotton for the bottom layer, and a random pattern. I sketched it out so I could place the colors in the correct place.

I decided on fleece for the center as an inlay. I cut the fleece squares to 12″. This meant there wouldn’t be fleece in the ragged seam.

Once all the top squares, middle inlays, and bottom squares were cut, I decided to stack all the square layers together square by square. I laid the bottom layer down, centered a fleece on that, then the top piece on top.

I made a nice tall pile of these layers to get them ready to sew “X’s” on them.

Before sewing the “X’s”, I made sure each layer was centered neatly. 2 Clips per side is a nice amount to keep the layers steady.

I kept the sewn layers in order so it would be easy to sew them into strips. Does this look like a CA king quilt?

The plan is to sew them into strips, rag them, then sew 2 strips together at a time so it isn’t hard to sew the whole blanket together. This step took about 2 weeks, bringing the total working time up to 8 weeks.

**Some people sew two straight stitches per square or strip for extra durability.

Beginning a Scrap Rag Quilt – CA King

I am embarking on a large task, sewing a California king sized rag quilt! Do I have lots of time for this? Not really. I anticipate this quilt will take several months working in 10-30 minute snippets at a time. First, I made a plan.

I decided on a star image with border sections. I sketched out several stars to try out different color placements. Next, I measured the bed (top and overhang desired) to determine what sized squares and triangles I would need. The top measured 72″ wide x 84″ long. The length of the sides could be 18-22″ long. I already know that I do not want the sides to touch the floor. With these dimension in mind, I decided on 12″ squares after being sewn together. I decided on 1/2″ seams on each side, so the squares need to be 13″.

Next, I sketched out a design. Many quilts used as bedspreads have a bunch of extra fabric in the corners. I don’t want all that fabric, so I decided to leave out the corner sections on the bottom of the blanket. If the quilt doesn’t close in the corners after being placed on the bed, I will come up with a creative solution for keeping the corners closed.

With this design in mind, I began tackling the shapes for the top. As drawn, I would need triangles, squares, and rectangles. Rag quilts often have 1/2″ (5/8″, 3/4″, or 1″) seams on the front/right side of the quilt that are clipped 1/8″ apart to create the rag look. Therefore, I cut the squares at 13″ to allow for a 1/2″ seam on each side. I cut the triangles to 13 1/2″ lengths (on the two sides that make the right angle, not the hypotenuse), but that ended up being just a tad short when I sewed the squares together. I recommend 14″ right triangles. The border is rectangles, and those were cut to 7″ x 13″ I don’t have special cutting equipment, so I decided to make cardboard templates from cereal boxes.

In addition to being a rag quilt, this is a scrap quilt. I decided to sew my remnant pieces together to create the star and border sections.

Because I couldn’t wait to see the star come together, I started my scrap quilt with the colorful triangles. I organized all my scraps by color and used the cardboard templates to make the triangles, squares, and rectangles.

Want to guess how long these steps took? Between homeschooling my two boys, driving my kids to appointments and activities, creating other sewing, weaving, and crocheted designs, the above steps took 6 1/2 weeks. Did I get frustrated? Normally I would have, but I decided that this project is allowed to take as long as it takes.

Next steps: Decide on the bottom fabric and colors, cut the bottom squares, cut middle fleece, then assemble the quilt.

Secret Santa Mini Gift Baskets Sewing Pattern

Miniature Gift Baskets Sewing Pattern, reversible and 6 sizes step-by-step instructions

This beginner friendly sewing pattern will show you step-by-step how to make a miniature basket as little as 1.5″. The pattern includes tracing templates to make miniature baskets in 6 tiny sizes.

We’ve used fabric scraps, old linens, discarded denim jeans and more to create adorable miniature gift baskets. They are super adorable with a print on one side and solid on the other. Pictured above, the winter fabric is a felt print and cotton solid.

Reversible Miniature Sewing Pattern includes:

  • 3 basket patterns each with 2 height options
    (small: 1 1/2″ w x 1 1/2″ d x 3″ h with handle)
    (medium: 2″ w x 2″ d x 3 1/2″ h with handle)
    (large: 2 1/2″ w x 2 1/2″ d x 4″ h with handle)
  • one or two handle option
  • traceable templates
  • 17 pages
  • 20 photos
  • Beginner friendly
  • Step-by-Step Written Instructions
  • BONUS Template: Frankenstein’s Monster Hair for a Halloween Basket!

Miniature Basket Sewing Pattern on Etsy

The reversible miniature baskets sewing pattern is available in our Etsy shop.

Now available on Etsy.

Buy the pattern on etsy

Just a Bit of Fabric to Make a Miniature Gift Basket

These miniatures are quick and easy to make and require very little fabric. This is the perfect project to raid your closet, dig through the rag pile or take a quick trip to the second hand store.

  • Small Basket: 6″ x 7″ of two different fabrics
  • Medium Basket: 7 1/2″ x 8 1/2″ of two different fabrics
  • Large Basket: 9″ x 10″ of two different fabrics
  • Stabilizer optional to match the size of basket

Pin on Pinterest

Share the love, pin a photo or two to Pinterest.

Thank you.

Miniature Baskets for Every Occasion

This is a sewing pattern you can use all year long making gifts for so many special occasions. Wedding gift, bridal shower gifts, teacher gifts, Secret Santa. Great for Birthday, Thinking of You, Get Well Soon, Graduation and more. They make super adorable Halloween treat baskets, too. Check out our Frankenstein’s Monster bag…which is included in the sewing pattern.

Miniature Baskets for Guy Gifts

Miniature gift baskets are fun for guy gifts, too. We’ve upcycled old button down shirts into stylish mini gift baskets. The tracing templates make it really easy to line up your fabric with striped and plaid prints. Should you use your hubby’s old shirts, like we did, you should probably get his permission first. Having said that, this is also a great way to create special gifts for loved ones. We’ve made and gifted mini baskets as memory gifts when a father-in-law passed away.

Get the Mini Gift Basket Sewing Pattern on Etsy

Get your copy of the Miniature Basket Sewing Pattern on Etsy.

Available now on Etsy.

Buy the pattern on etsy

The pattern is for your eyes only. We encourage you to sell or give away your finished projects with credit to yarnovations.com as the original designer.