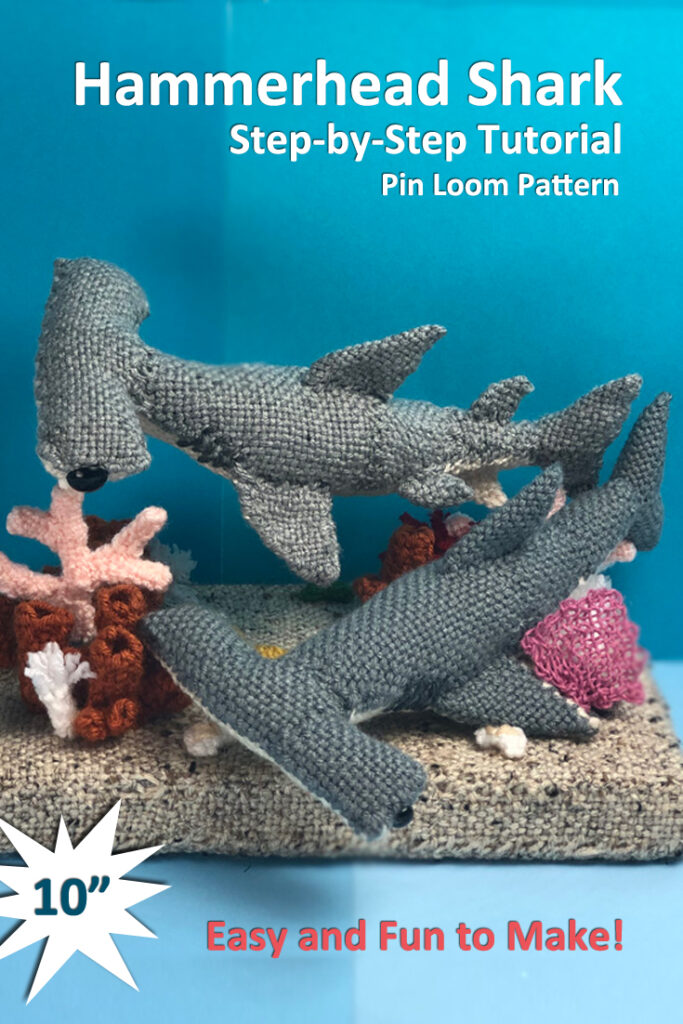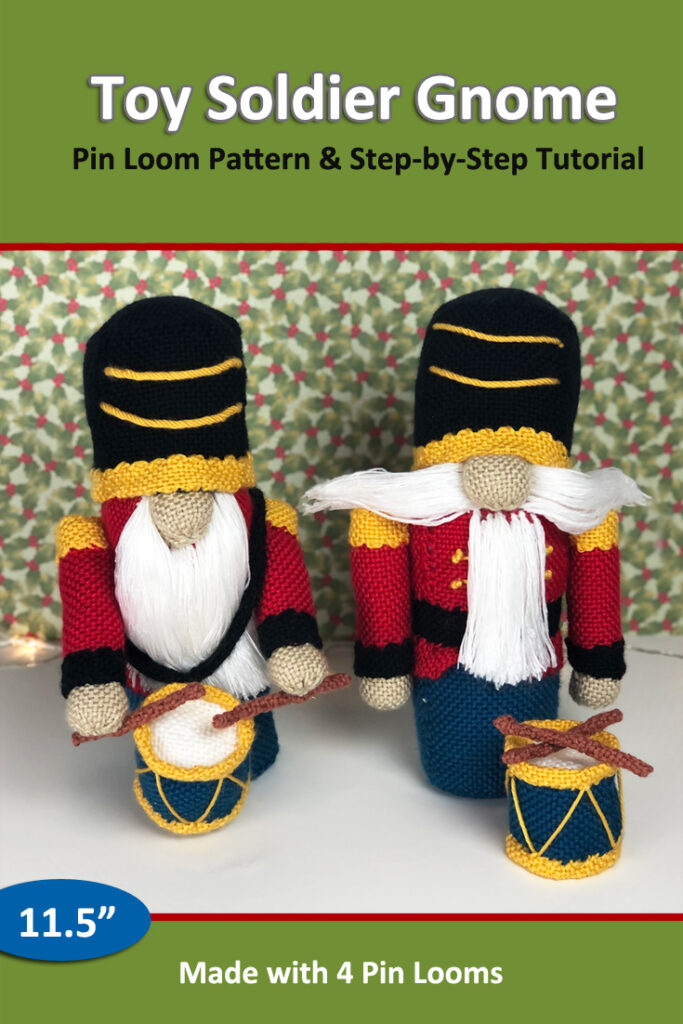
Make your own little drummer boy with this Toy Soldier Pin Loom Pattern. We’ll show step-by-step how easy it is to turn yarn into a nutcracker gnome with this PDF download. The toy was made with only 4 pin looms.
It’s quite adorable at 11 1/2″ tall. The finished measurements are approximately 6 1/2″ wide x 4 1/2″ deep x 11 1/2″ tall.
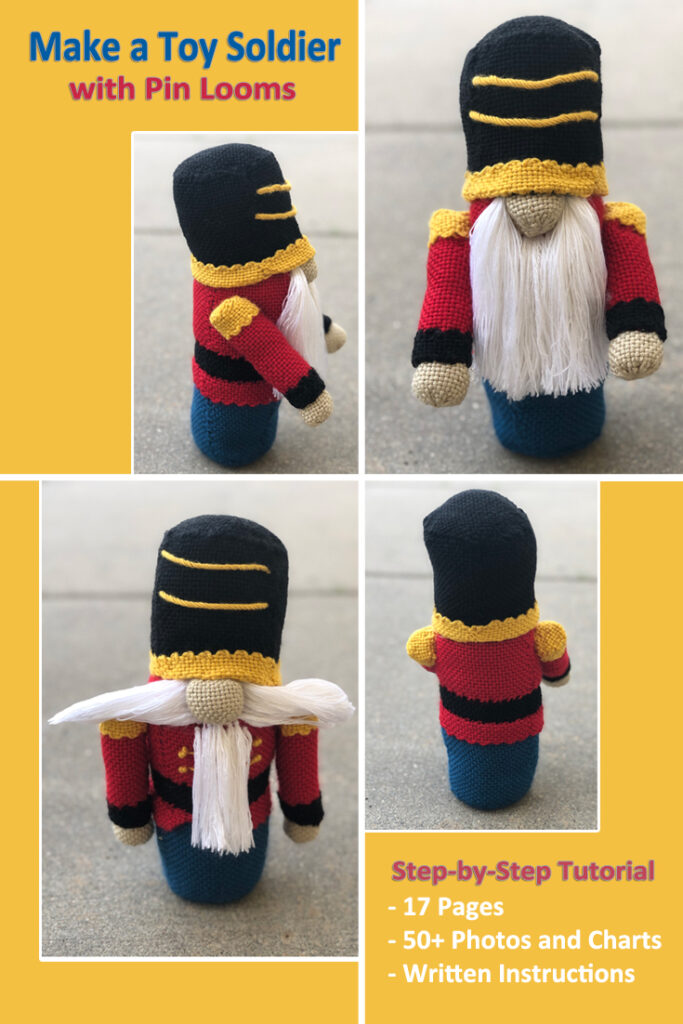
When you look closely at the drummer boy, you’ll notice extra little scallops on the sleeves and shoulders, etc. Lucky for us, this is a natural feature if pin loom shapes. It’s little “cheats” like that which give the illusion of grandeur to the toy soldier.
What’s in the Toy Soldier Gnome Pin Loom Pattern
This step-by-step tutorial for the Toy Soldier Gnome includes all of the following:
- Toy Soldier Gnome Instructions
- Drum Instructions
- Step-by-Step Written Instructions
- 17 Pages
- 50+ Color Photos and Charts
- Complete Materials List
- Helpful Tips
Toy Soldier Gnome Pattern Available on Etsy
The Toy Soldier Gnome Pin Loom Pattern is available in our Etsy Shop.
Available now on Etsy.

Pin the Toy Soldier Gnome to Pinterest
Share the love, pin these pictures to Pinterest.
More about the Toy Soldier Gnome Pin Loom Pattern
We rate the Toy Soldier Gnome as intermediate, but it’s very doable by the confident beginner. This gnome is made by folding, rolling and tucking woven shapes. The photos will show you step-by-step how to do that.
Here are the supplies you’ll need to make your own Nutcracker Gnome.
- Pin Loom Squares: 2” and 4”
- Pin Loom Rectangles: 1”x4” and 2”x4”
- Yarn: Caron Simply Soft –
- Medium Worsted Weight (4)
- BLACK #727 – 55 yds
- WHITE #701 – 55 yds
- BONE #9388 – 15 yds
- HARVEST RED #763 – 75 yds
- OCEAN #759 – 40 yds
- GOLD #782 – 50 yds
- TAUPE #783 – 8 yds
- Needle: 6” needle for weaving and yarn needle for sewing
- Stuffing
- Fringe Twister or premade gold cord – 14”
- Beans: to weigh the gnome down
- Fabric Marker: – white, dark, or chalk
- Pet comb: – metal
- Steamer (optional)
- Starch or Hair Spray (optional)
We’ve added a little bonus at the end for turning the drum into a Christmas ornament. This little drummer boy would make a great decoration for a table or fireplace mantel. He’s also a great gift to make for your friends and family who love the Nutcracker ballet or have a passion for drums.
Get your copy of the Toy Soldier Gnome Pin Loom Pattern today.