Bear Pillow Sewing Pattern

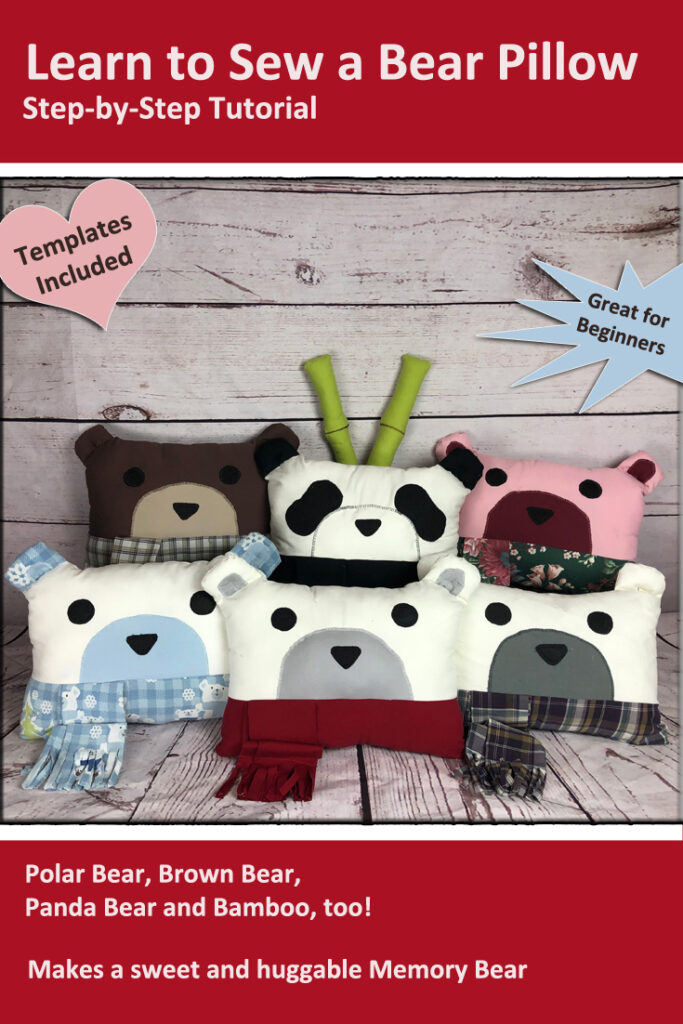
Looking for a bear sewing pattern? Look no further. This step-by-step tutorial will guide you through each step of turning fabric into a cute and cuddly bear pillow. Mix and match your fabric to make your own one of a kind bear.

This sewing project is so much fun, and easy, that we kept coming up with more bears to make. This tutorial is great for making all kinds of bears such as: Asiatic black bear (moon bear), brown bear (including grizzly), giant panda, North American black bear, polar bear, sloth bear, Andean bear (spectacled), and sun bear!

Not only that, this bear pillow is festive, too. One can be made for various holidays by changing out the fabric on the scarf. These are great for new baby, nursery and baby shower gifts, Christmas, Halloween, and going away to college gifts. They also make great gifts for boys and gifts for girls, memory bears, gifts for bear enthusiasts and bears for those who love to cuddle.

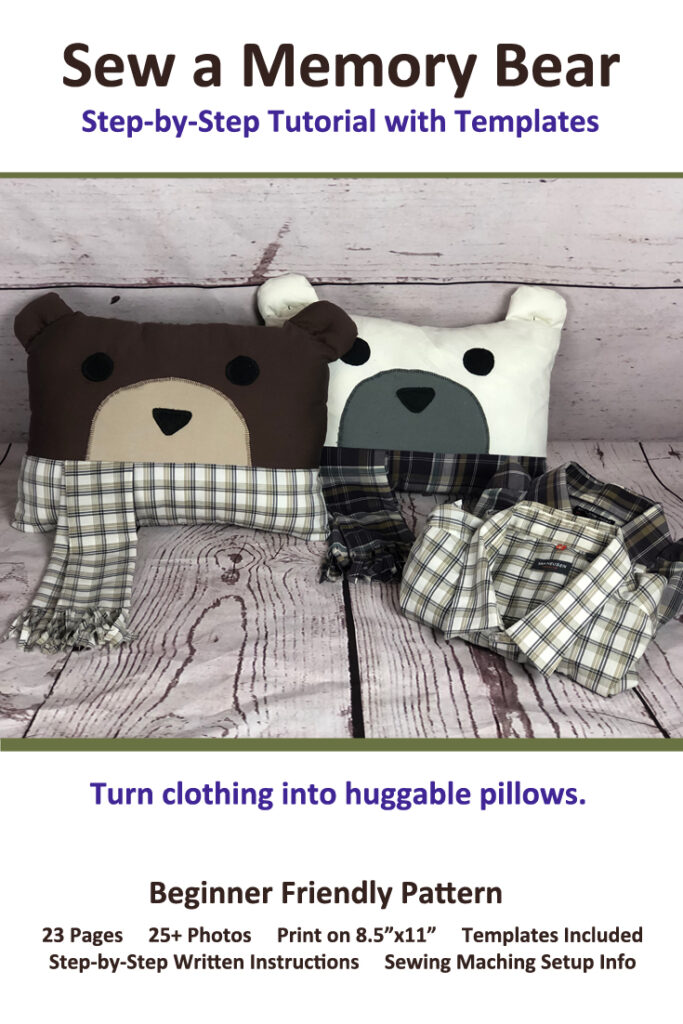
They can also be a heartfelt and thoughtful gift for someone that has lost a loved one. Sew the bear with a shirt that belonged to their special person and they can hug it in times of sorrow.

The bear sewing pattern includes:

  • Bear Pillow Pal Rectangular Pillow Pattern
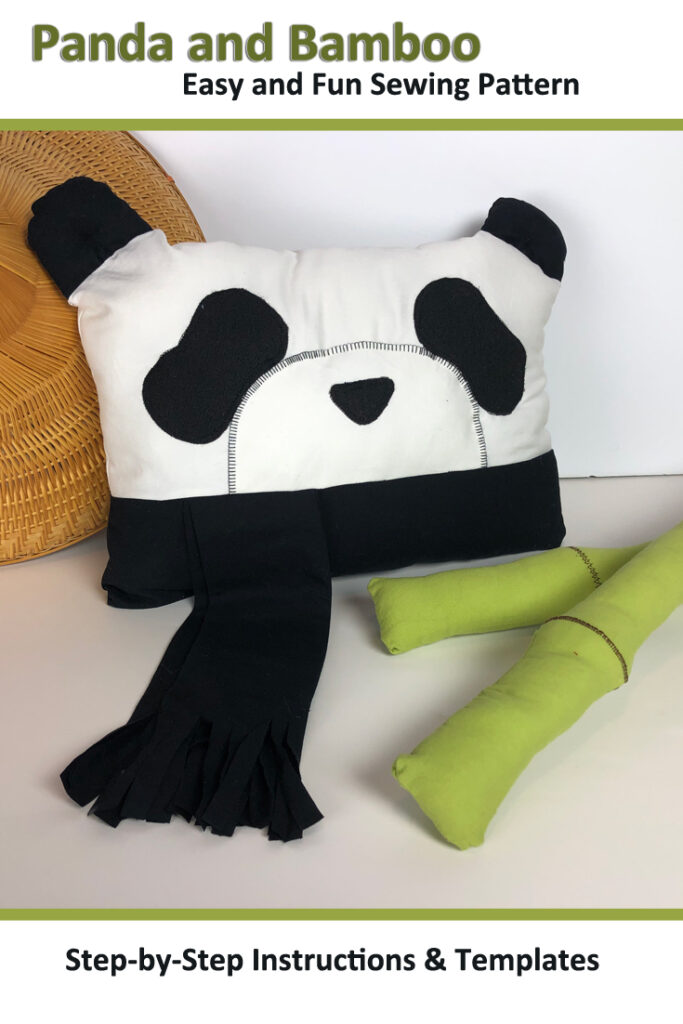
  • Panda Bear Instructions
  • Bamboo Instructions
  • Step-by-Step Written Instructions
  • 25+ Color Photos
  • 10 Printable Template Pages (8.5″x11″)
  • Complete Materials List
  • Helpful Tips
  • Information About Sewing Machine Settings
  • Links to helpful videos

The finished measurements of the bear pillow are approximately 16″ wide x 3 1/2″ deep x 12″ tall. The templates are drawn at 100% and can be printed on 8.5″ x 11″ paper. So you’ll need to cut out the templates and tape pieces together.

Bear Pillow Available on Etsy

Our bear pillow sewing pattern is available in our Etsy Shop.

Available now on Etsy.

Buy Now on Etsy

More About the Bear Pillow Pattern

Bonus: Panda and Bamboo are included!

This bear pillow pattern can be sewn in an afternoon if you have all the supplies. Here’s what you’ll need to sew your own bear pillow:

  • Pattern Pieces: Template included with pattern
  • Fabric: Head Color: 20” x 10”
  • Snout Color: 12” x 5”
  • Scarf Color: 25” x 12”
  • Bamboo: 25” x 4” per stalk
  • Felt: Black – 1 sheet (10” x 5”)
  • Thread: To match felt and fabric
  • Straight Pins and Needle
  • Stuffing: Approximately 8-10 oz of Poly-fil or 12”x16” pillow form
  • Scissors
  • Sewing Machine
  • Pencil, Pen or Chaulk

Pin a Picture to Pinterest

Share the love, pin these pictures to Pinterest.

Even More about the Bear Sewing Pattern

This is a great pattern for sewists of all abilities from the brand new to the seasoned enthusiast. The tutorial includes information about how to set up your sewing machine and different stitches to use. Three different stitches were used on the bear because sometimes the fabric is sewn on the right side and sometimes on the wrong side.

The pattern will take you step-by-step with written instructions and helpful color photos. Helpful tips and included as well as links to videos that will show you different sewing techniques.

So, pick out your fabric and head over to Etsy for your copy of the Bear Pillow Sewing Pattern.

This pattern is for your eyes only. We encourage you to give away or sell your finished projects and ask that you mention Yarnovations.com as designer. Thanks.

Get your copy of the Bear Pillow Sewing Pattern on Etsy.

Buy Now on Etsy

Hammerhead Shark Pin Loom Pattern

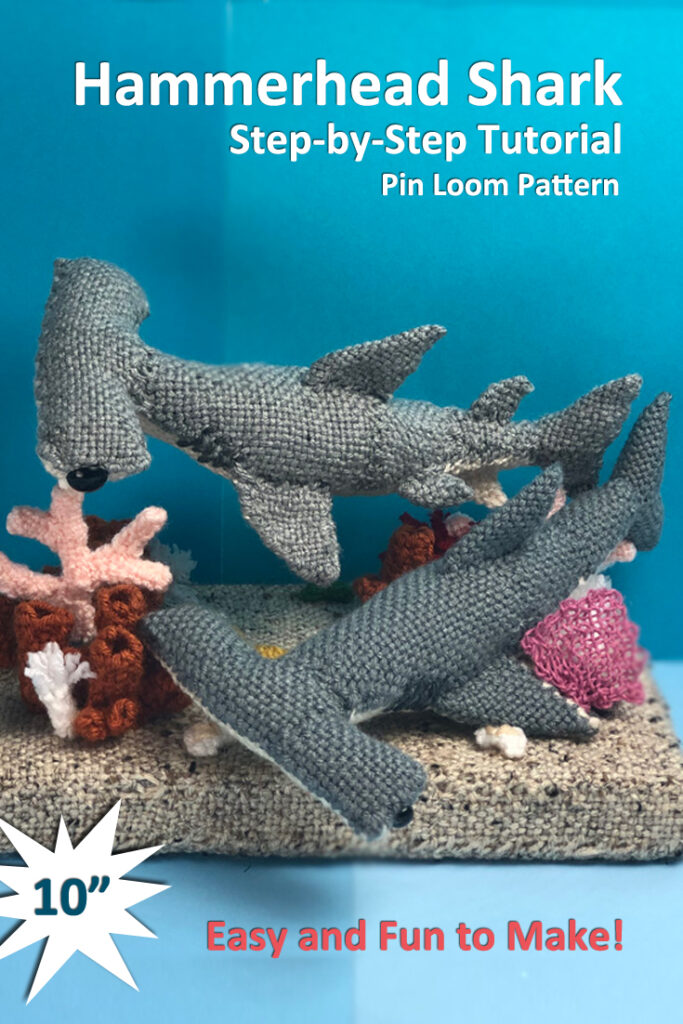
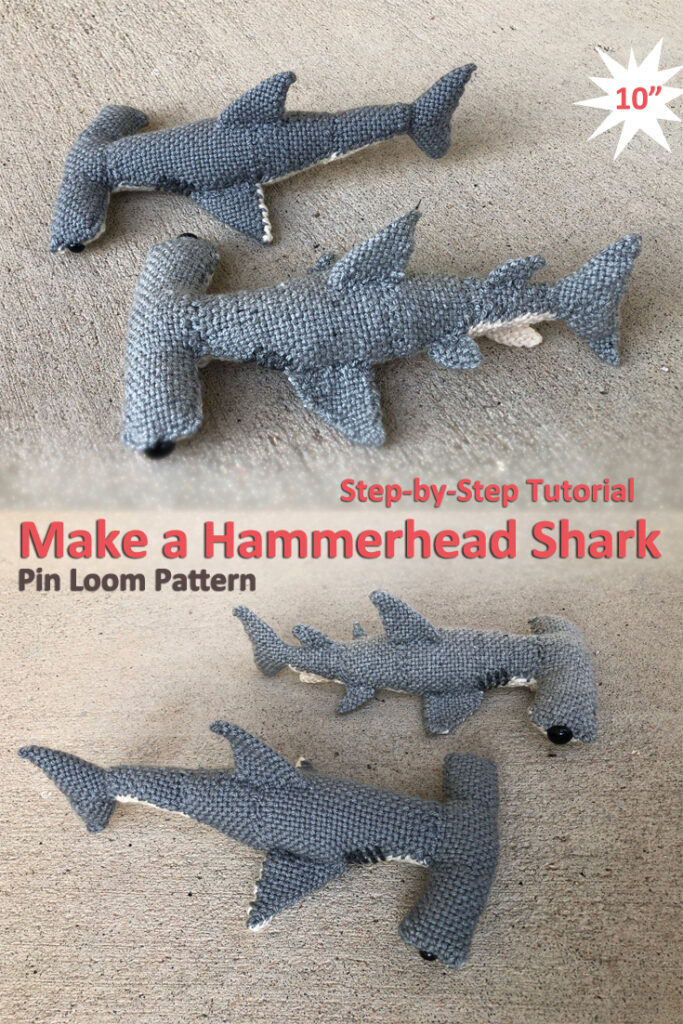
Don’t wait for shark week to pin loom weave your own hammerhead shark stuffed animal! These pups are so fun and super adorable at only 10″ long. Real pups are about 24″ long when born, so these are about half the size.

Not only is this hammerhead shark adorable, we’ve made it really easy for you to make your own because we’ve created a step-by-step tutorial with lots of great photos and easy to follow directions.

What’s in the hammerhead shark pin loom PDF pattern tutorial?

  • Step-by-Step Written Instructions
  • 30 Color Photos
  • 7 Pages
  • Helpful Tips
  • Complete Materials List

Hammerhead Shark Pattern on Etsy

We’ve made the Hammerhead Shark Pin Loom Pattern available in our Etsy Shop.

Available now on Etsy.

Buy Now on Etsy

Share on Pinteret

Share the love, pin this photo to Pinterest.

In the photo above, the hammerhead shark is sitting on a diorama of coral. The entire coral reef is made from pin loom woven shapes. Unfortunately, there is no pattern at this time. There is a Starfish Pin Loom Pattern in our Etsy shop if you are looking for other sea creatures.

What You’ll Need to Weave a Hammerhead Shark

The materials list is surprisingly small for this hammerhead shark stuffed animal. In fact, it uses only 73 yards of yarn total! Here’s the complete list.

  • Pin Looms:   Squares: 1”, 2”, and 4”; (1” square loom is optional)
  •          Rectangles: 2” x 4” and 2” x 6”,
  •          Triangle: 2”
  • Yarn:   Lion Brand: Basic Stitch – Medium Worsted Weight (4)
  •             ECRU #098C – 25 yds
  •             SILVER HEATHER #404J – 45 yds
  •             CHARCOAL HEATHER #403J – 3 yds
  • Needle:  6” needle for weaving and
  •                yarn needle for sewing
  • Safety eyes (2) 8 mm
  • Stuffing

This hammerhead shark measures approximately 10″ long x 5 1/2″ wide x 3″ tall.

As you can see in the picture above, we’ve woven one hammerhead shark with all the fins a real hammerhead shark has. The other has fewer fins. But we think you’ll agree, both versions are super cute.

The Hammerhead Shark Pin Loom Pattern is available in our Etsy shop.

Buy Now on Etsy

Snake Sewing Pattern

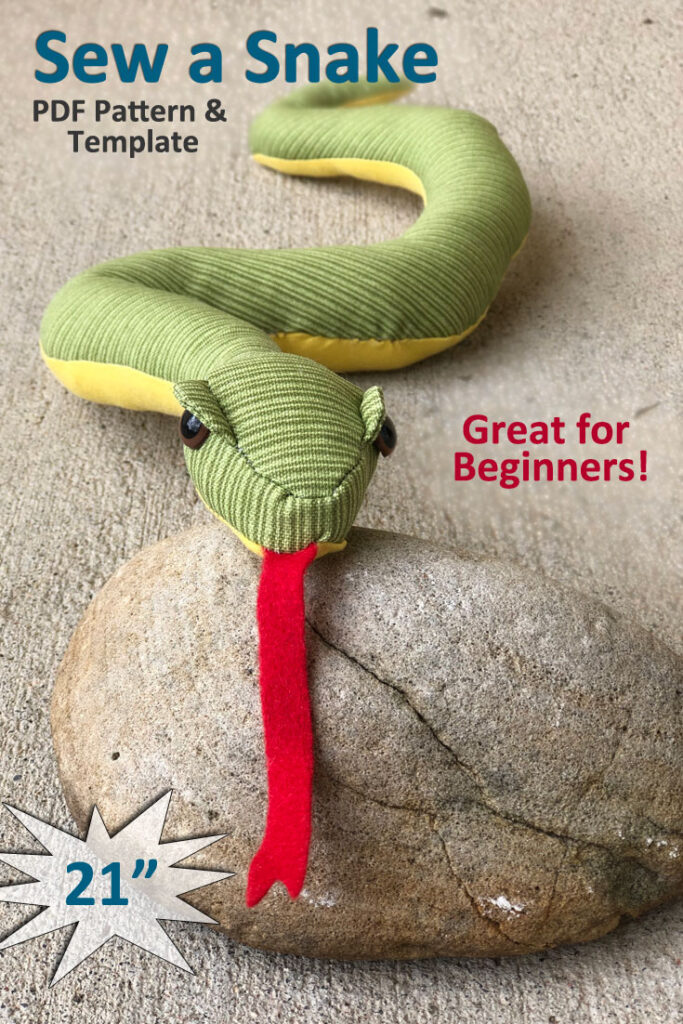
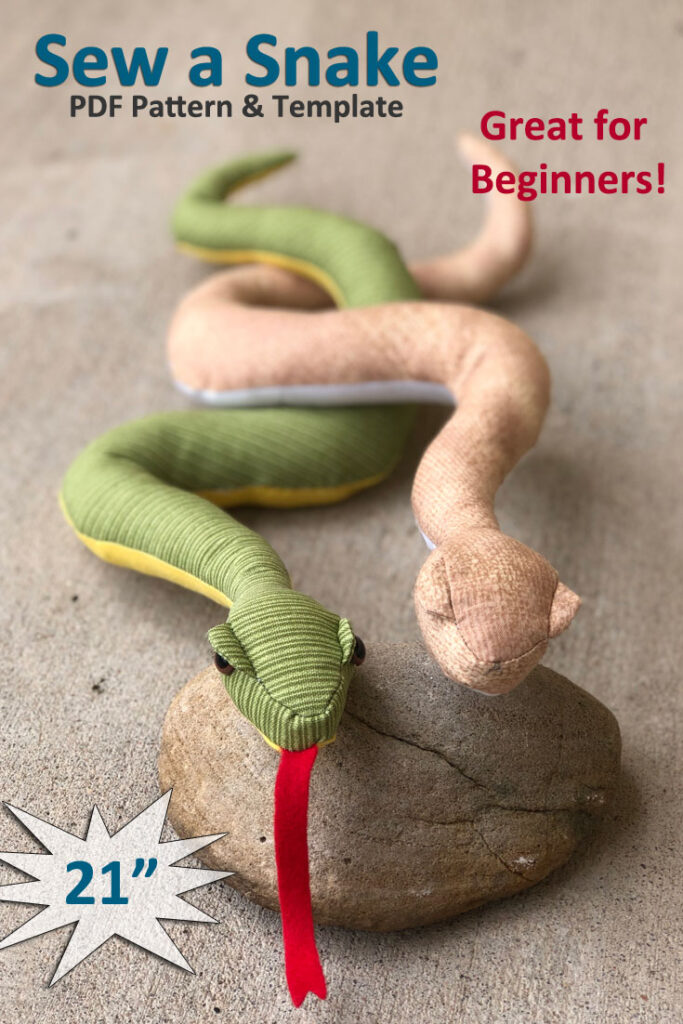
Looking for a fun toy for the kids? Snakes are a blast to play with and they look great in a wide variety of fabric! This step-by-step sewing tutorial has printable templates to make a 21″ long snake. What makes this particular pattern unique is the eye hood. Some snakes have what appears to be a brow above their eyes…so we’ve added that feature to this pattern. It definitely gives this serpent an aura of invincibility.

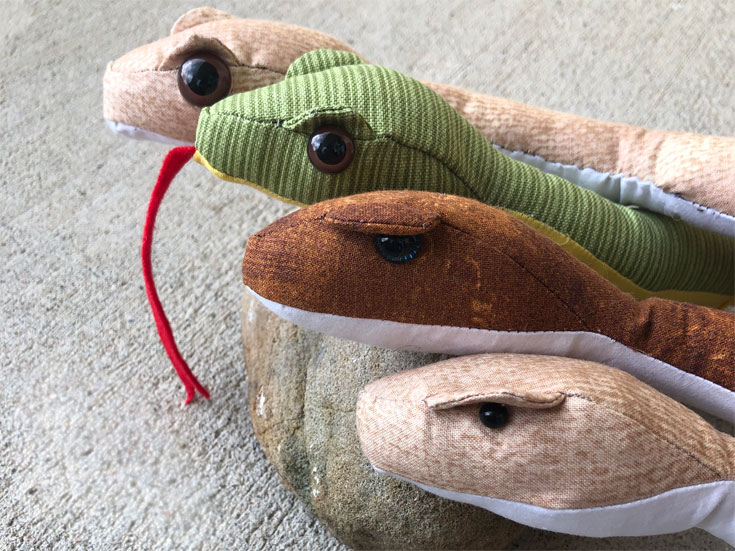
The safety eyes used can make a big difference in how “sinister” your snake will look. We used various colors and sizes of safety eyes to demonstrate how that one little detail will impact the look of your stuffed animal.

What’s in the Snake Sewing Pattern?

This is a step-by-step tutorial with printable template. The template is at 100% scale so you’ll tape together pieces from 3 pages to create the 21″ long snake top and another 3 pages to create the bottom. Here’s what’s in the PDF pattern.

  • Step-by-step written instructions
  • 15 color photos
  • Template printable on 8 1/2″ x 11 paper
  • Materials List
  • Helpful tips
  • Links to sewing videos

Snake Sewing Pattern Available on Etsy

This snake sewing pattern is available in our Etsy Shop.

Available now on Etsy.

Etsy Shop

Pin This Snake Pattern to Pinterest

Share the love, pin this picture to Pinterest.

What Will You Need to Sew This Snake?

The materials you’ll need to are pretty minimal. Here’s what you’ll need to sew your own snake.

  • Template: at the end of the pattern
  • Fabric: 2 different colors – 22” x 7”
  • Felt or Ribbon for Tongue:    Red – 4” x ¼” or ½”
  • Needle and Thread: To match snake fabric
  • Straight Pins
  • Stuffing and Chopstick
  • Safety Eyes: (2) 5mm, 8mm, or 12mm
  • Scissors
  • Pencil or Washable Marker

We’ve kept this snake design pretty simple, yet added a few special details to make it interesting.

Happy sewing!

Making Animals for VBS

Sewing Bug

Got the sewing bug this year as preparations were made for vacation Bible school. The theme is Australia and team names are various animals found down under. Down the rabbit hole we went sewing animals to give away to the kids.

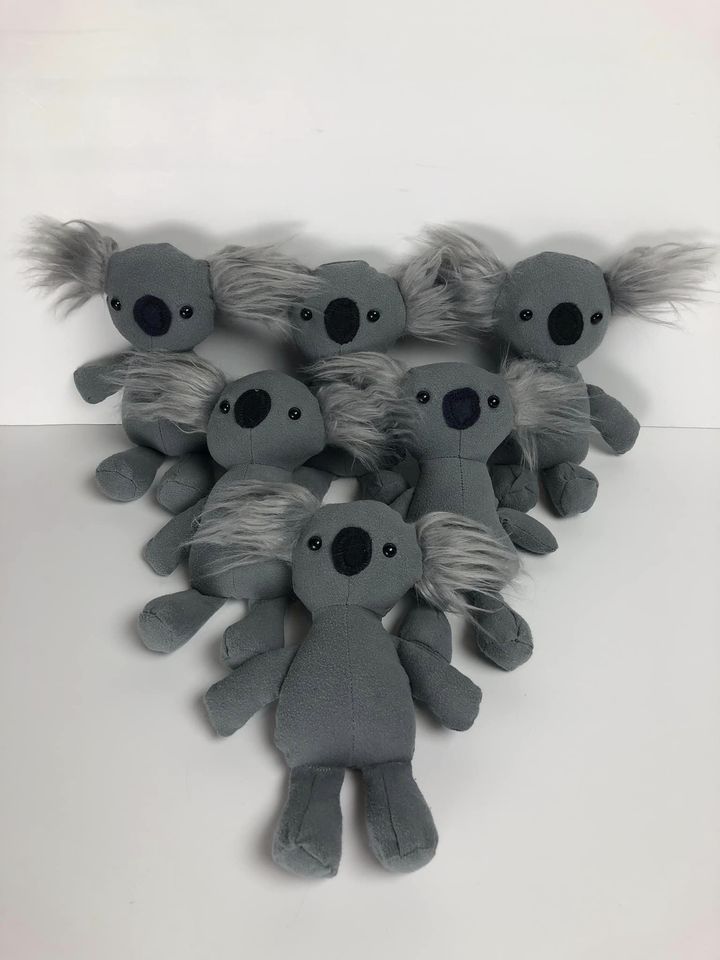
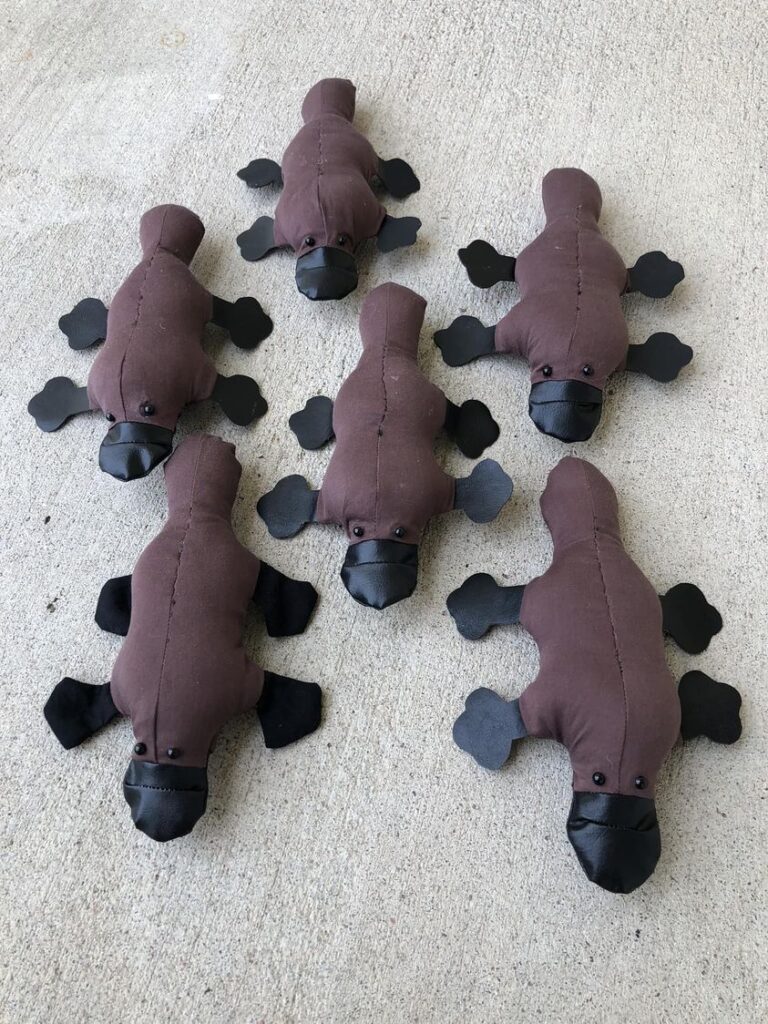
Sewn Koalas, jellyfish, clown fish, dingos and platypus. These creatures are so different and fascinating.

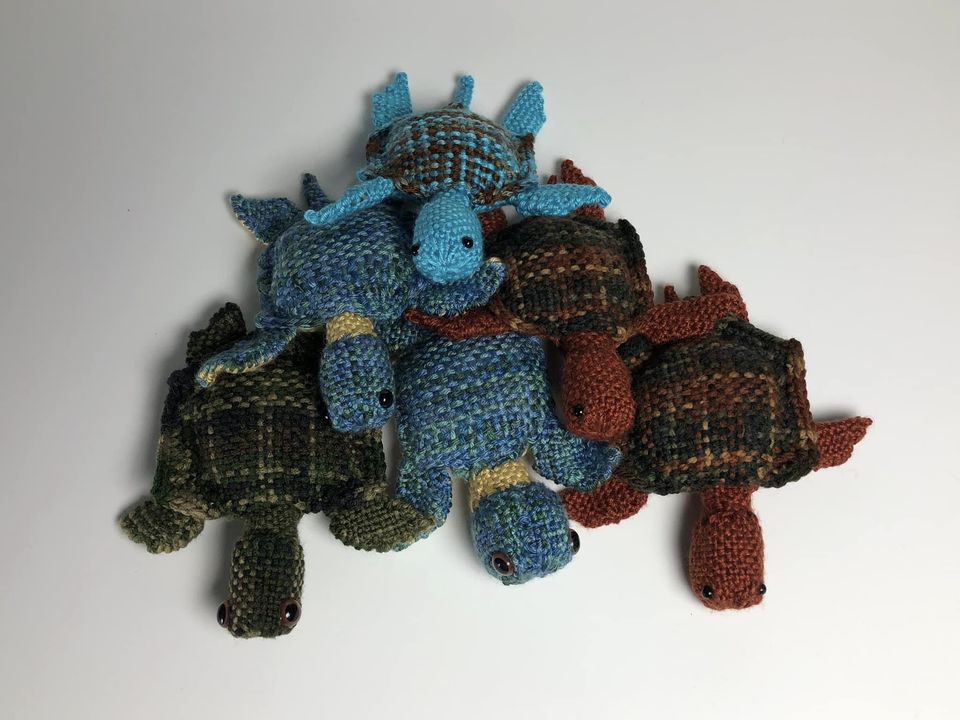
Got the pin looms out to create some turtles. It’s amazing how different they look with yarns of different colors both solid and variegated.

The turtles were made with a few different looms including:

  • hexagon pin loom
  • 2″x4″ rectangle pin loom
  • 2″ square pin loom

Found the sewing patterns online. Some were on Etsy others were free on various blogs. The turtles were inspired by a weave along on the Facebook Pin Loom Support Group. If you love to craft, we encourage you to look into pin loom weaving and join this private group for inspiration.

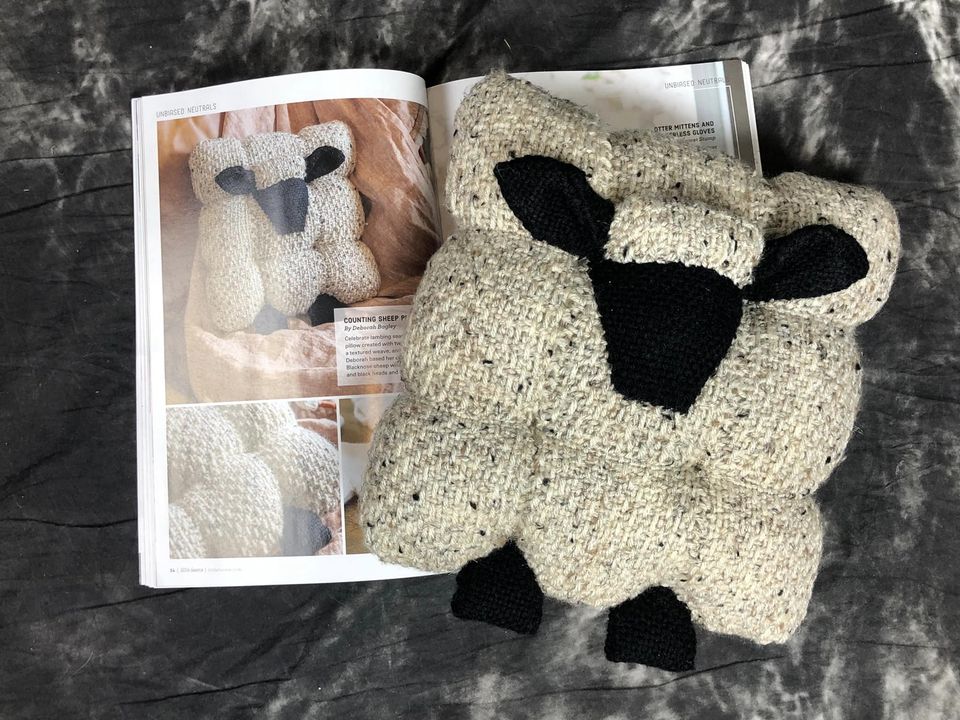
Sheep Pillow Published in Little Looms

Sheep are neat and so are pillows that look like them! Deborah designed an adorable sheep pillow using yarn and pin loom woven shapes.

We love this pillow because it’s fairly easy to make, yet has lots of little details that make it quite interesting. The 4″ squares give it a puffed / quilted look. The woven texture of each square adds more interest. The fleck in the yarn adds still more depth.

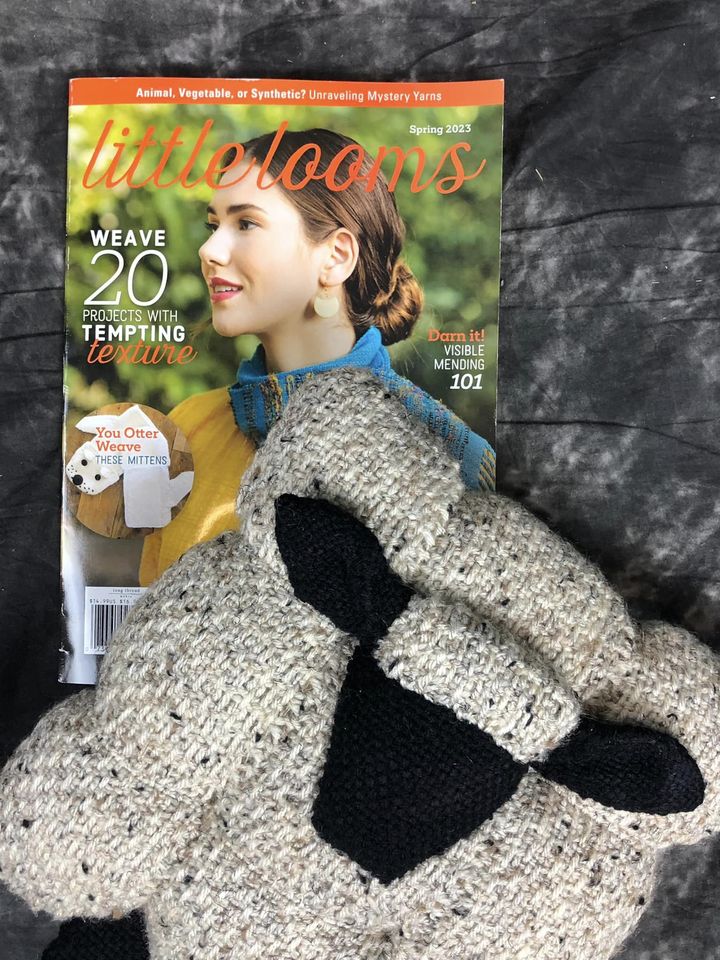
Sheep Pillow Pin Loom Pattern in Little Looms Magazine

Little Looms Magazine first published this “Counting Sheep” pattern in their Spring 2023 issue. You can access the pattern either by purchasing that single issue or joining their all access subscription service.

About the Pin Loom Sheep Pillow Pattern

The finished size is approximately 10″ x 11″ x 4 1/2″.

There are two weaving structures: plain weave and Loomette Weave #1. Check out our blog post for the Loomette Weave #1 pattern. Here are the supplies needed to make your own Pin Loom Sheep Pillow:

  • Pin Loom Square: 4″
  • Pin Loom Rectangle: 2” x 4”
  • 5” weaving needle
  • Tapestry Needle
  • Yarns: Lion Brand Yarns Vanna’s Choice Heather (92% acrylic/8% rayon; 145 yd/3 oz), #400D Oatmeal, 160 yd.
  • Lion Brand Yarns Vanna’s Choice Solid (100% acrylic, 170 yd/3.5oz), #153 Black, 40 yd.
  • Stuffing
  • Pins

It’s really fun to see how many people find this project so appealing. Even though it’s pin loom woven, we find that fiber enthusiasts of all kids find this little guy irresistible. So do farmers and city folk…and people who like to count sheep before they nod off to sleep.

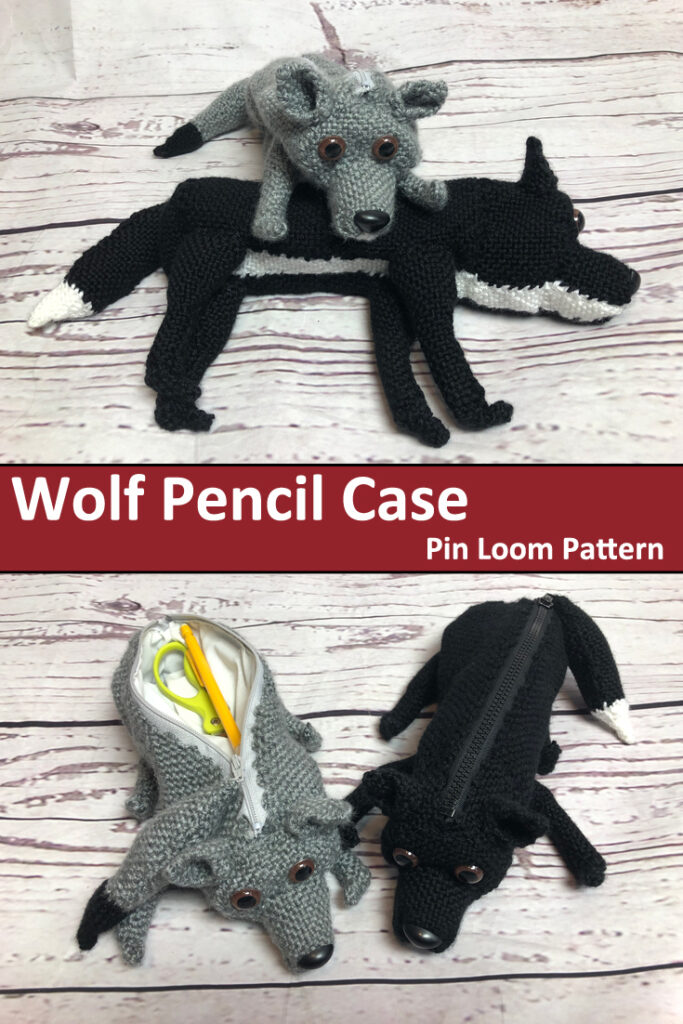
Wolf Pencil Case Pin Loom Pattern

There’s no need to scratch and claw through the junk drawer looking for a pen. Make your own wolf pencil case with yarn and pin looms to store them in. These are great for holding pens, pencils, crochet hooks, mini scissors and more. And since it’s pin loom woven, you can even weave your needle through the outside of the case when you’re not using it.

The wolf pencil case measures approximately 12” long x 7” tall x 4” wide.

Pin These Pictures to Pinterest.

Share the love, pin this image to Pinterest.

Wolf Pencil Case Available on Etsy

The Wolf Pencil Case Pin Loom Pattern is now in our Etsy Shop.

Available now on Etsy.

Buy Now on Etsy

About the Wolf Pencil Case Pin Loom Pattern

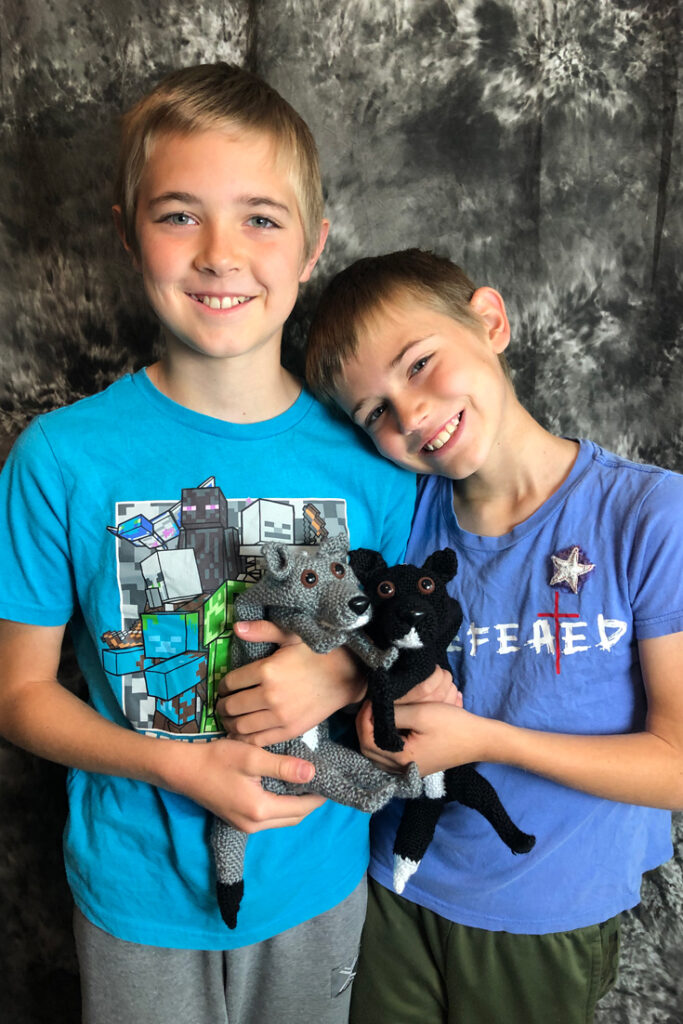
This pencil case was a special request from one of the boys…he wanted a coyote. Both wolves and coyotes are a bit dog like, so sure, it’s not a wolf, it’s a coyote!

The pattern is 5 pages which includes step-by-step written instructions. There are 10+ photos that show the pencil case at different points of construction. Instructions are for the grey wolf, though step-by-step photos are often for the black dog. The shape for the black dog and grey wolf are the same.

Here’s what you’ll need to make the Pin Loom Wolf Pencil Case:

  • Pin Loom Square: 1”, 2”, and 4”
  • Pin Loom Rectangles: 2”x4”, 1”x4”
  • Yarn:   Red Heart: Soft – Medium (4), acrylic, 5 oz/256 yds
  •             Grayscale #9931
  •             Black #4614
  •             White #4600
  • Needle:           6” needle for weaving and yarn needle for sewing
  • Safety eyes: (2) 14mm
  • Safety nose: 2cm
  • Zipper: 9” in color of yarn
  • Fabric for lining: approximately 12” x 12”
  • Can – with 2 5/8” diameter for helping sew the ends to the body of the pencil case (optional)
  • Notions: straight pins, needle and thread

Please note that there are not photos to match each step-by-step written instruction. But there are photos throughout the pattern to help provide clarity.

PDF Instant Download Available

Buy the Wolf Pencil Case Pin Loom Pattern in our Etsy Shop.

Available Now on Etsy.

Buy Now on Etsy

The pattern is for your eyes only. We encourage you to give away or sell your finished work as long as you credit yarnovations.com as the designer.

Giraffe Pin Loom Pillow in Little Looms

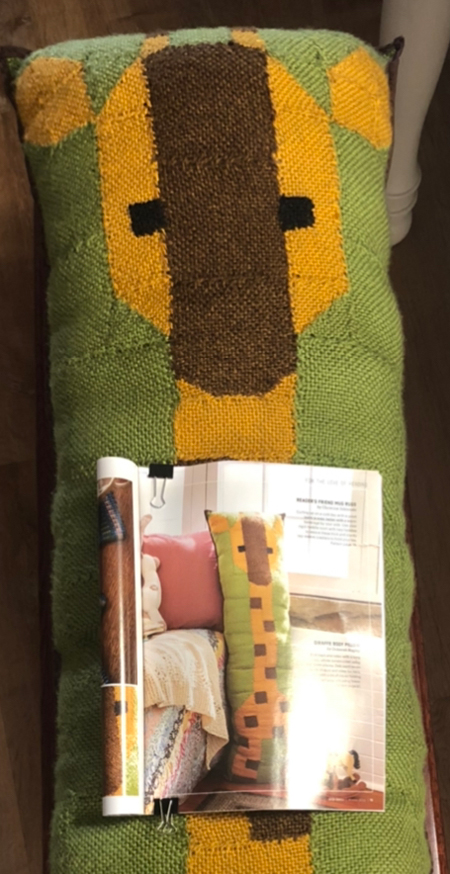
The worlds tallest mammal is now the worlds tallest pin loom pillow. Ok, we just made that up. But it might be true. This giraffe pin loom body pillow measures approximately 16″ wide x 49″ tall. If it’s not the tallest pin loom pillow, we don’t know what is!

Kick back and relax with your very own cozy long-necked friend. This large pin loom body pillow has a quilt-like front and a fabric back, sewn together with a binding edge. There is shaping and layering on the nose portion of the giraffe, otherwise, each woven shape is sewn to the shapes next to it like a puzzle.

Giraffe Pin Loom Pillow available at Little Looms

We designed the Giraffe Pin Loom Pillow for Little Looms magazine and it made it’s debut in the Little Looms Magazine Winter 2022. To get the pattern, you can purchase a digital copy of the magazine or join their all access program. Learn more on the Little Looms website.

About the Giraffe Pin Loom Body Pillow Pattern

As we’ve said, this giraffe pillow is tall, so there are a lot of shapes to weave. It’s kind of like weaving a lapghan only more cuddly. To cut down on the weaving, we’ve attached a fabric back. But you could certainly weave squares for the back as well.

Everything is woven in plain weave.

Here’s what you’ll need to make your own Giraffe Pin Loom Pillow:

  • Pin Loom Squares: 1”, 2”, and 4”
  • Pin Loom Triangles: 2” and 4” right triangles
  • Pin Loom Rectangles: 2” x 4” and 2” x 6”
  • Needle: 7″ weaving needle; tapestry needle; sewing needle
  • Sewing Machine (though you could hand stitch the project)
  • Yarns Lion Brand Heartland (100% acrylic; 251 yd/5 oz), #173 Everglades, 370 yd; #158 Yellowstone, 160 yd; #124 Big Bend, 70 yd; #153 Black Canyon, 1 yd.
  • Fiber-fil
  • 17” x 50” fabric
  • 4 yds brown double fold ¼” bias tape,
  • brown thread

Enjoy!

Caterpillar Pencil Case in Little Looms

We’ve designed an adorable caterpillar pencil case for Little Looms Magazine. Isn’t it sweet!

We love this little pin loom woven creature. It’s the little finishing details that make it so cute. And those are really easy to make because they are just bits of felt fabric glued to the assembled project. But, wow, do they give this insect so much charm.

The caterpillar pencil case measures approximately 9 1/2″ x 3″ x 3″. Keep reading to learn more about the pin loom weaving caterpillar pencil case.

Available now in our Etsy shop: Caterpillar Pencil Case Pin Loom Pattern

Caterpillar Pencil Case in Little Looms

The Caterpillar Pencil Case made it’s debut in the Little Looms Fall 2022 issue. You can get the pattern by purchasing the digital issue of the magazine or becoming an all access member to Little Looms. Learn more at Little Looms website.

More about the Pin Loom Weaving Caterpillar Pencil Case

The caterpillar pencil case uses only 2 pin looms; a 4″ square and 2″x4″ rectangle. If you’ve needed an excuse to buy the 2″x4″ pin loom, than this is it! The materials list for this project are pretty minimal. Here’s what you’ll need to make the pin loom caterpillar pencil case:

  • Pin Loom Square: 4″
  • Pin Loom Rectangle: 2” x 4”
  • Needles: 6″ weaving needle, tapestry needle, sewing needle
  • YARNS: Lion Brand Yarns Vanna’s Choice (Acrylic, 170 yd/3.5 oz)
  • #180 Cranberry, 20 yd
  • #172 Kelly Green, 20 yd
  • #171 Fern, 30 yd
  • Zipper: green 8”
  • Washable marker
  • Fabric Glue
  • Straight Pins
  • Green Thread
  • Optional: fabric and thread for lining
  • Optional: Sewing machine

Caterpillar Pencil Case is Great for New Crafters

There are just a few techniques used to make the pencil case. If you’re new to crafting, than this is a great project to learn new skills.

First, the caterpillar body / the main portion of the bag, is made with a technique called pin loom weaving. The fabric is woven in plain weave which is the most basic form of weaving on a pin loom. You weave under one thread and over one thread across.

Second, there are embroidered French knots on the body to represent spots. Those are another great beginner friendly embroidery technique.

Third, is sewing a zipper into the project. This can be done by hand sewing a running stitch or back stitch. Both are sewing stitches everyone should have in their knowledge banks.

Fourth, and completely optional, is a lining. This can be hand sewn as well, but most people will pull out a sewing machine for this portion. Lining is added to the bag prior to attaching the zipper.

A lining is recommended because woven fabric has holes and it’s easy for additional holes and larger ones to be poked into it.

Available now on Etsy: Caterpillar Pencil Case Pin Loom Pattern.

Pork Chop Pig Crochet Pattern

Hunting for Bacon?

Whether you need more bacon in your life or want to go on a boar hunt, Pork Chop the Pig crochet pattern is PETA approved!

pig with collar

This pig can be accessorized with a sweater and a medal. He can be Wilbur from Charlotte’s Web, or a trophy piece for the hunters out there. We even made it in red for the Razorback fans!

I made several of the mounted pig heads for my students after we read Animal Farm. They loved them!

Pig Crochet Pattern

Be sure to download the free accessories pattern for the fun variations.

Pork Chop Pig Crochet Pattern on Etsy.

Pork Chop accessories pack (sweater, medal, Razorback) available on our free downloads page.

Behind the Scenes: Lil’ Snapper

Behind the Scenes: Lil’ Snapper

My in-laws recently had a baby, and to celebrate, I decided to crochet something to match the theme of the baby’s room. The overall theme was turtles, so I set out to make a sweet little turtle photo prop. After looking at the various turtle patterns available, I wanted to make something as lifelike as possible.

Baby Turtle Photo Prop Crochet Pattern

Lil’ Snapper Crochet Pattern on Etsy.

I drew various shell patterns and debated about the shape of the shell segments. I finally decided that hexagons and pentagons would be the easiest. Still, I wanted a pattern that would show intricate texture found on shells. That’s when I decided to try the spike stitch. After several prototypes, I settled on the pattern used in this Lil’ Snapper Crochet Pattern Set.

Crochet Turtle Blue and Brown

Originally I designed the pattern in green and brown, thinking that was the color of the baby’s room. Nope, it was blue and brown! I furiously set to work redoing all the work I had done before. Turns out blue and brown make for an adorable turtle as well! That got me to thinking, there are girl turtles too, so I played with a pink version as well.

Turtle Family
Turtle Family

The set originally included the blanket, hat and diaper cover. Those were published in Love of Crochet. I was doing some research on rattles for another project when I realized that the hexagon shape would work for a little turtle rattle. A plastic Easter egg filled with popcorn seeds was the perfect size for the little hexagon. I also thought the little cape photo prop could be turned into a little stuffed animal, and thus the Turtle Family was born. I even debated about turning it into a purse, but that has yet to be done.

6 in 1 Crochet Pattern: Turtle Blanket, Shell, Diaper Cover, Stuffed Animals available on Etsy.