Pin looms come in lots of shapes and sizes….including the humble triangle. This shape is a powerhouse for weaving fun projects. It extends the boundaries of creativity, making it a must have for your pin loom collection.
As it is with weaving a pin loom square, so it is with the triangle. The process for weaving a triangle is the same no matter the size. We’ll demonstrate how to weave on a 2″ triangle, but keep in mind that a 4″ and 6″ weave the same…they simply have more repeats.
Pin looms can be found at some independent yarn shops, Etsy and Amazon. And you can build your own pin loom. There are 2 different types of pin looms: ones with evenly spaced pins and those with a 3 pin configuration. This post teaches you how to pin loom weave a triangle with a 3 pin configuration.
How to Weave a Pin Loom Triangle VIDEO
Weaving a pin loom triangle is simple, but can be a bit frustrating because warp strands are closer together (especially at the corners). Learn how to weave a triangle with this short video.
Weave a Pin Loom Triangle – Illustrations
Below are several illustrations for weaving a pin loom triangle. It’s accomplished in 4 layers: 3 warp and 1 weave. The pins on the hypotenuse are evenly spaced which makes weaving the triangle different than the square.
Note about the illustrations: The drawings show lines that are cattywampus, but when you weave them, your strands will be nice and straight.
Note about the pin spacing: our pin loom templates intentionally have the top pin slightly out of alignment for easier weaving. The finished woven triangle will look nice and neat.
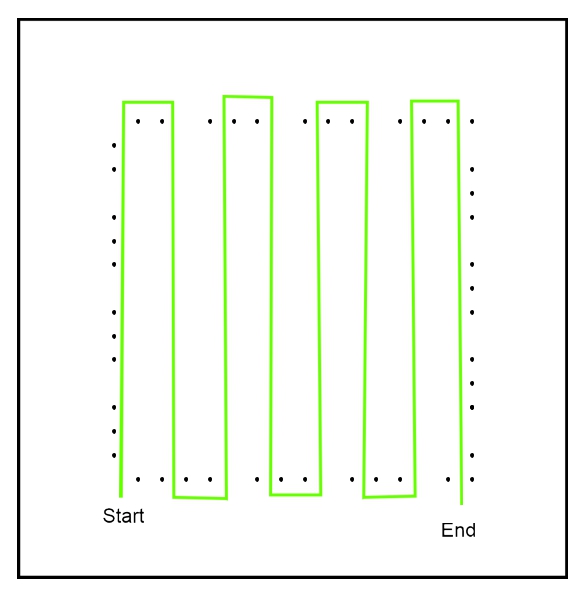
Layer 1: Warp 1 (Illustrated in Green)
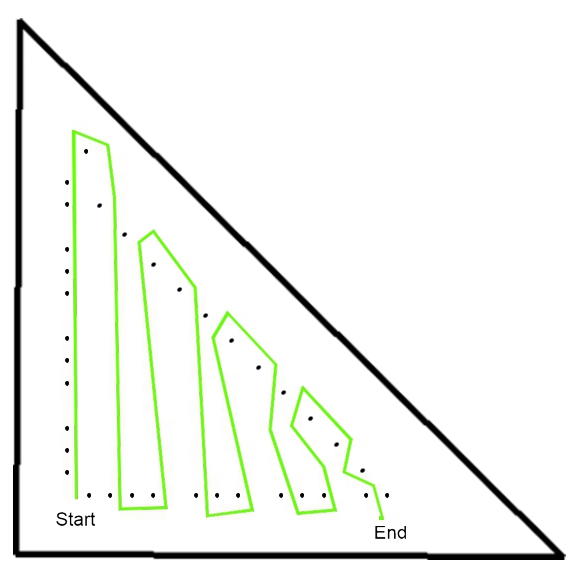
Orient the pin loom so the start arrow is in the bottom left corner. The right angle will be the left corner.
- Hold the yarn at the start (to the left of the 4 pins), bring it up to the top and wrap it right across the first 2 pins.
- Bring yarn back down to bottom row of pins and between pin 2 and 3.
- Wrap yarn to the right across 2 pins (pins 3 and 4).
- Bring yarn back to top. Skip a pin, wrap yarn across next 2 pins.
- Bring yarn back down, skip a pin, wrap across next to 2 pins.
- Repeat previous 2 steps across ending with yarn between last 2 pins at bottom right corner.
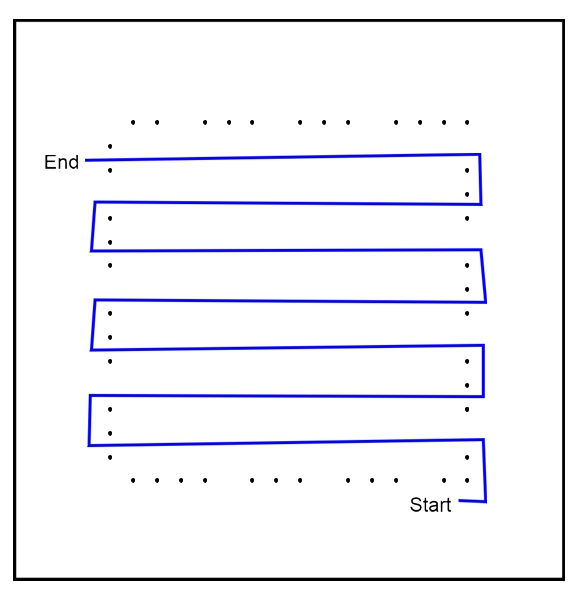
Layer 2: Warp 2 (Illustrated in Blue)
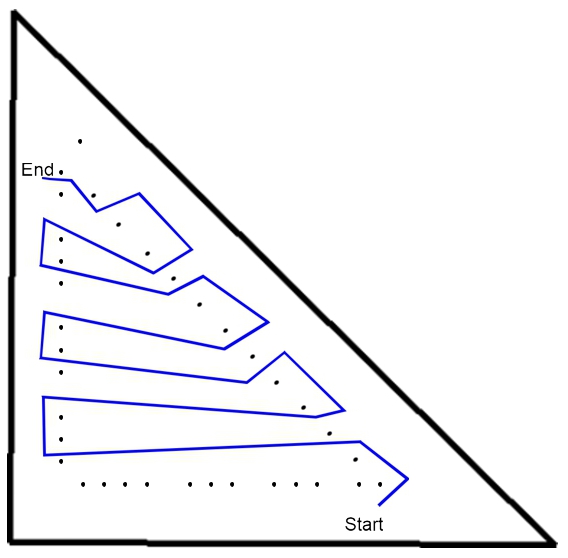
This layer will work right to left. Continue where you left off at warp layer 1.
- Bring yarn to right side.
- Bring yarn up and wrap across 2 pins.
- Bring yarn to left side of loom, skip 1 pin, wrap yarn across next 2 pins.
- Bring yarn to right side of loom, skip 1 pin, wrap across next 2 pins.
- Repeat previous 2 steps to the top.
- Finish by bringing yarn to the left between pin 1 and 2 near the top.
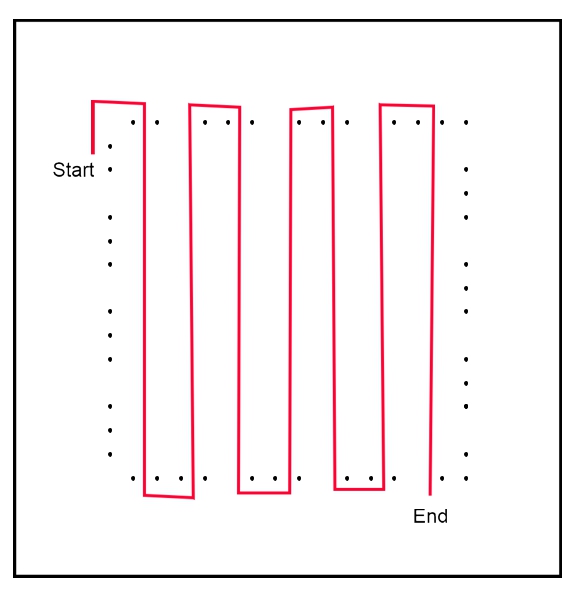
Layer 3: Warp 3 (Illustrated in Red)
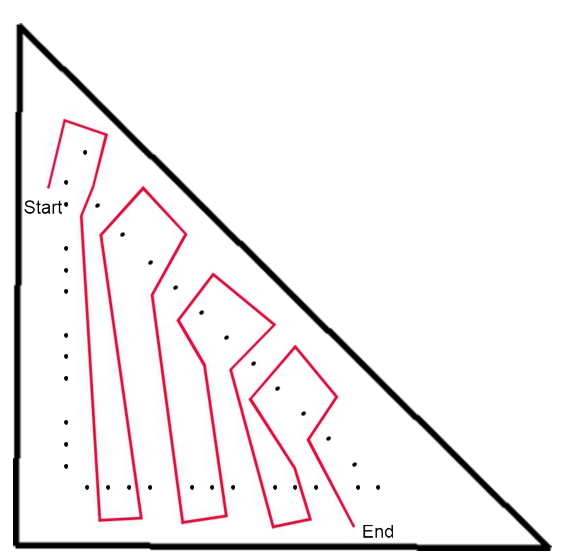
This layer will work from top to bottom. Continue from where you left off at warp layer 2.
- Bring yarn to the top around the 1st pin of the hypotenuse.
- Bring yarn to bottom, skip the 1st pin, wrap yarn across 2 pins.
- Bring yarn to top, skip 1 pin, wrap yarn across 2 pins.
- Bring yarn to bottom, skip 1 pin, wrap yarn across 2 pins.
- Repeat previous 2 steps across.
- Finish at the bottom, skip 1 pin, place yarn in gap with 2 pins to the right.
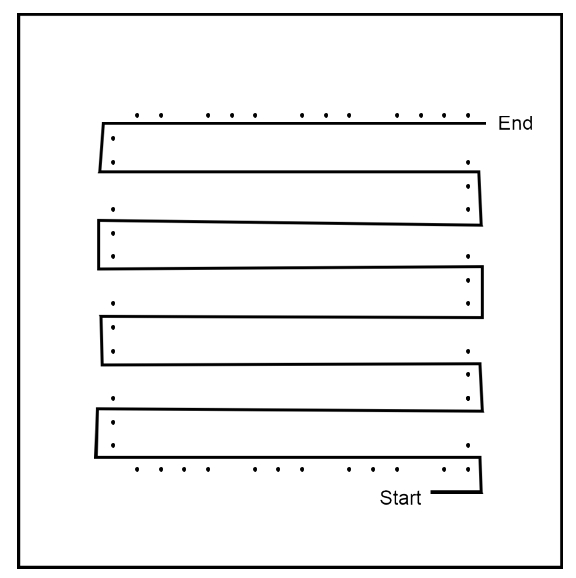
Step 4: Weave (Illustrated in Black)

This layer will be worked right to left. Continue from where you left off at warp layer 3.
- Before starting this layer, you need to measure out a length of yarn for weaving. Wrap the yarn around the outside of the pins (around all 3 sides) 4 to 6 times. This will give you enough yarn to weave and a little extra for joining shapes together.
- Cut the yarn after the last wrap, unwrap yarn back to end of last warp, and place yarn on weaving needle.
- Plain weave is the most common pattern. You will bring needle under a strand, then over the next strand, repeating under/over all the way across.
- Begin at right side of loom. Look for yarn that wraps across 2 pins, which is the first 2 pins on the bottom right. The needle will always go over the loop (See ***Special Weaving Note below if there are 2 strands at the start of your weaving row).
- Because you are starting in a corner, it may be challenging to see the different yarns to weave under and over. You can tell which to go under because the strand will be lower/recessed. The strand to weave over will be higher/raised. Weave under/over across.
- Pull yarn all the way through.
- Now weave left to right (next is weaving between pins 2 and 3). Place yarn over the strand across the pins and weave as normal: under/over across.
- ***Special weaving note. The next row is woven right to left and you’ll notice there are 2 strands wrapped around these pins (see photo below). YOU MUST WEAVE THEM INDIVIDUALLY as follows:
- With weaving needle, push top strand to right, exposing the strand below.
- Now, put your needle under that second/lower strand. This is your 1st under.
- Weave the remainder of the row as normal: over/under across.
- Continue weaving the remainder of the rows under/over across. Note that the hypotenuse side will often have 2 strands wrapped across the pins. Weave them as mentioned above.
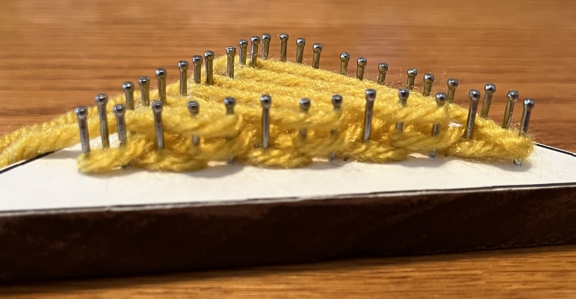
Photo shows the hypotenuse side of the triangle where some pins have a double wrap. See ***Special Weaving Note above for how to weave those end strands so your triangle looks nice and tidy on this side.
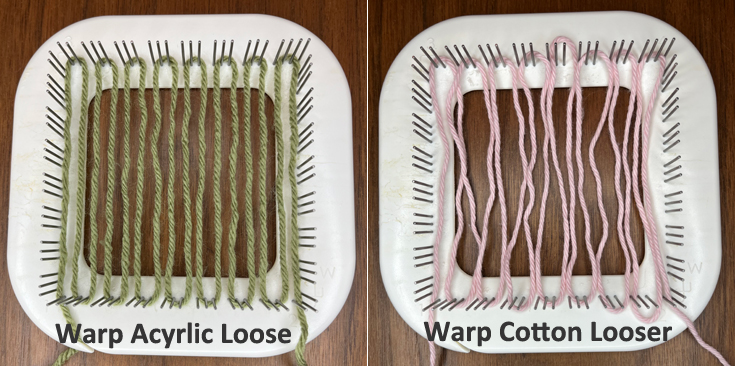
Yarn Size
Traditional pin looms are designed to be woven with light weight (size 3) and medium worsted weight (size 4) yarns. Since the triangle is a little bit trickier to weave than the square, we recommend that you weave your first triangle with cotton thread. That will allow you to see how all the strands interact with the pins.
Yarn Fiber
The type of yarn you use will also impact how easy you triangle is to weave. Yarns with some elasticity will be easier to weave with because they have some stretch and give.
- Easier yarns: acrylic, wool and other animal fibers.
- Difficult yarns: cotton, bamboo and other plant fibers.
- Learn more in our Selecting Yarn to weave post.
Tips for Weaving
We share 11 Tips for Pin Loom Weaving in another post. It was written with the 4″ square in mind, but the concepts will translate well to weaving a triangle. For instance:
- We recommend that you leave a long tail so you can joins woven shapes together.
- After weaving a row, you can beat down the strands with your weaving needle or a dinner fork.
- You will want to use both hands when you weave the pin loom triangle. One moves the needle while the other moves warp strands aside so you can weave more easily. Sometimes I’ve even used a yarn needle to move strands aside so I can find where to place my weaving needle.
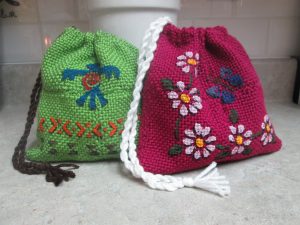
Pin Loom Triangle Patterns
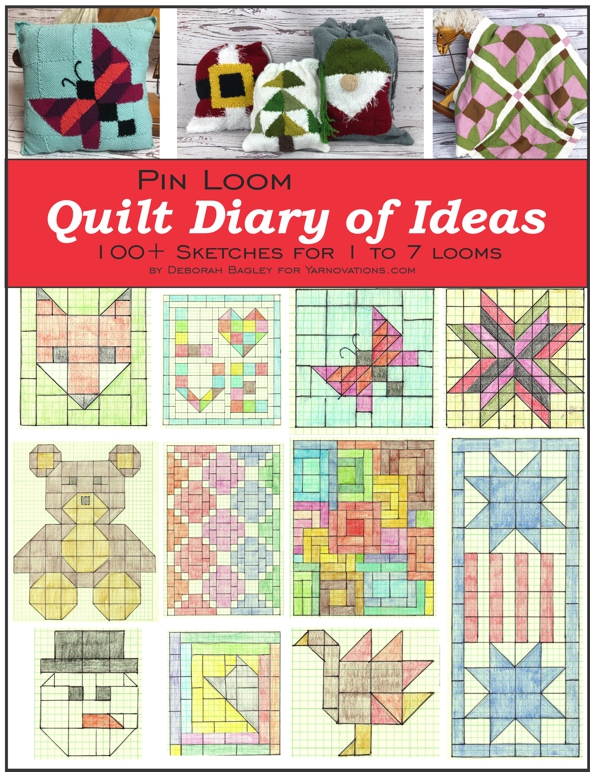
What can you make with pin loom triangles? Lots of things, especially if you combine them with squares (and/or rectangles). One of our favorite patterns is the Quilt Diary of Ideas which has chapters devoted to single shapes and other chapters for multiple shapes.
Check out our YarnovationsShop on Etsy for fun and exciting pin loom patterns.
Can’t find a triangle loom? Build your own pin loom triangles (squares and rectangles, too).