I am embarking on a large task, sewing a California king sized rag quilt! Do I have lots of time for this? Not really. I anticipate this quilt will take several months working in 10-30 minute snippets at a time. First, I made a plan.
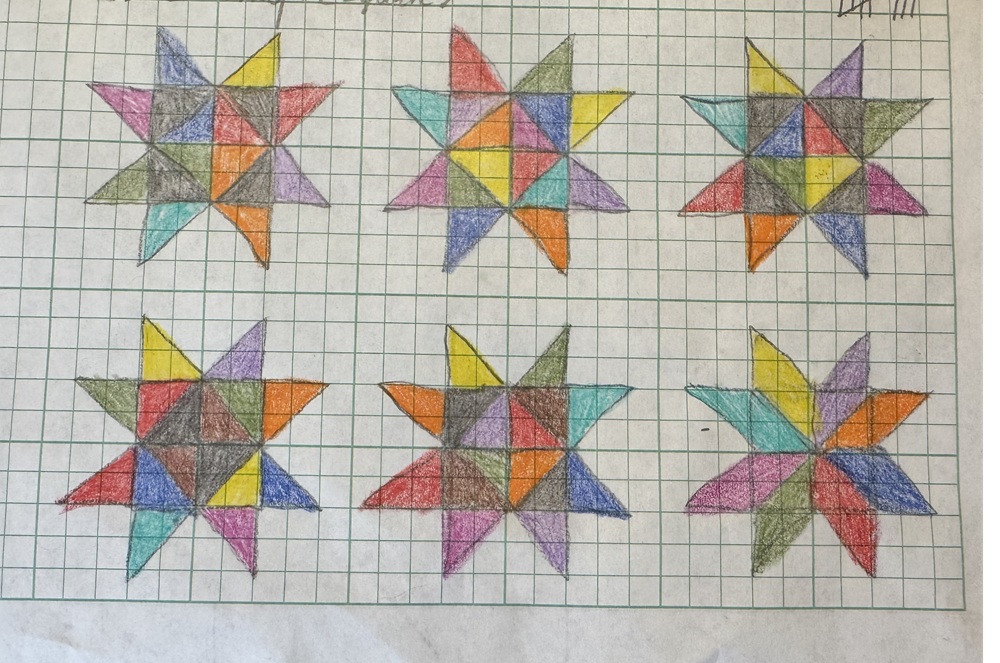
I decided on a star image with border sections. I sketched out several stars to try out different color placements. Next, I measured the bed (top and overhang desired) to determine what sized squares and triangles I would need. The top measured 72″ wide x 84″ long. The length of the sides could be 18-22″ long. I already know that I do not want the sides to touch the floor. With these dimension in mind, I decided on 12″ squares after being sewn together. I decided on 1/2″ seams on each side, so the squares need to be 13″.
Next, I sketched out a design. Many quilts used as bedspreads have a bunch of extra fabric in the corners. I don’t want all that fabric, so I decided to leave out the corner sections on the bottom of the blanket. If the quilt doesn’t close in the corners after being placed on the bed, I will come up with a creative solution for keeping the corners closed.
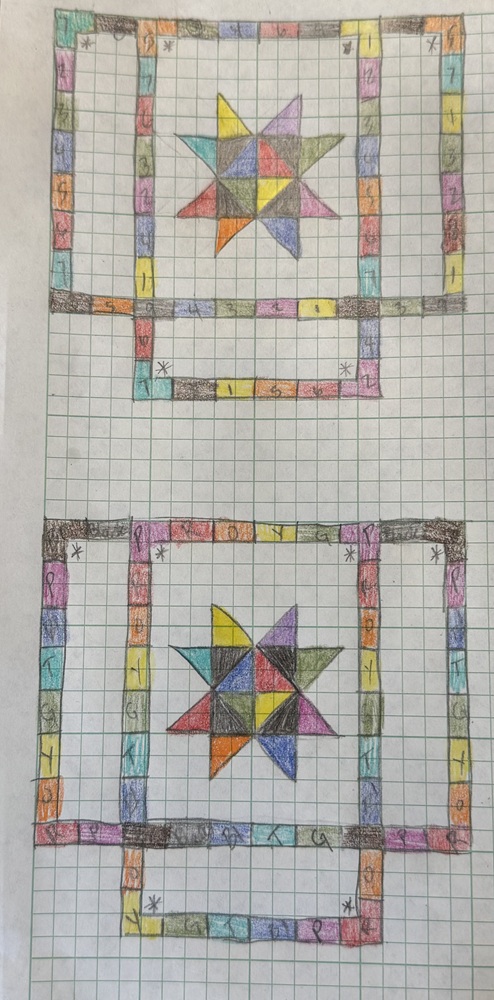
With this design in mind, I began tackling the shapes for the top. As drawn, I would need triangles, squares, and rectangles. Rag quilts often have 1/2″ (5/8″, 3/4″, or 1″) seams on the front/right side of the quilt that are clipped 1/8″ apart to create the rag look. Therefore, I cut the squares at 13″ to allow for a 1/2″ seam on each side. I cut the triangles to 13 1/2″ lengths (on the two sides that make the right angle, not the hypotenuse), but that ended up being just a tad short when I sewed the squares together. I recommend 14″ right triangles. The border is rectangles, and those were cut to 7″ x 13″ I don’t have special cutting equipment, so I decided to make cardboard templates from cereal boxes.
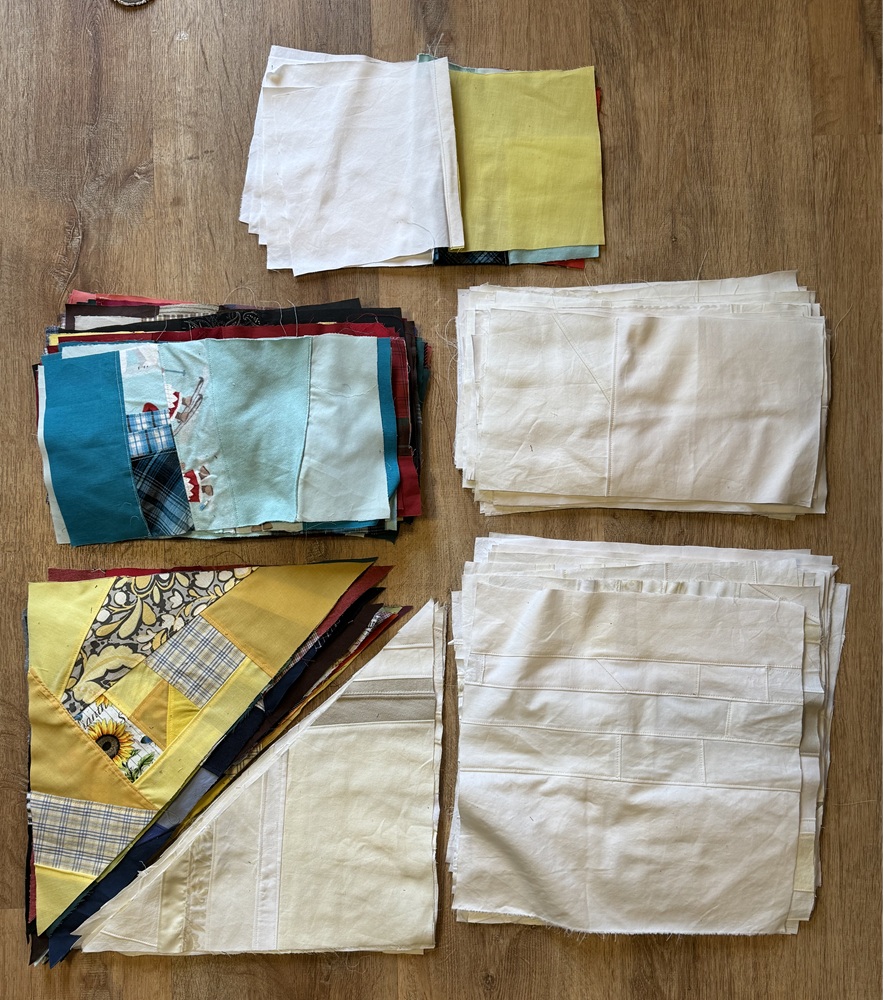
In addition to being a rag quilt, this is a scrap quilt. I decided to sew my remnant pieces together to create the star and border sections.
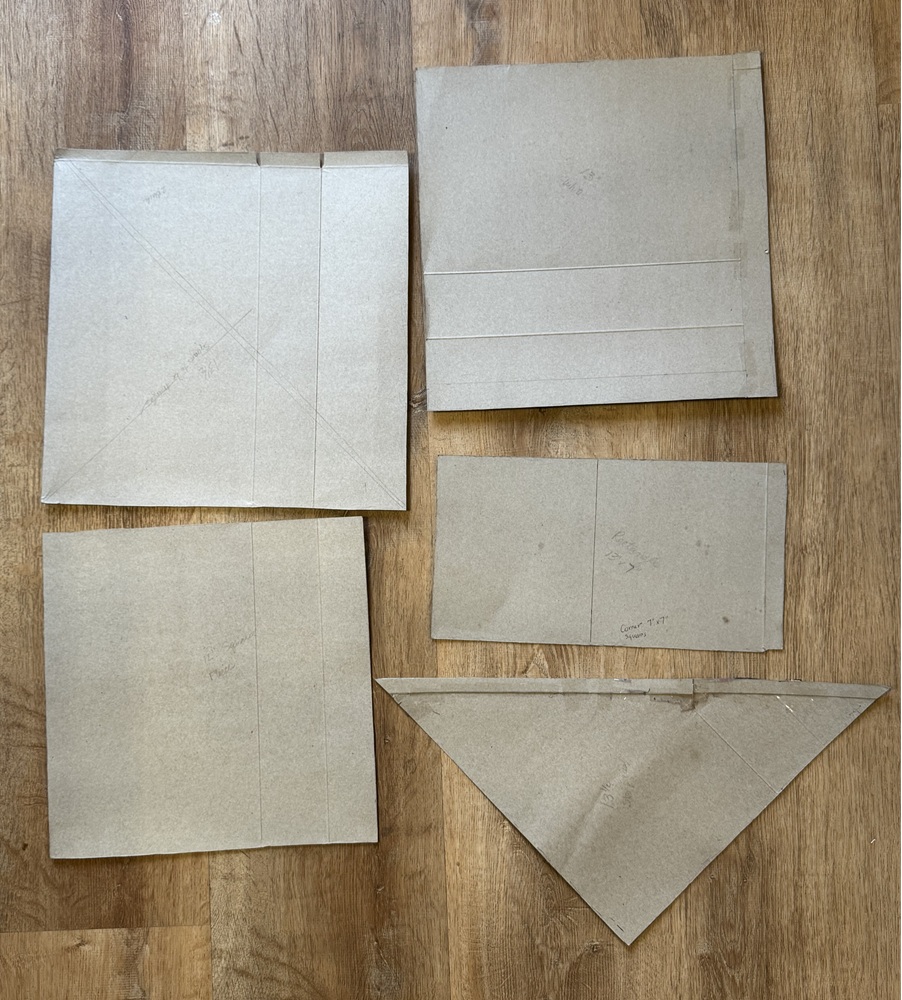
Because I couldn’t wait to see the star come together, I started my scrap quilt with the colorful triangles. I organized all my scraps by color and used the cardboard templates to make the triangles, squares, and rectangles.
Want to guess how long these steps took? Between homeschooling my two boys, driving my kids to appointments and activities, creating other sewing, weaving, and crocheted designs, the above steps took 6 1/2 weeks. Did I get frustrated? Normally I would have, but I decided that this project is allowed to take as long as it takes.
Next steps: Decide on the bottom fabric and colors, cut the bottom squares, cut middle fleece, then assemble the quilt.

