Yarn Snips Waste Basket Crochet Pattern

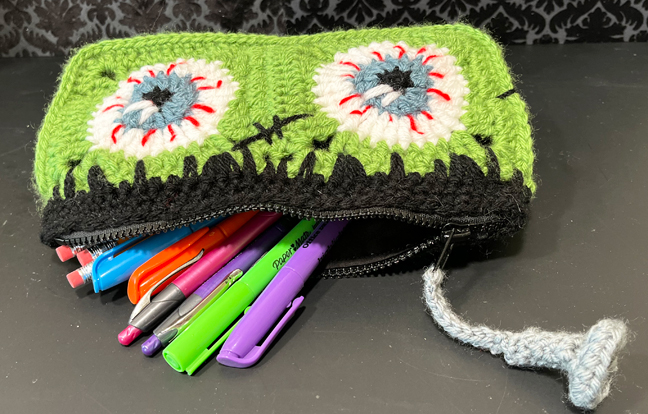
Practical and beautiful, this mini trash can is the perfect solution to pesky yarn snips that collect on our side tables and work spaces.

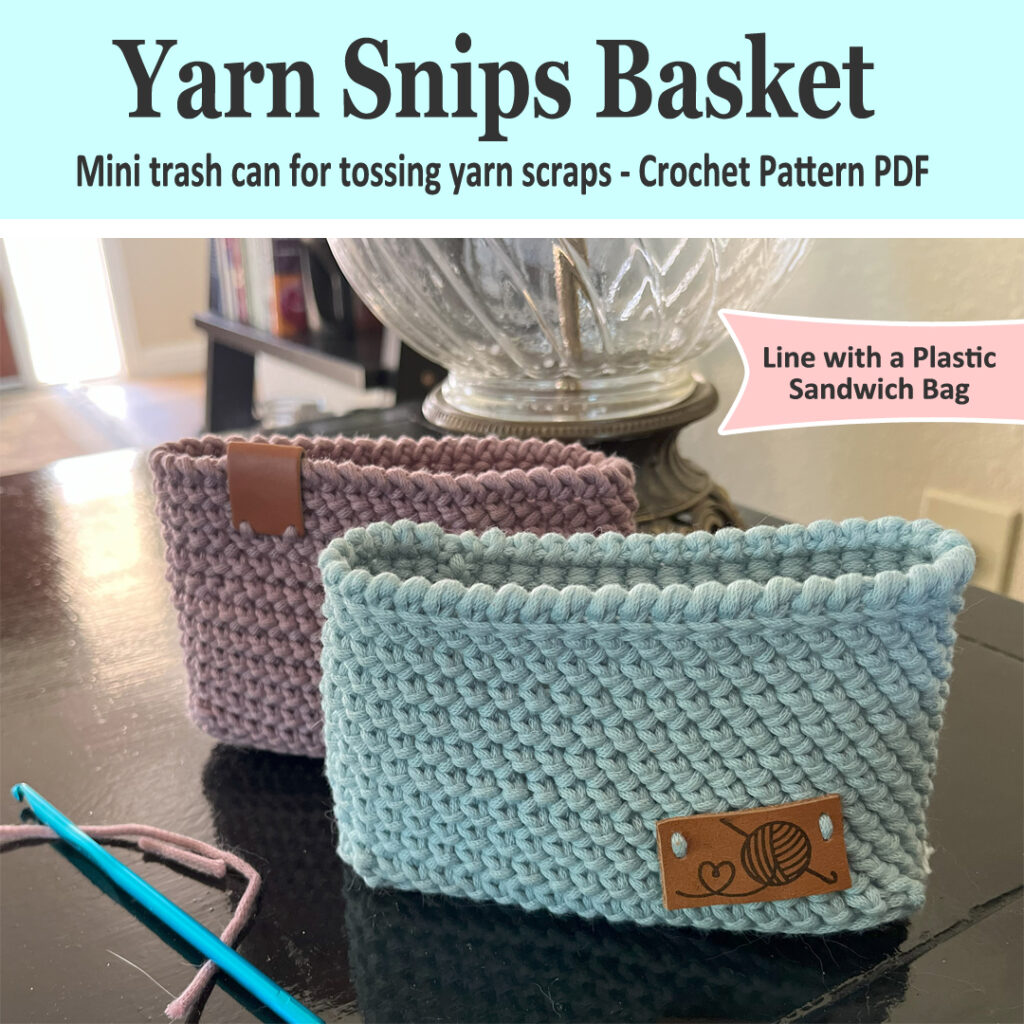
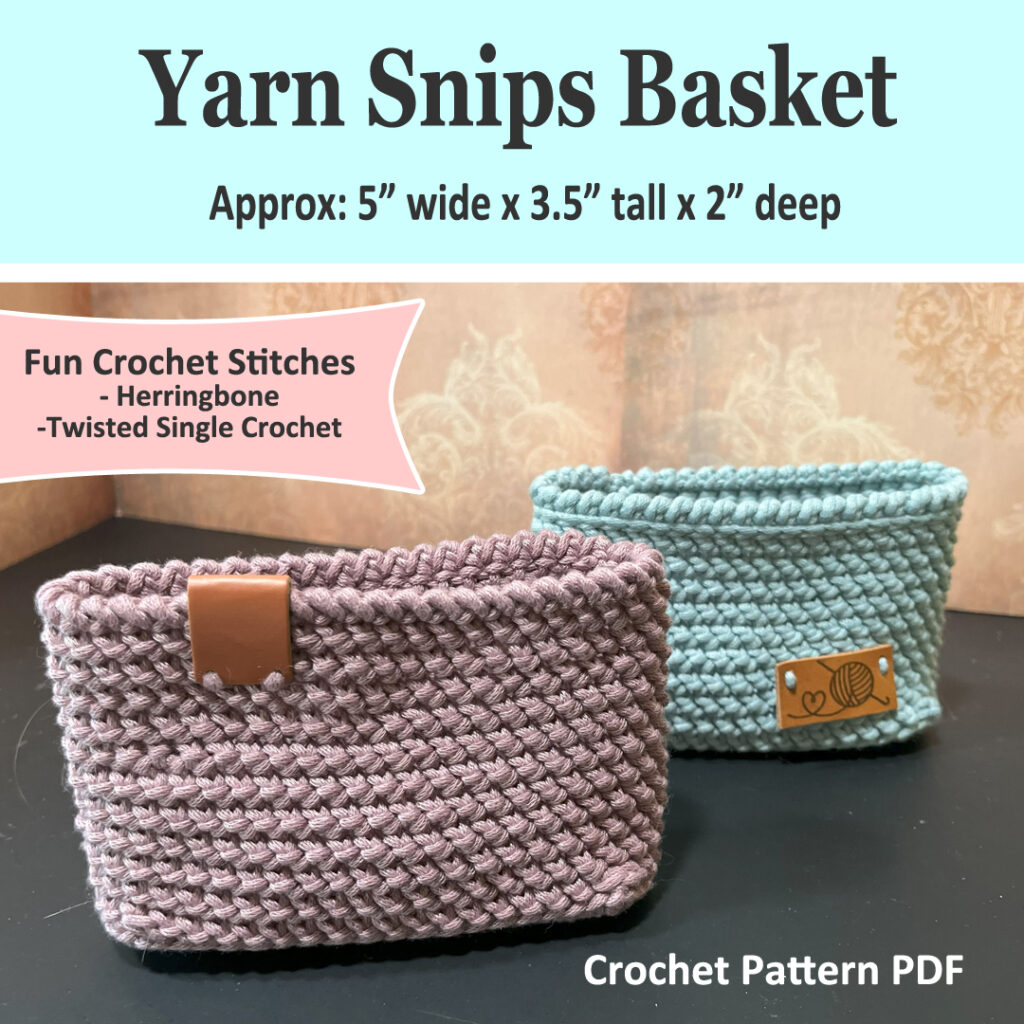
This mini crochet basket is the most practical item we’ve every made…next to a dishcloth. It’s surprising how much a little 5″x3.5″x2″ crochet basket can hold. You can toss yarn snips, candy wrappers, pistachio shells and more! Really.

About the Yarn Snips Basket Crochet Pattern

The crochet pattern for the yarn snips basket / trash can includes:

  • Step by Step Written Instructions
  • Supplies List and Links
  • Instructions for working Herringbone Stitch
  • Instructions for working Twisted Single Crochet
  • Optional Finishing with Reverse Single Crochet
  • 5 Photos
  • 5 Pages

Skill Level: Easy

Stitches Used: Chain, Slip Stitch, Single Crochet, Half Double Crochet
Special Stitches: Herringbone Stitch, Twisted Single Crochet (or Reverse Single Crochet)
Techniques Used: Crochet in rows, crochet in the round, increase, decrease

Yarn Snips Basket Crochet Pattern Available on Etsy

The Yarn Snips Basket crochet pattern is available in our Etsy shop.

Available now on Etsy.

Buy Now on Etsy

Share the Love, Pin to Pinterest

Share this fun project with others by pinning one of our images to Pinterest.

More About the Yarn Snips Baskets Crochet Pattern

Little leather tags make crochet projects look extra special. The pink crochet basket was accented with a tag purchased from Etsy. The teal crochet basket has a leather tag we hand stamped. A link to the supplies used to make the crochet baskets and tags are included in the pattern.

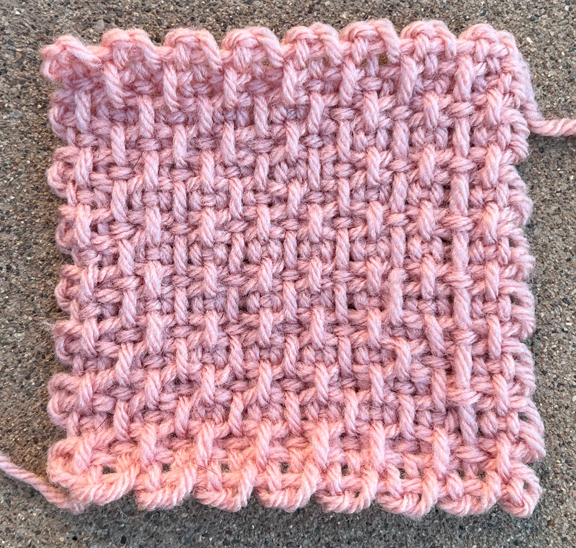
The finished edges on these yarn snips baskets are slightly different. The pattern includes both finishing options. The pink one was stitched with twisted single crochet The teal one was stitched with reverse single crochet.

Yarn Snips Basket Pattern Available on Etsy

The Yarn Snips Basket is available in our Etsy shop.

Available now on Etsy.

Buy the pattern on etsy

Santa Gnome Pin Loom Pattern

Is that you, Santa Claus?

Weave your own Santa with gift sack with this easy to follow step-by-step tutorial for Pin Loom Weaving. This pattern is beginner friendly – everything is woven in plain weave and the tutorial shows you how to tuck, roll and cinch pin loom woven squares and rectangles into jolly old St. Nick gnome / stuffed toy.

The Santa Gnome Pin Loom Pattern includes:

  • Santa Claus Gnome
  • Santa Gift Sack
  • Step by Step Written Instructions
  • 40+ Color Photos
  • 18 Pages

The Santa Gnome Pin Loom Pattern is available on Etsy

This Santa Gnome Pin Loom Pattern step by step tutorial is now available in our Etsy Shop.

Available now on Etsy.

Buy the pattern on etsy

More about Santa Gnome Pin Loom Pattern

This version of Kris Kringle, aka Santa Claus, is made with worsted weight yarn. He’s approximately 12″ tall x 7″ wide x 4 1/2″ deep.

Only 3 pin looms are needed to make this festive home decor Santa Gnome. We use these pin looms all the time, especially in our Gnome series. You’ll need:

  • Square 4″
  • Rectangle 2″x4″
  • Rectangle 1″x4″

Share the Love, Pin a Photo to Pinterest

Share the love of pin loom weaving and Christmas by pinning one of these images to pinterst.

Thank you!

Materials Needed to Make Papa Noel

Chances are, you have most of the tools you’ll need to make this Papa Noel, aka Santa Claus, Gnome. Here’s what you’ll need:

  • Pin Looms: Squares: 4”
  • Pin Looms: Rectangles: 2” x 4” and 1” x 4”
  • Yarn: Lion Brand: Basic Stitch – Medium (4)
    • RED HEATHER #400g – 175 yds
    • BLACK #153 – 32 yds
    • ALMOND #121l – 16 yds
    • WHITE #100 – 132 yds
    • MUSTARD #158 – 4 yds
  • Needle: 6” needle for weaving and yarn needle for sewing
  • Stuffing
  • Beans: to weigh the gnome down
  • Fringe Twister, Gold Cord or Braided Yarn
  • Fabric Marker/Chalk: – white, dark
  • Straight Pins – (optional)
  • Pet Comb – metal (optional)
  • 1 ½” pompom maker
  • Steamer (optional)

Santa by Any Other Name

Santa Claus is known by many names: St. Nicholas, Sinterklaas, Kris Kringle, Papa Noel, and Father Christmas. No matter what you call him, this Gnome is sure to bring festive cheer this holiday season with a “Ho, Ho, Ho” and “Merry Christmas” to everyone you know.

Get Your Santa Gnome Pin Loom Pattern

The Santa Gnome Pin Loom Pattern step-by-step tutorial is now available in our Etsy Shop.

Available now on Etsy.

Buy the pattern on etsy

Monster Pin Loom Pattern

Make a monster with a 4″ pin loom square following this tutorial with photos.

Pin Loom Monsters Pattern for 4″ Squares

These cute and cuddly monsters were made with only a 4″ pin loom square. They are super easy and really fun to make. Learn to make textured squares and how to tuck and fold squares to make ears, arms and feet.

  • Pajama Keeper – the mouth is left open so kids can tuck their PJ’s inside.
  • Pillow Pal – the monster is stuffed with fiberfill and the mouth is sewn closed.
  • Purse – sew a zipper in place of the mouth and use this monster as a purse. Pattern includes instructions for a crocheted shoulder strap.

Monster Pin Loom Pattern Available on Etsy

Get your copy of the monster pin loom pattern pdf from our Etsy Shop.

Available now on Etsy.

Shop our Etsy Shop

Monster Pattern: What’s Included

This is a tutorial with photos to make the trio of monsters pictured here. The pattern includes:

  • Step-by-by-Step Instructions
  • Pattern for 2 textured woven squares with photos
  • Step-by-Step Photos for shaping the ears and arms
  • Crochet instructions for eyes, teeth and purse handles (or use felt)
  • 20+ photos
  • 14 pages

Share the Love, Pin a Picture to Pinterest

Share the love of pin loom projects by pinning the above photo to pinterest.

More about the Monsters Pin Loom Pattern PDF

As we mentioned, the monsters are made with only one loom: a 4″ pin loom square. We used medium worsted weight yarn, specifically: Red Heart Soft and eyelash yarn. The textured squares use two colors on each square. The furry head also uses two different kinds of yarn. The ears, arms and legs are woven in plain weave with one color yarn.

The pattern is surprisingly easy to make. We include step-by-step photos for several steps…like the ears and how we warped the loom for the special squares. And of course, each step is written out from start to finish.

There is a tiny bit of crochet. But you can make the eyes and teeth with felt if you prefer.

Monster Pin Loom Pattern Available on Etsy

Get your copy of the monster pin loom pattern pdf from our Etsy Shop.

Available now on Etsy.

Shop our Etsy Shop

Frankenstein’s Monster Clutch

We’re celebrating Halloween all month long with this Frankenstein’s Monster clutch.

Designed to stand on it’s own, this blue eyed green monster bag has a zippered top to hold all your valuables safe inside. It can be used as a purse, pencil case, make-up bag and more. The gusset is narrow at the top by the zipper and wide at the base which allows it to stand. Make with or without a purse strap.

The Frankenstein’s Monster zipper pouch also features a bolt zipper pull. The sides and bottom are reinforced with heavy duty stabilizer so it flexible yet maintains it’s clutch shape.

Measurements: Approximately 9 ½” wide x 5 ½” tall x 2 ½” deep at base

Frankenstein’s Monster Crochet Pattern on Etsy

The Frankenstein’s Monster crochet pattern is available in our etsy shop.

Available now on Etsy.

Buy the pattern on etsy

More About The Frankenstein’s Monster Clutch

We call it Frankenstein’s Monster because of the scar on the forehead and bolt on the zipper pull. But we’ve also had people call it the Incredible Hulk or a Zombie. We can go with that, too.

The Frankenstein’s Monster Purse Crochet Pattern includes:

  • Written Instructions
  • 10 Pages
  • 10 Photos

The bag is made with 2 eyeball granny squares on the front panel and 2 plain granny squares on the back. A gusset is crocheted separately and joined to the front and back panels. The hair is crocheted at the end with regular crochet and spike stitches. Stabilizer, zipper, lining and optional handle give it a nice crisp look and make it super practical.

Share the Love, Pin to Pinterest

Share the love of Halloween by pinning one of our pictures to Pinterest.

Materials List for Frankenstein’s Monster Purse

We used Vanna’s choice yarn. But any medium worsted weight yarn should work. For the lining, you’ll want to measure your own bag as you may need more or less fabric and stabilizer.

  • Yarn:   Lion Brand Yarns: Vanna’s Choice – Medium Worsted Weight (4)
  • 100% acrylic (170 yds/156 m; 3.5 oz/100 g) 1 ball each:
  • #860 153 Black, C1
  • #860 108 Dusty Blue, C2
  • #860 100 White, C3
  • #860 171 Fern, C4
  • #860 113 Scarlet, C5
  • #860-149 Silver Grey, C6
  • Fabric: black for lining 15”x14” or size needed for your finished bag.
  • Stabilizer: Extra Firm 15”x14” or size needed for your finished bag.
  • Crochet Hook: H/8/5.00mm
  • Needle:  yarn needle for sewing
  • Needle and Thread: black
  • Stitch Markers
  • Straight Pins
  • Zipper: 10” black

Frankenstein’s Monster Crochet Pattern on Etsy

The Frankenstein’s Monster crochet pattern is available in our etsy shop.

Available now on Etsy.

Buy the pattern on etsy

Denim and Fabric Basket Sewing Pattern Collection

Sew your own gorgeous basket with this fun and easy Denim Basket sewing pattern PDF.

It’s a beginner friendly sewing pattern with step-by-step instructions and photos. Traceable templates are included for a denim basket (or fabric basket) that measures 10″ wide x 6″ long x 6 1/2″ tall.

About The Denim Basket (Fabric Basket) Pattern

This denim basket sewing pattern is FULL of helpful information making it great for new and experienced sewists alike. Here’s what’s in the basket sewing pattern:

  • 1 basket pattern: 10″ wide x 6″ long x 6 1/2″ tall
  • 2 lining options: sewn in or sewn separate
  • 3 handle options
  • 6 fabric designs
  • Traceable templates
  • 40 pages
  • 70+ photos
  • Beginner Friendly
  • Step-by-Step instructions

You can build your own fabric design, or sew a basket with a solid piece of material.

denim basket and fabric basket options in this beginner friendly sewing pattern

What material do you need to make a denim basket?

You only need 1 pair of children’s jeans to make a denim basket. However, we used 5 pairs for the chevron because we wanted different shades of blues and black material. You can use any denim you have on hand to make the denim baskets. If you want a basket with a pocket on the front, we recommend children’s jeans as the small size pocket is a perfect fit. Don’t have denim, check out your local second hand store for a pair or two.

What material do you need to make a fabric basket?

If you want to sew a basket from fabric, you have even more options. You can buy new fabric or use material you have on hand such as clothing and bed linens. This is a great time to upcycle fabrics that are worn or neglected or have a stain or two (just cut around those bad spots). The second hand store is also a great resource because you can browse all the clothing departments (children, men’s women’s) as well as the linens. We recommend cotton fibers for new sewists.

How much material is needed to sew a denim basket?

The denim basket and fabric basket each require 3 layers of fabric.

  • Layer 1: The outside fabric (such as denim or cotton)
    (2) pieces at least 12″ x 17″
  • Layer 2: The inside lining fabric (such as muslin or cotton)
    (2) pieces at least 13″ x 17″
  • Layer 3: The stabilizer (ultra firm – fusible or non-fusible)
    (1) piece at least 20″ x 24″

You’ll also need thread to match your fabric.

The Denim Basket / Fabric Basket Sewing Pattern PDF

You’ll also need the Denim Basket Sewing Pattern. It’s available in our Etsy Shop.

Now available on Etsy.

Buy the pattern on etsy

1 Basket Pattern – 6 Fabric Designs

Even though there is only 1 size basket in this pattern, we show you how to create 6 unique fabric designs. So it’s really 6 patterns in 1!

Basket measures: 10″ wide x 6″ long x 6 1/2″ tall.

The 6 fabric designs included in the denim basket sewing pattern are as follows. Keep in mind that this is in addition to a solid fabric basket design:

  • Chevron
  • Quadrant
  • Pocket Front
  • Stripes
  • Wide Stripe
  • Scrappy
Denim Basket with pocket used as baby diaper basket

Uses for Denim Basket (Fabric Basket)

This 10″ x 6″ basket size is really quite convenient. It will help you get organized and help your house feel neat and tidy. We’ve used these baskets as:

  • Baby Diaper Basket
  • Baby Shower Gift
  • Paperless Towel Basket
  • Book Storage
  • Bathroom Storage
  • Christmas Basket
  • Laundry Room Storage Basket
  • College Dorm Room Storage Basket
  • And more…

Pin Our Picture to Pinterest

Share the love. Pin our pictures to Pinterest.

Buy the Denim Basket and Fabric Basket Sewing Pattern on Etsy.

We had a lot of fun sewing basket after basket. You will, too. The Denim Basket Sewing Pattern is available in our Etsy Shop.

Available now on Etsy.

Buy the pattern on etsy

Shells and Lace Crochet Baby Blanket Set

The Shells and Lace crochet baby blanket pattern set is surprisingly quick to stitch, and it comes with 3 accessories making it a great baby shower gift. This pattern set includes a baby blanket, sweater, hat and booties for newborns.

The baby blanket measures 27″ wide x 36″ tall.

The Shells and Lace pattern looks great in so many colors. We’ve stitched one in pink and one in blue. They are so sweet! The main stitch of the baby blanket is corner-to-corner with a twist. The edging is stitched in 5 rounds and it adds a gorgeous finish to the solid center panel.

Corner to Corner – C2C In Rows!

Did I mention this is a fun pattern to crochet? Sooo much fun.

The main pattern of the baby blanket is like corner-to-corner but better! This is worked in rows without any decreases or increases. In fact, it has a one row repeat. It’s made in a rectangle rather than from corner to corner. No more worrying about when to make a corner. This C2C stitch is worked back and forth until you have the length needed.

The blanket is a great project to work on while watching tv or at a ball game, because you just need to glance down every so often to work a cluster.

Shells and Lace includes a Newborn Baby Sweater

Yep, you read that right. The Shells and Lace crochet pattern includes a newborn baby sweater. It coordinates with the baby blanket with a bit of corner-to-corner stitching.

The collar has a bit of the crochet shell pattern found on the edging of the baby blanket, too.

newborn baby sweater crochet pattern with some corner-to-corner stitch

Shells and Lace includes Baby Booties

Oh yeah. The fun continues with adorable newborn baby booties. The main body of the baby booties is single crochet, but the cuffs are similar to the shells edging the Shells and Lace Baby Blanket Pattern.

We’ve attached cute pink buttons, but we’ve also seen these dressed up with little daisy buttons, too. We recommend that you crochet the booties then take them to the store to select a pair of sweet and whimsical buttons.

baby booties with shell cuff crochet pattern

Shells and Lace includes Newborn Hat

The set wouldn’t be complete without a baby hat! This newborn beanie is stitched in half double crochet and edged with corner-to-corner stitch. Yep, corner-to-corner makes a great edging! Who knew?

newborn baby hat crochet pattern

Pin to Pinterest

Share the love, pin our pictures to pinterest.

4 in 1 Crochet Newborn Set Available on Etsy

The Shells and Lace Baby Blanket Set crochet pattern is available in our Etsy Shop.

Available now on Etsy.

Buy the pattern on etsy

4 in 1 Crochet Pattern includes:

  • Baby Blanket: 27″ x 36″
  • Newborn Baby Hat
  • Newborn Sweater
  • Newborn Baby Booties

More about the Shells and Lace Baby Set

Shells and Lace Crochet Baby Set was made with a size 3 light weight yarn.

  • Yarn: Bernat Softee Baby: Light Weight (3) Soft Red

Stitched in USA abbreviations:

  • ch = chain
  • dc = double crochet
  • dec = decrease
  • hdc = half double crochet
  • inc = increase
  • picot = ch 3, sl st in 3rd ch from hook
  • rnd = round; work in the round
  • sc = single crochet
  • sc inc = single crochet increase; two single crochet in the same stitch
  • sl st = slip stitch
  • st(s) = stitch(es)
  • trc = treble / triple crochet
  • *instructions* = repeat the instructions written between the ** the number of times indicated after the second *
  • [instructions] = repeat the instructions written between the [ ] the number of times indicated after the ]

About the Shells and Lace Crochet Pattern

The pattern was written as part of the Twins Face Off in 2015 where Deborah and Dana each made a baby set and asked people to vote for their favorite. The pattern has not been modified.

The pattern is not written as a beginner pattern. There’s nothing complicated, but the pattern is a bit abbreviated which a beginner may find confusing. We assume one stitch will be worked in each stitch and only specify if multiple stitches are worked in the same space or stitch. For example:

  • “8 hdc, 3 hdc in next st”
  • This means to hdc in each of the next 8 sts, then 3 hdc in the next st.

This abbreviated version of pattern writing allows you to read each line more quickly and condenses the pattern.

Get Shells and Lace Baby Set on Etsy

Purchase your copy of Shells and Lace Baby Blanket Set crochet pattern in our Etsy Shop.

Available now on Etsy.

Buy the pattern on etsy

The pattern is for your eyes only. We give you permission to give away and sell your finished projects with credit to Yarnovations.com as pattern designers.

Miniature Pumpkins Revsied

Way back in 2015 we created a pattern for miniature crochet and knit pumpkins. We dubbed them “My First Pumpkin“. Since that time, we’ve added pin loom weaving and sewing to our crafting routine. Therefore, we’ve revised the pattern to include those as well.

Yep, this is a 4 in 1 pattern: crochet, knit, sewing, pin loom weaving.

pumpkin pattern for knit, crochet, sewing and pin loom weaving

Aren’t they gorgeous? I really can’t decide which is my favorite. I love the distinct look of each pumpkin…and they were all truly a joy to create.

And…drum roll please…there is a step-by-step tutorial available as well! Yep, there are pictures and written instructions for all four crafts: sewing, knit, crochet, and pin loom weaving.

Check out the updated and revised My First Pumpkin Pattern blog. Make one or all four or an entire pumpkin patch! These are fun to decorate your home and work place. They are also fun gifts because they are quick to make and so darn cute.

The blog has a free version of all 4 mini pumpkins. The printer friendly version has a TON of photos and lots and lots of tips; it’s available on our Etsy shop.

Head over to our blog to learn more: My First Pumpkin Patch.

Frankenstein’s Monster Gnome Pattern

Frankenstein’s Monster just got a whole lot cuter. And now you can pin loom weave your own gnome. Here he is sporting a Frankenstein’s Monster hat and a trick or treat bag. He’s all ready for Halloween and a spooky night of trick or treating.

The PDF pattern is a step-by-step guide to pin loom weaving your own Frankenstein’s Monster and Pumpkin Trick or Treat Bag. Every shape is woven in plain weave. He measures 10″ tall x 7″ wide x 4 1/2″ deep.

Here’s what’s included in the Frankenstein’s Monster Gnome Pin Loom Pattern:

  • Gnome with Frankenstein’s Monster Hat
  • Pumpkin Trick or Treat Bag
  • 14 Pages
  • 35+ Color Photos and Charts
  • Detail Written Step-by-Step Instructions
  • Complete Materials List

Purchase Frankenstein’s Monster Pin Loom Pattern

Frankenstein’s Monster Pin Loom Pattern is now available to purchase in our Etsy Shop.

Available Now on Etsy.

Mary Shelley introduced Frankenstein’s Monster in her novel Frankenstein in 1818. The concept of electricity to spark life into Frankenstein’s monster was introduced later in James Whale’s 1931 film. The main plot remains consistent, but modifications are made with each adaptation of the story…and now he’s been changed once again. This time Frankenstein’s Monster is a Halloween costume and this gnome is hoping to gather a ton of candy in his oversize pumpkin trick or treat bag.

Pin These Frankenstein’s Monster Photos To Pinterest

Share the Love, pin one of these Photos to Pinterest

The Step-by-Step tutorial makes this gnome really easy to make. If you can pin loom weave, then you can make this gnome. He makes for a great handmade Halloween decoration. But…he’s also fantastic gift for those friends and family members who are fans of horror books and films.

Here’s what we used to construct our own pin loom woven Frankenstein’s Monster:

  • Pin Loom Squares: 4” and 1”
  • Pin Loom Rectangle: 2” x 4”
  • Pin Loom Triangle: 2”
  • Yarn:   Red Heart: Soft – Medium (4)
  •             GRAPE #3729 – 100 yds
  •             BLACK #4614 – 40 yds
  •             WHEAT #9388 – 25 yds
  •             GUACAMOLE #4420 – 20 yds
  •             LIGHT GREY HEATHER #9440 – 10 yds
  •             CORAL #9251 – 16 yds
  •             WHITE #4600 – 120 yds
  • Needle:  6” needle for weaving and yarn needle for sewing
  • Stuffing
  • Felt: Black, remnant
  • Button: (2) 5/8”
  • Beans: to weigh the gnome down
  • Fabric Marker/Chalk: – white, dark
  • Straight Pins – (optional)
  • Tacky or Fabric Glue
  • Pet Comb – metal (optional)
  • Steamer (optional)

Buy the PDF Pattern for Frankenstein’s Monster

Instant download for Frankenstein’s Monster Gnome Pin Loom Pattern is available in our Etsy Shop.

Available Now on Etsy.

Buy Now on Etsy

Selecting Yarn for Pin Loom Weaving

Unlike knit and crochet, you can’t change the pin size on the pin loom to weave with yarns of various weights. The pins are fixed and to get a traditional weave, you are limited to a certain size of yarn. Or are you? Let’s take a closer look at yarns and what yarns work best for pin loom weaving.

Three variables should be considered when selecting yarn for pin loom weaving: yarn weight, fiber content and yarn structure. Below is a photo of yarns in various fibers and weights including wool, silk, nylon, cotton and polyester in superfine (1), sport (3), and medium worsted (4) weight.

See Yarn Label for Details

Yarn labels have a wealth of information. Some have more info while others make you turn to the internet for answers. Refer to the label below and see if you can find the following information:

  • Washing instructions (yes, you can wash and dry this – elsewhere on the label it gave more detail washing information)
  • yarn fiber (100% acrylic)
  • yarn weight (medium worsted (4))
  • skein weight (3.5 oz/100 g)
  • skein length (170 yd/156m)
  • knitting needles recommended (9/5.5mm)
  • crochet hooks recommended (J/10/6mm)
  • this label even says it’s great for making afghans, scarves and sweaters!

Yarn Weight for Pin Loom Weaving

A thin yarn creates a fabric with large holes between strands while a thick yarn creates a fabric that’s really dense. Most people weave with yarn that’s somewhere in the middle. Below is a photo of a 4″ square woven in Lion Brand Yarns Vanna’s Choice which is a medium worsted weight (4) yarn.

Light or DK weight (3) and medium worsted weight (4) are what most people use to weave on a standard pin loom. It creates a fabric that has some drape but also tight enough to use for flat or shaped projects like afghans, shawls and toys.

We’ve made afghans, gnomes and even vegetables with worsted weight yarn! Pictured below, the Viking Gnome was made primarily with Lion Brand Basic Stitch (4). The vegetables were made with Red Heart Soft (4).

Fine (2), superfine (1) and lace (0) weight yarn can also be used. For very loosely woven fabric, weave it as a single strand. For a drape similar to light or worsted weight yarn, then double up the threads.

Below is a photo of a 4″ square made with superfine (1) yarn held double for both warping (wrapping yarn on) the loom and weaving the square.

two strands of superfine yarn on pin loom

Yarns labeled bulky (5), super bulky (6) and jumbo (7) are too big for most pin looms. There are some pin looms with more space between the pins, but those are not as common. So as a general rule you want to avoid these fibers. But…maybe not. See Breaking the Rules below.

Yarn Fiber Content for Pin Loom Weaving

The great news is you can weave with any type of yarn whether it’s animal or plant based, man made or repurposed material. The bad news is, some materials are easier to weave than others.

The easiest yarn to pin loom weave with those with elasticity. When you pull on the strand, does the yarn stretch? If so, than it has some elasticity and will be easier to weave. Examples would be acrylic and wool.

warping pin loom with acrylic vs cotton

The yarns more challenging to weave are made with fibers/materials that have no elasticity like cotton and bamboo. They can also be used for pin loom projects and may even be preferred because of their fiber content (like dishcloths). You will just need to weave a little differently. Namely, you need to warp (wrap the loom) more loosely, see photo above for reference).

Yarn Structure for Pin Loom Weaving

Basically you’re looking for smooth vs. textured yarns. A smooth spun yarn like the cotton, acrylic and polyester chain pictured below are easier to weave because you will be able to see your strands as you weave. The Eyelash yarn will make it difficult to see your strands.

Most yarns are not single stranded, meaning they are constructed with 2 or more strands/plys twisted together. There is an S twist, Z twist, chain and more. Above, the cotton and acrylic are S twist and the polyester is a chain. We haven’t noticed any difference in S vs. Z twist and are mostly concerned about yarns that have bumps, halos (fuzzy) and eyelashes. Textured yarns are super challenging to weave on a pin loom and generally avoided. But…see Breaking the Rules, below.

The polyester chain (Lion Brand Let’s Get Cozy Lazy Days) has a nice elasticity and weaves up nicely, though it’s easy to accidently split the yarn. Just be sure not to pull too tightly as you finish pulling the yarn each weave. You don’t want to “cinch” it which will cause the square to have concave looking sides. As mentioned, the smooth texture of the chain makes it really nice to weave.

Below is a photo of dishcloths that were crocheted, knit and pin loom woven with eyelash yarn. You can read more about our experience on the blog, Scrubby Dishclothes…and why we say eyelash yarn should be avoided.

crochet, knit, pin loom dishclothes with scrubby yarn

Breaking the Rules

We generally warp/wrap three layers of yarn on the loom and weave one. Most of the time we warp and weave with the same yarn. But mixing and matching is popular too. It changes the entire look of a pin loom woven fabric and can have a drastic effect on your project.

This is where you can experiment; break the rules and use different yarns. You can use a different yarn for each layer or just some of the layers.

Smooth Textured Warp and Textured Weave

A popular combination is wrapping the loom with a smooth yarn then weaving with a textured yarn. This is a great compromise and will save you a lot of frustration and heartache.

Want a scrubby dishcloth? Try warping in cotton and weaving with scrubby.

Another fun combination is warping in acrylic and weaving in eyelash. Below is a photo of Santa’s Belly pillow that incorporated eyelash yarn for just the weave portion. Woven Christmas Decorations were made with 4″ pin loom squares and medium worsted weight (4) yarn.

pin loom christmas decorations

We loved the look of eyelash yarn in woven squares so much, we included it into the beard of the gnome bag found in the Pin Loom Quilt Book of Ideas, too.

A diary of 100 quilt like shapes to make on a pin loom.

Breaking the rules is where you turn on the creative juices. If you have a yarn that you love but think it would be too difficult to use on a pin loom, try using it for only one or two layers. You can also try it for a partial layer to create gorgeous stripes or embroidery.

Yarns to Pin Loom for Beginners

Putting all this information together, we do have a few recommendations for beginner pin loom weavers. It’s not an exhaustive list, just a place to get started. Here are a few yarns we recommend you use as you learn:

  • Cascade 220 Superwash or Cascade 220 Superwash Sport
  • Lion Brand Basic Stitch or Heartland or Baby Soft
  • Red Heart Soft
  • Caron Simply Soft

More could be said, more rules could be made and broken, but we’ll leave it at that.

May you enjoy the journey of experimenting with yarns and creating fabrics and projects that you love.

How to Pack Down Yarn in Pin Loom Weaving

Packing yarn is not about going on a trip and deciding what yarn to take with you. Though I’m sure there are some nuances about what to take and how to pack it. This is about how to straighten yarn strands on the loom between weaving passes.

The Problem

When you weave your yarn through the pin loom, the strands above get pushed out of alignment. It just happens. And that’s a problem because you need to weave above that next strand but there’s not much space to work with.

This problem will continue…from the first weave to the last. Let’s take a look at the problem.

The yarn needle pictured above has been woven through the first row on the pin loom. It is ready to be pulled through. You’ll notice the next horizontal line has risen out of alignment and is very near the third strand. On your next weave, you need to weave your needle between those two strands but there’s not much space.

The Solution

After you draw your needle through your weaving, you’re ready to start packing. Packing means to compress your strands to the bottom of the loom. Packing not only helps align the yarn for your weaving, but it helps create a beautiful fabric by compressing previously woven strands which will make your weaving look more crisp and even.

There are a few options for packing. You can use a packing comb, a fork, hair pick or the needle you’ve been weaving with. Experiment with them to see which method or combination of methods you like best. We’ll discuss them in a little more detail below.

packing tools for pin loom weaving

No Packing Comb, No Problem

To straighten weaving strands, you use a packing comb to comb the strand you just wove as well as the next strand to the bottom of the loom. A packing comb is kind of like a metal pet comb. Generally it’s a slender piece of wood with tines. Don’t have a packing comb? Try one of these options:

Pack With A Dinner Fork

You read that right. The tines on a dinner fork tend to be just the right width for packing weave strands. Place the fork above the strand to be packed and pull it toward the bottom of the loom. You will repeat this process several times moving the fork to the left and right to pack strands across the row.

The down side to using a fork is that it’s narrow. You’ll need to move it many times to pack the strands.

Pack with a Hair Pick

The process is the same as using a fork. Place the pick above the strand to be packed and pull down. The obvious benefit to this over the fork is that it has more teeth and can pack more threads at once. The only down side is that it’s one more tool to keep track of.

Pack With Your Weaving Needle

The packing won’t be as tight, but you can just poke at your work with your weaving needle to pack your threads. This is obviously the slowest method, but the benefit is that you don’t need an additional tool. This method works well when combined with the following packing method “Pack As You Weave”.

packing yarn strands on pin loom with weaving needle

Pack As You Weave

The yarn needle itself can be a packing tool. Weave most of the row, then press the needle down toward the bottom of the loom to try to smash all the previous woven strands together. I know, not very elegant, but very effective! Packing as you weave will open up your current work area as well as compress your previously woven strands.

This doesn’t solve the problem of the creating space for the next weave, however. So you’ll need to you use this in addition to the method mentioned above “Pack With Your Weaving Needle”, then you won’t need any special packing tools.

We’ve used all of the methods mention above. And they are all great. We have woven so many shapes and misplaced our packing tools often enough that we pretty much just pack as we weave and pack with the weaving needle.

Take a look at the following image of a pin loom woven square. It was packed in our preferred style. It created a nice looking weave even without the use of a special packing tool.

Now that we’ve talked through a few options, it’s time to get packing!

Packing Isn’t So Hard

As mentioned previously, the last few rows can be more challenging to weave. But that’s not always true. If you weave patterns that go over 1, under 3, for instance, packing is easier because the weave is looser. A great example is Loomette Weave #1 which we blogged about.

loomette weave 1 for pin loom

An example of a project where the packing was easier is the Starfish Trio. The cushion star was woven with two different colors of yarn in a weave pattern of over 1, under 3.