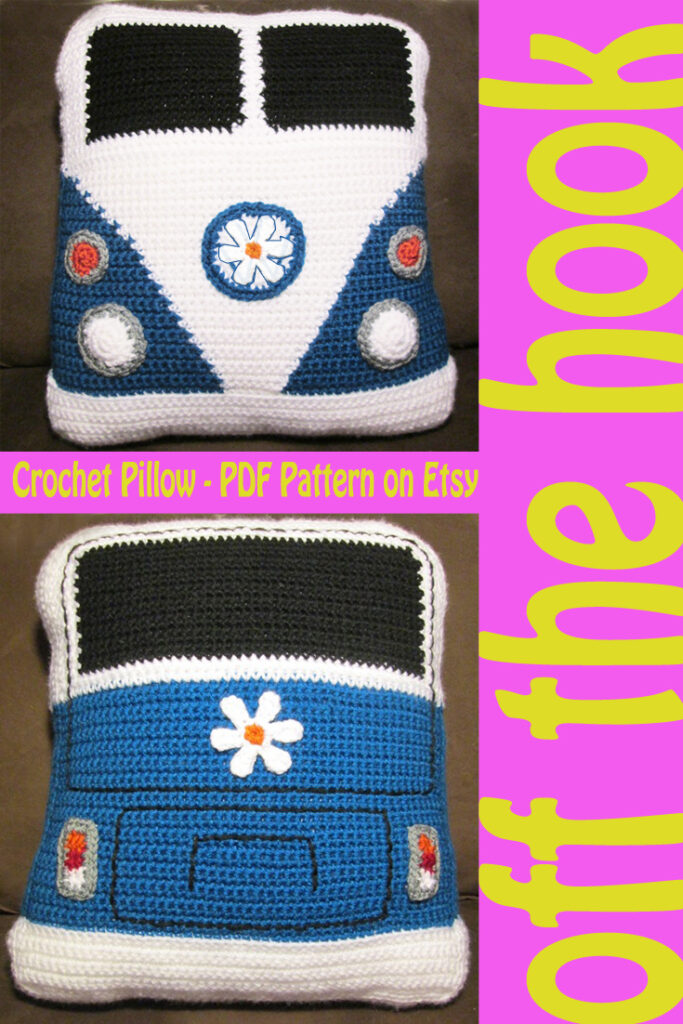
VW Van Pillow – Free Crochet Pattern
Love VW Van’s? Here’s our groovy interpretation on the campervan. We picked some of our favorite shapes for the lights and turn signals, etc. so this doesn’t match any particular model.
This free crochet pattern off the hook! It’s written in USA terms as a fair isle project so you’ll pick up and drop colors as you need them. Although it is a fairly easy project, the use of multiple colors per row can make it a tiny bit more challenging. But the majority of the project is single crochet, so crocheters of all experience levels will be able to tackle it.

PDF Download Available on Etsy
If you’d like the printer friendly version Groovy Campervan Pillow, it’s available in our Etsy Shop.
Available now on Etsy.

Information Before You Begin the VW Campervan Pillow Crochet Pattern
Is this pattern right for you? We rate this as easy because it’s mostly single crochet worked in rows or rounds…but if you’ve never crocheted before, it may be challenging. If you know how to chain, slip stitch, single crochet, half double crochet and double crochet, then this is a piece of cake. Most of the project is worked in rows. The accent pieces are stitched in rounds. Here are some other stats:
- Skill Level: Easy
- Project Type: Pillow
- Size: 13 1/2″ wide x 16″ tall
- Gauge: 7 sc and 8 rows = 2″
Since this is a pillow, gauge isn’t super important. We used medium worsted weight (4) yarn and the size hook recommended on the label. We also used a smaller hook for the accent pieces like the lights, turn signals and flower.
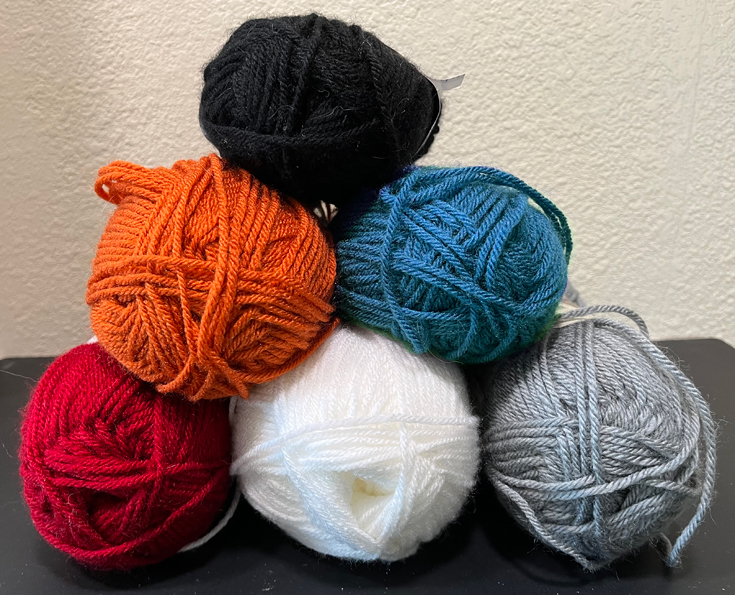
Belowis a quick picture of the colors of yarn used in this project. It’s amazing how a skein of yarn can be transformed into a huggable couch cushion. Or maybe this is going in your vehicle. We’ve had people tell us they made this for their kid’s college dorm room. This VW campervan is just so happy.
Here’s a list of items we used to make the pillow:
- Yarn: Lion Brand Vanna’s Choice –Worsted Weight (4)
- BLACK – 1 skein
- SAPPHIRE – 2 skeins
- WHITE – 1 skein
- SILVER GRAY – 1 skein
- CRANBERRY – remnant
- TERRACOTTA – remnant
- Hook: J / 10 . 6.00 mm
- Hook: H / 8 / 5.00 mm
- Needle: Yarn Needle for sewing
- Stuffing
Crochet Abbreviations and Meanings
Almost all patterns are written with abbreviations to cut down on space. Here is the key to the abbreviations you’ll see in this VW Van Pillow Crochet Pattern:
- Ch = chain
- DC = double crochet
- Dec = decrease; crochet two stitches together
- Hdc = half double crochet
- Inc = increase; work two stitches in the next stitch
- Rnd = round; work in the round
- Sc = single crochet
- Sl st = slip stitch
- St(s) = stitch(es)
- *instructions* = repeat the instructions written between the ** the number of times indicated after the second *
There is no standard for pattern writing for crochet. This particular pattern may be a bit more brief than others you’ve seen.
How to Read the VW Van Pillow Pattern
Let me give you an example of how to read a row of this pattern. As you stitch it, you’ll really like it because you can get all the information you need with just a quick glance.
The pattern reads:
Row 12: Turn, 19 Sapphire sc, 9 White sc, 20 Sapphire sc.
How to work the row:
Row 12: Turn your work, pick up the Sapphire yarn from previous row, work 1 sc in each of the next 19 sts, drop the Sapphire yarn, pick up the White yarn from the row below, work 1 sc in each of the next 9 sts, drop the White yarn, pick up the Sapphire yarn from the row below, work 1 sc in each of the next 20 sts.
Wow, we sure saved a lot of space…and we “assume” all sorts of things with our condensed version. Check out the next section for tips and tricks.
Tips and Tricks to Fair Isle
If this is your first fair isle pattern, here are a couple of tips:
- You do not cut the yarn after each row. Instead you drop it to use in the following row.
- Always drop your yarn to the same side of the pillow. This will be the back of your work. You do this because there will be little “floats” of yarn. Particularly on sections where you pick up a color earlier or later than you did in the previous row. No one will see the floats if you always drop the yarn to the same side. One Row the floats will be on the back of the work. When you turn your work, then the floats seem to be on the front. So when you drop the yarn, drop it to the front of the work that row. The trick is to be consistent.
- You may want to put a stitch marker on one side of your work to help remind you which side is the back. Then always drop the yarn to side that has the stitch marker.
We’ve included all this information in the printer friendly version of the Groovy Campervan Pillow Crochet Pattern on Etsy as well.
VW Campervan Pattern Notes
- We recommend that you read through the entire pattern before you begin so are familiar with techniques used.
- Pillow is made two panels that will be sewn together.
- Sew accessories such as lights, to panels before joining front and back panels together.
How to Change Color
You will change color in the middle of the last stitch of the old color.
Start working the stitch of the old color. Stop just before the last yarn over, drop the old color, pick up the new color, yarn over with the new color and finish the stitch with the new color.
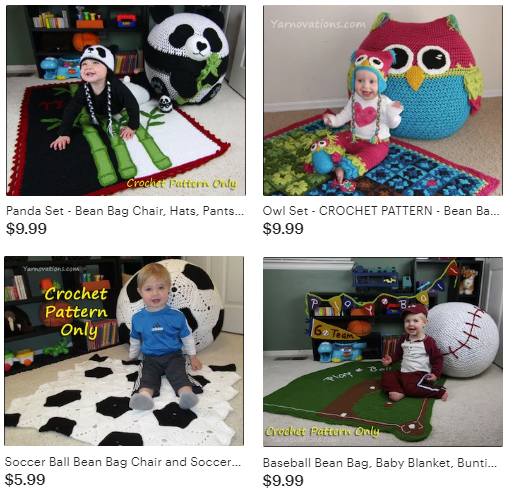
Check Out These Bean Bag Chairs!
I know you’re right in the middle of your cushion, but these bean bag chairs make me so happy, I couldn’t resist sharing them with you. You can see more pictures on our Etsy Shop.
These sets include bean bag and blanket. Some include baby clothes, too!
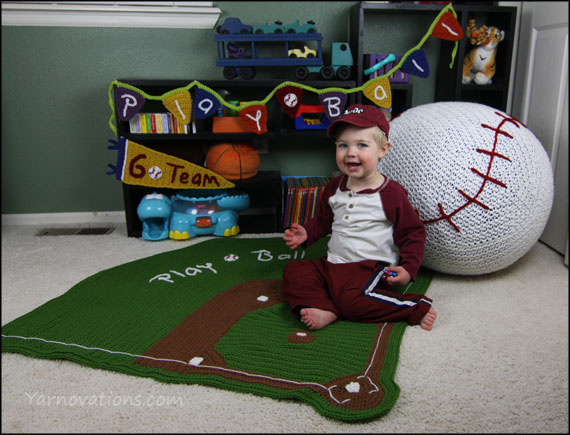
Campervan Crochet Pattern
FRONT PANEL INSTRUCTIONS
White
Hook: J
Ch 51
Row 1: Sc in second ch from hook and in each st across. (50)
Rows 2-8: Turn, sc across.
Finish off. Cut yarn; weave in end.
Skip the first st. Attach Sapphire to the second st.
Row 9: Work in back loops only. 21 Sapphire sc, 6 White sc, 21 sc Sapphire. (48)
Row 10: Turn, 20 Sapphire sc, 7 White sc, 21 Sapphire sc.
Row 11: Turn, 20 Sapphire sc, 8 White sc, 20 Sapphire sc.
Row 12: Turn, 19 Sapphire sc, 9 White sc, 20 Sapphire sc.
Row 13: Turn, 19 Sapphire sc, 10 White sc, 19 Sapphire sc.
Row 14: Turn, 18 Sapphire sc, 11 White sc, 19 Sapphire sc.
Row 15: Turn, 18 Sapphire sc, 12 White sc, 18 Sapphire sc.
Row 16: Turn, 17 Sapphire sc, 13 White sc, 18 Sapphire sc.
Row 17: Turn, 17 Sapphire sc, 14 White sc, 17 Sapphire sc.
Row 18: Turn, 16 Sapphire sc, 15 White sc, 17 Sapphire sc.
Row 19: Turn, 16 Sapphire sc, 16 White sc, 16 Sapphire sc.
Row 20: Turn, 15 Sapphire sc, 17 White sc, 16 Sapphire sc.
Row 21: Turn, 15 Sapphire sc, 18 White sc, 15 Sapphire sc.
Row 22: Turn, 14 Sapphire sc, 19 White sc, 15 Sapphire sc.
Row 23: Turn, 14 Sapphire sc, 20 White sc, 14 Sapphire sc.
Row 24: Turn, 13 Sapphire sc, 21 White sc, 14 Sapphire sc.
Row 25: Turn, 13 Sapphire sc, 22 White sc, 13 Sapphire sc.
Row 26: Turn, 12 Sapphire sc, 23 White sc, 13 Sapphire sc.
Row 27: Turn, 12 Sapphire sc, 24 White sc, 12 Sapphire sc.
Row 28: Turn, 11 Sapphire sc, 25 White sc, 12 Sapphire sc.
Row 29: Turn, 11 Sapphire sc, 26 White sc, 11 Sapphire sc.
Row 30: Turn, 10 Sapphire sc, 28 White sc, 10 Sapphire sc.
Row 31: Turn, 9 Sapphire sc, 30 White sc, 9 Sapphire sc.
Row 32: Turn, 8 Sapphire sc, 32 White sc, 8 Sapphire sc.
Row 33: Turn, 7 Sapphire sc, 34 White sc, 7 Sapphire sc.
Row 34: Turn, 6 Sapphire sc, 36 White sc, 6 Sapphire sc.
Row 35: Turn, 5 Sapphire sc, 38 White sc, 5 Sapphire sc.
Row 36: Turn, 4 Sapphire sc, 40 White sc, 4 Sapphire sc.
Row 37: Turn, 2 Sapphire sc, 44 White sc, 2 Sapphire sc.
Row 38: Turn, 48 White sc. Cut Sapphire yarn; weave in ends.
Row 39: Turn, working in back loops only, sc across.
Row 40: Turn, working in both loops, sc across.
Row 41: Turn, 4 White sc, 18 Black sc, 4 White sc, 18 Black sc, 4 White sc.
Row 42-56: Turn, 4 White sc, 19 Black sc, 2 White sc, 19 Black sc, 4 White sc.
Row 57: Turn, White sc dec, 3 sc, 17 Black sc, 4 White sc, 17 Black sc, 3 White sc, White sc dec. (46)
Cut Black; weave in ends.
Row 58: Turn, use White all across, sc dec, 42 sc, sc dec. (44)
Row 59: Turn, sc dec, 40, sc dec. (42)
Row 60: Turn, sc dec, 38 sc, sc dec. (40)
Row 61: Turn, sc dec, 36 sc, sc dec. (38)
With right side facing, attach White to the first unused stitch left on row 8.
Row 62: 2 sc in the unused stitch, continue working around the white area, 1 sc on the end of every white row, turn and continue working on the foundation ch, sc inc in the first st, sc across, sc inc in the last st, turn and work on the ends of each row, 1 sc on the end of each row, turn, 2 sc in the 1 unused st. Continue with the Sapphire, 1 sc on the end of every Sapphire row, continue on the White using White, 1 sc on the end of every row, continue along the top, 1 sc in each st, turn, 1 sc in the end of every White row. Continue with Sapphire, 1 sc in the end of every Sapphire row. Join with a sl st.
Row 63: Working in the back loops only, sc around using the same color as each section.
Row 64-65: Working in both loops, sc around using the same color as each section. Finish off. Cut yarn; weave in ends.
Share The Love
Share the love; pin one of VW Campervan images to Pinterest.
Also, consider buying the VW Campervan Crochet Pattern from Etsy. It’s only a couple bucks and it encourages us to keep making groovy patterns.
You’ve made your first panel. Now it’s time for the magic…the addition of the lights. Be sure to notice that we are using a smaller hook size here. We recommend that you make each of these front side accessories ahead of time, then place them on the pillow to see how they all work together. Refer to the pictures for placement recommendation.
HEADLIGHTS INSTRUCTIONS (make 2)
White
Hook: H
Ch 2
Rnd 1: 8 sc in second ch from hook. (8)
Rnd 2: Sc inc around. (16)
Rnd 3: Sc, sc inc around. Finish off. Cut yarn; weave in end. (24)
Attach Silver Gray to any stitch.
Rnd 4: 2 sc, sc inc around. Finish off. Cut yarn; weave in end. (32)
Stuff lightly. Sew to the lower right and left of the front of the pillow. See pillow for placement.
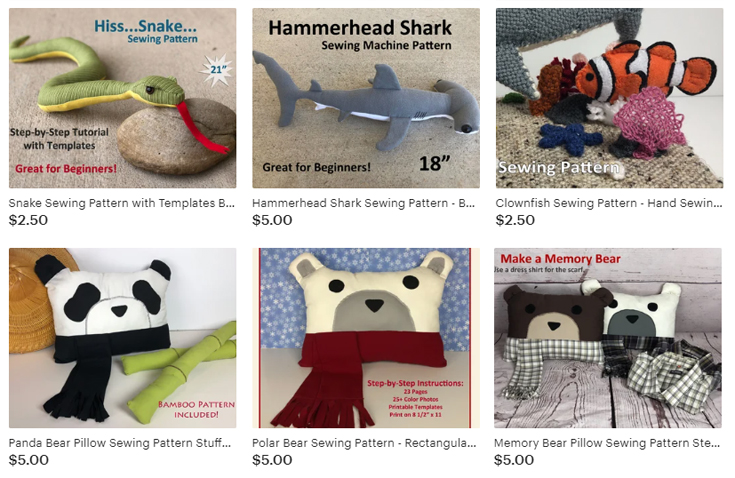
Beginner Friendly Sewing Patterns
We also have fun beginner friendly sewing patterns. Great for new sewists! These are fun to make and fun to give as gifts. Many of these are Step-by-Step tutorials and include templates you can trace.
These are available on Etsy, too!
FRONT BUTTON/EMBLEM INSTRUCTIONS
White
Hook: H
Ch 2
Rnd 1: 7 sc in second ch from hook. (7)
Rnd 2: Sc inc around. (14)
Rnd 3: Sc, sc inc around. Finish off. Cut yarn; weave in end. (21)
Rnd 4: 2 sc, sc inc around. Finish off. Cut yarn; weave in end. (28)
Attach Sapphire to any stitch.
Rnd 5: 3 sc, sc inc around. Finish off. Cut yarn leaving long tail for sewing. (35)
Embroider logo on front or stitch a second flower (pattern below) and whip stitch to emblem. Sew to front center of pillow. See photo for placement.
FRONT TURN SIGNAL INSTRUCTIONS (make 2)
Terracotta
Hook: H
Ch 2
Rnd 1: 7 sc in second ch from hook. (7)
Rnd 2: Sc inc around. Finish off. Cut yarn; weave in end. (14)
Attach Grey to any st.
Rnd 3: Sc, sc inc around. Finish off. Cut yarn; weave in end. (21)
Stuff lightly. Sew to the front of the pillow slightly above the headlights and offset to the side. See photo for placement.
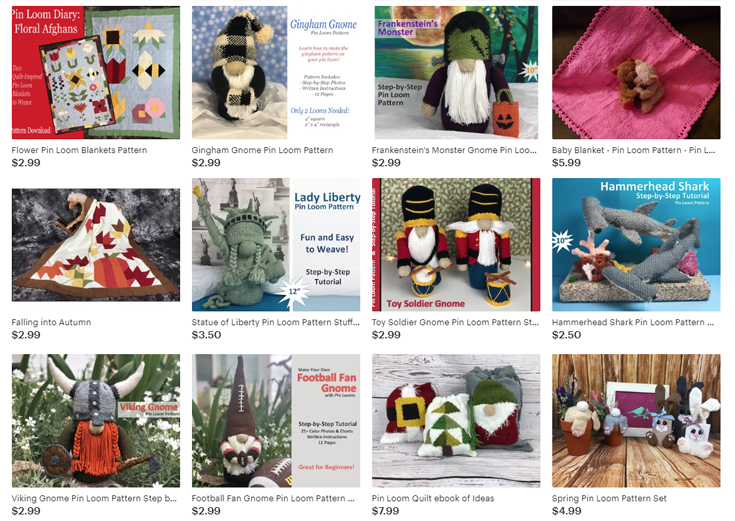
Have You Tried Pin Loom Weaving?
Another great craft for using your yarn is pin loom weaving. It’s fun and easy. You can make a 4″ woven square with only 8 yards of yarn! And there are a ton of things you can make with pin loom woven squares. And many of these patterns include step-by-step photos/instructions.
Learn how to Pin Loom Weave on our website.
Check out these pin loom patterns on our Etsy Shop.
BACK PANEL INSTRUCTIONS
White
Hook: J
Ch 51
Row 1: Sc in second ch from hook and in each st across. (50)
Row 2-8: Turn, sc across.
Finish off. Cut yarn; weave in end.
Skip the first st. Attach Sapphire to the second st.
Row 9: Working in back loops only, sc in the same st as the attached, 47 sc. (48)
Row 10-37: Turn ,sc across.
Attach White to first st.
Row 38: Turn, sc across.
Row 39: Turn, working in back loop only, sc across.
Row 40: Turn, working in both loops, sc across.
Row 41-56: Turn, 4 White sc, 40 Black sc, 4 White sc.
Row 57: Turn, White sc dec, 3 White sc, 38 sc, 3 White sc, White sc dec. (46)
Cut Black; weave in end.
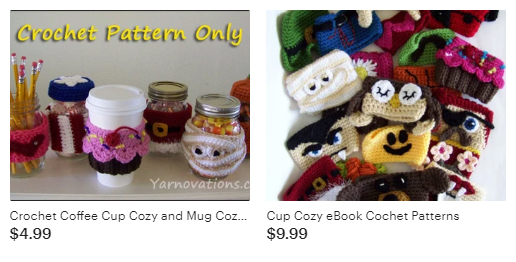
Wild and Wacky Cup Cozy Patterns
Impress your friends with a new cup cozy every week! The eBook has over 26 designs including cup cozies for major holidays. The ebook includes recipes and crafts so you can make gifts to go along with the cozies.
Go to Etsy for the Cup Cozy Patterns.
Row 58: Turn, sc dec, 42, sc dec. (44)
Row 59: Turn, sc dec, 40 sc, sc dec. (42)
Row 60: Turn, sc dec, 38, sc dec. Finish off. Cut yarn; weave in end. (40)
With right side facing, attach White to the first unused stitch left on row 8.
Row 61: 2 sc in the unused stitch, continue working around the white area, 1 sc on the end of every white row, turn and continue working on the foundation ch, sc inc in the first st, sc across, sc inc in the last st, turn and work on the ends of each row, 1 sc on the end of each row, turn, 2 sc in the 1 unused st. Continue with the Sapphire, 1 sc on the end of every Sapphire row, continue on the White using White, 1 sc on the end of every row, continue along the top, 1 sc in each st, turn, 1 sc in the end of every White row. Continue with Sapphire, 1 sc in the end of every Sapphire row. Join with a sl st.
Row 62: Working in the back loops only, sc around using the same color as each section.
Row 63-65: Working in both loops, sc around using the same color as each section. Finish off. Cut yarn; weave in ends.
Stuff and sew front and back panels together with a whip stitch.
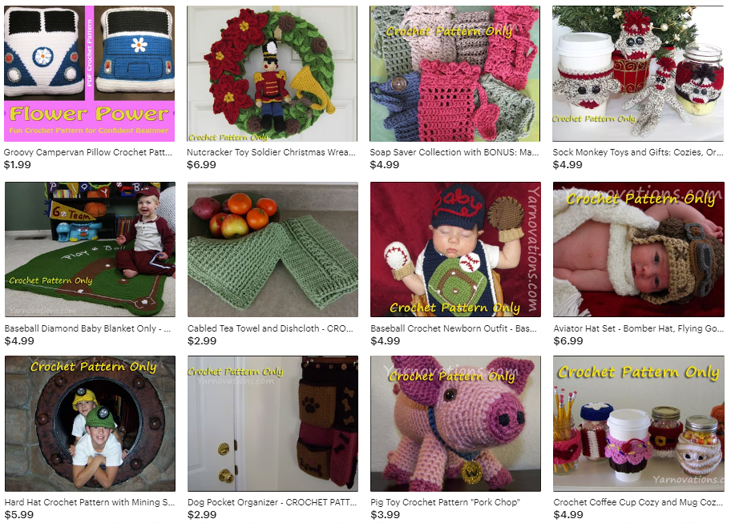
More Fun Crochet Patterns
If you’ve been enjoying this VW Campervan crochet pattern, take a look at these other fun crochet patterns on our Etsy Shop.
REAR TURN SIGNAL INSTRUCTIONS
Terracotta
Hook: H
Ch 4
Row 1: Sc in second ch from hook, 2 sc. (3)
Row 2: Turn, 3 sc. Finish off. Cut yarn; weave in end.
Attach Cranberry to first st.
Row 3: 3 sc.
Row 4: Turn, 3 sc. Finish off. Cut yarn; weave in end.
Attach White to first st.
Row 5: 3 sc.
Row 6: Turn, 3 sc. Finish off. Cut yarn; weave in end.
Attach Silver Gray to first st.
Row 7: Sc around. Finish off. Cut yarn leaving a long tail for sewing.
Sew turn signal to back panel. See picture for placement.
FLOWER INSTRUCTIONS
Terracotta
Hook: H
Ch 2
Rnd 1: 6 sc in second ch from hook. Join with a sl st. Finish off. Cut yarn; weave in ends.
Attach White to the back loop of any stitch.
Rnd 2: Ch 6, dc in third ch from hook, hdc, sc, sl st, sl st into the same terracotta st, sl st into next back loop of next terracotta st six times. Finish off. Cut yarn leaving a long tail for sewing.
Sew to center back of van.
You’ve Made It!
You are one groovy crocheter. You have just completed your VW Campervan crochet pillow. Good job.
We enjoyed making this pattern and hope you enjoyed it as much as we did. We love encouragement, so share the love.
- Heart this project on Ravelry
- Pin one of the pictures above to Pinterest
- Buy another pattern from our Etsy Shop.
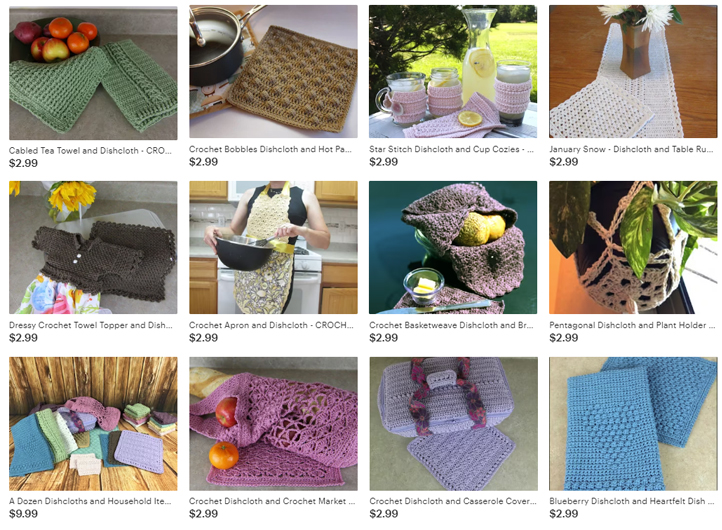
Learn a New Stitch with Our Dishcloth+ Series
Learn a new stitch or two with our fun Dishcloth + Series. Each pattern includes a beautiful dishcloth + another kitchen or dining room item.
Dishcloth+ Series available on Etsy.


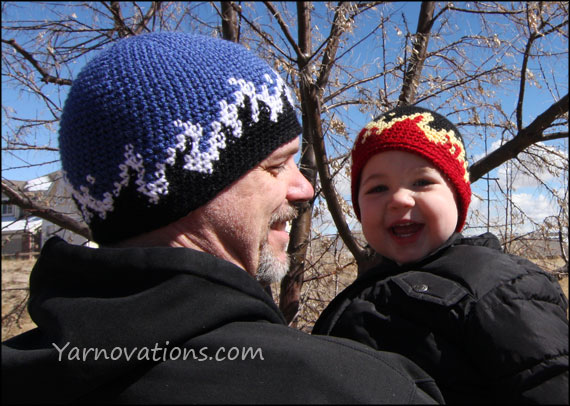
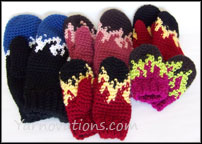
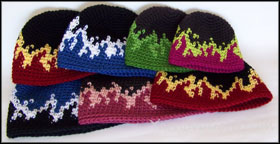 Fair Isle crocheted in the round creates fun flame patterns.