Archives for February 2014

The Knitting Challenge

The Knitting Challenge

A few months ago, our knit and crochet group had a knitting challenge – similar to other project challenges we’ve had in the past. Here’s how it went:

The Criteria:

  • Item must be knit (any type of knitting)
  • Must incorporate a button

Seriously, only two requirements. As avid crocheters, Deborah and I definitely found this a challenge.

The Entries:

Knitting Entries

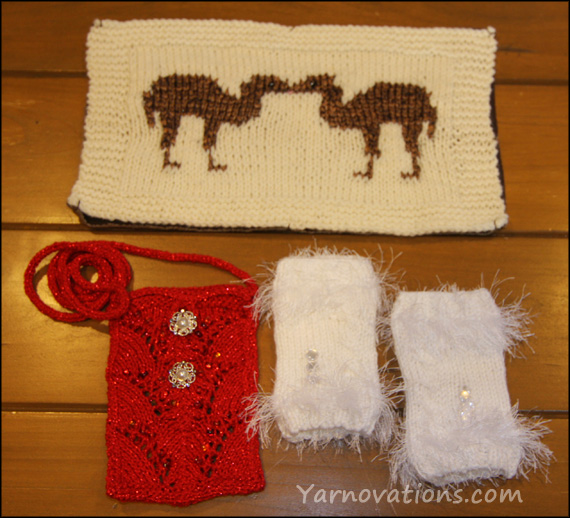
Let’s take a closer look at the three entry.

Entry One – Kissing Camels Tapestry
by Carol

kissing camels

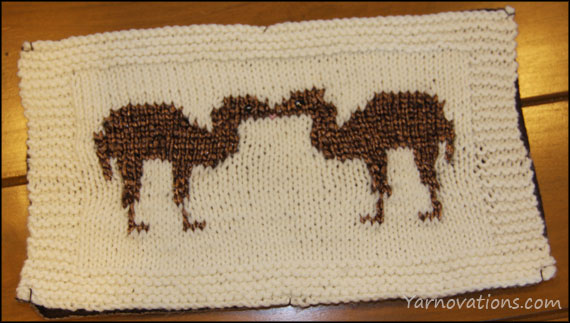
Carol is a long time knitter who charted her own tapestry. Her inspiration is a rock formation named Kissing Camels which is located in the Garden of the Gods – a local park in Colorado Springs made of rock spires.

There are button eyes and pink lips. What a fun way to capture a local treasure.

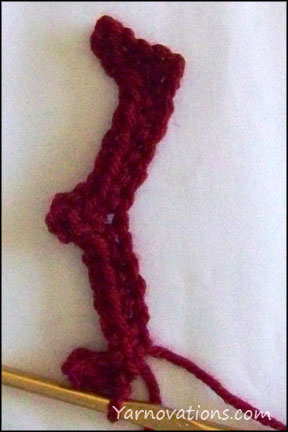
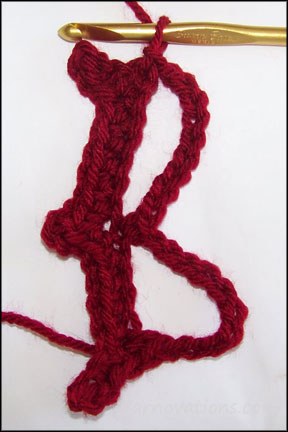
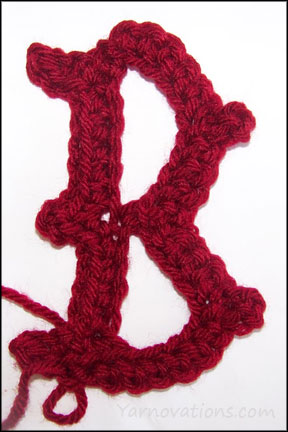
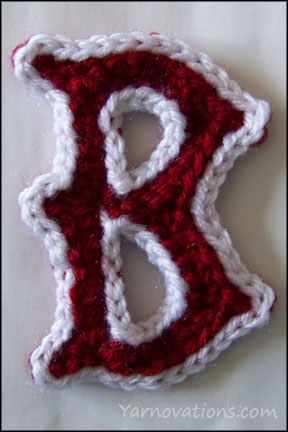
Entry Two – Bluebell as Crimson Red Purse
by Dana

Knit and Beaded Purse

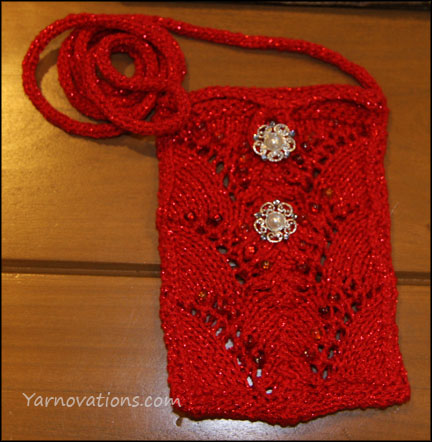
This beaded purse is a modified version of Bluebell, a cuff (bracelet) pattern by Elizabeth Klett. This project was a first for me on many levels. I’d never beaded a knitted project. Nor had I knit an icord. I confess: I ripped this out and started it over again several times before getting the hang of it. I was pleased with the end result.

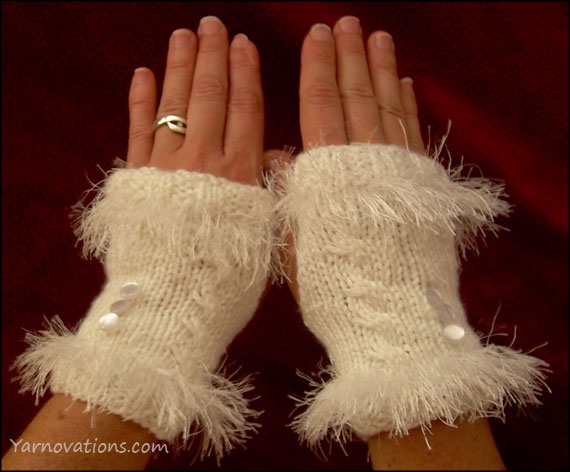
Entry Three – White Mistress Fingerless Gloves
by Deborah

Cabled Mitts

Like Carol, Deborah decided to write her own pattern! These ladies’ fingerless gloves have lots of fun elements like the 4 stitch cable, buttons, and cuff work at the top and bottom accented with fun fur.

The pattern is available for free. Learn more about the Women’s Fingerless Gloves.

Each project is beautiful and judging was truly a challenge. A special thank you to Lorien for judging. The fingerless mitts took first place and the beaded purse second. We all had a delightful time with the challenge and look forward to the next.

Women’s Fingerless Gloves – Free Knitting Pattern

Women’s Fingerless Gloves – Free Knitting Pattern

These fingerless gloves are simply adorable. They are easy and quick to make with a bit of elegance and touch of flair.

fingerless gloves free knitting pattern

There a lot of fun elements to these mitts. There is a simple 4 stitch cable, buttons and cuffs at the top and bottom accented with fun fur.

Deborah designed these gloves for a knitting contest we had with our local knitting and crochet group. We’ll tell  you more about that in a future post.

White Mistress finglerless gloves are available on our Free Knitting Patterns page.

FREE Patterns

Enjoy!

Tips for Crocheting a Bean Bag Chair

bean bag

Tips and Tricks for Crocheting a Cover for a Bean Bag Chair

Crocheting a cozy to cover a bean bag chair is easier than it looks. It’s similar to making a cup cozy…just a bit larger! Here is some designer feedback with tips and tricks to help you as you crochet your own bean bag creation.

#1 – Make it a tight fit

Stretching CozyThe first and foremost important tip: make the cozy smaller than the bean bag chair. You want it to be a really tight fit, as in…super tight.

I didn’t think there was any way the bean bag would fit into the cozy.
– quote from Deborah

Yarn stretches. Which is helpful when stuffing the cozy. But not so good after people have played with and sat on the bean bag chair. After lots of use, the yarn will stretch to the point that the cozy may sag. To prevent future issues of sagging, make sure the cozy is a tight fit around the bean bag.

yarn sags after play

The Owl Bean Bag, pictured above left, is one of our first bean bag projects. Several nieces came over for a visit one afternoon…and after only a few hours of play, the yarn on the owl was loose and sagging…a lot! Needless to say, we corrected the issue and every bean bag project we work on has a much tighter fit (as seen in the Soccer Ball on the right)!

Owl Bean Bag pattern available on Etsy.

Soccer Ball Bean Bag pattern available on Etsy.

#2 Tie it up

tie bean bag
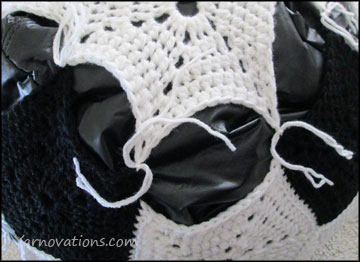
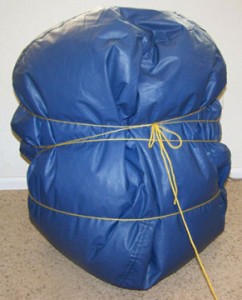
Bean bags by nature are malleable; they reshape with a little bit of pressure. This makes them more tricky to stuff into a cozy. So, we recommend that you tie up your bean bag with yarn into a tall cylinder type shape. After it’s stuffed into the cozy, remove the ties so the bean bag chair is free to reshape when people sit on it.

Use yarn in a contrasting color and tie a bow with long tails. This will make it easier to locate the tied yarn through the cozy so you can pull it out.

#3 You only need a few rounds to close it up

For some bean bag designs, you’ll stuff the bean bag into a partially finished cozy, then crochet a few rounds to close it up locking the bean bag inside.

I didn’t think the pattern had enough rounds left to close up the cozy.
– quote by Dana

bottom of bean bag
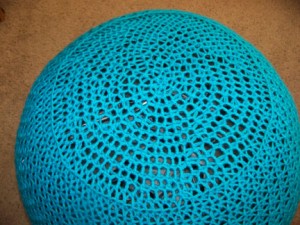
When the bean bag is stuffed into the cozy, there will still be quite a bit of the bean bag left uncovered. Surprisingly, you won’t need very many rounds to finish off the cozy. As tip #1 says…you want a tight fit.

Work a decrease round, then tug on the cozy to stretch the yarn as you stuff the bean bag into the cozy. Crochet the next decrease round, tug and stuff. Repeat a few more times. The last step is to grab each loop in the last round and cinch closed with yarn.

Bean Bag Chair Crochet Patterns

We have several Bean Bag designs. Here are a couple of fun sets:

Boston “B” – Photos of Each Row

Crochet Boston B – More Details

Boston fans asked us for more photos on how we crocheted the B we blogged about on our post: Boston Red Sox – Crochet B Applique.

Here are some tips and photos that may help.

Tips:

  1. First crochet this with a worsted weight yarn (4) and a J hook. Once you are comfortable with it, then switch to a C hook for a nice tight applique.
  2. There are slip stitches that are worked into a chain and the side of a single crochet. If that’s too complex, just sl st into the ch.
  3. Take liberty to wing it. If you aren’t liking how your B is looking…try inserting your hook in different places and using different stitches to get the look you want. It won’t hurt our feelings if you don’t follow our pattern to the letter. =)

Crochet Boston B Photo Help

“B” INSTRUCTIONS

B Row 1

Ch 13

Row 1: Sc in 2nd ch from hook. Ch 3. Sl st into 2nd ch from hook. Ch 1. Work sl st in 1st ch made in the ch-3 and side of last sc made. 5 sc. In next st work sc, ch 3 and sc. 5 sc, ch 3. Sl st into 2nd ch from hook. Ch 1. Work sl st in 1st ch made in the ch-3 and side of last sc made.

B Row 2

Row 2: Work on the other side of the foundation ch. Sc inc. Ch 10, skip 4 sts, sc (in sp opposite of ch-3 sp), ch 10, skip 5 sts, sc, sl st on top of work.

B Row 3

Row 3: Turn, skip the sl st. 6 sc, ch 3. Work sl st into 3rd ch from hook and side of last sc made. 4 sc, skip a st, sc dec, 3 sc. Ch 3. Work sl st into 3rd ch from hook and side of last sc made. 6 sc, 2 sl st (last sl st will be on top of the B). Finish off leaving a long tail for sewing.

OUTLINE INSTRUCTIONS

B Row 4

There is no “right side” to the letter. Choose which side you want to be the top.

In the back loop only, loosely sl st around the outside of the “B” and the inside holes. If your sl sts are tight, the “B” will bunch making it harder to stretch the “B” to its desired form when pinning it to the hat. Finish off and weave in ends.

Attach the B to a little baby baseball cap. Check out the Baseball pattern set on Etsy.